2013 Shop Hop

Shop hopping is exhausting!
Three months later, I’m finally writing about this past November’s Eastern PA Shop Hop. I’ve been quilting, organizing, and planning; after all, there’s a guild show coming up in (horrors!) four short months now, and I hope to have more posts up soon! But this one has been hanging over my head, so I thought I’d better just get it out of the way.
This year, Ronan got a pass on Shop Hopping and got to stay home with Dan, where they did fun things like going to the movies and to a truck zoo. While I’m certainly not trying to set up expectations that Finley will be a quilter or that Ronan won’t be, I did feel very proud that we had three matrilineal generations in the car this year. Therefore: team t-shirts!

Customink.com did a great job for me
There were 11 shops again this year, following some additional shuffling. The Happy Sewing Room closed on short notice last summer when the owner moved to the midwest for her husband’s new job, and J&B Fabrics was inexplicably (at least to us) off the roster this year. However, two new shops were added: In Stitches in Womelsdorf and Rose of Sharin‘ in Danville.
As with other recent years, I really tried to keep my purchasing in check. The decision to buy the block kits was pretty much made for me by the fact that they used Northcott’s Starry Night Stonehenge collection. I fell in love with the Stonehenge fabrics when they first came out, but I’ve managed to restrain myself from buying any so far because I didn’t have a specific use in mind. This gave me a handy excuse to finally get some. I wasn’t sure if some shop hoppers might be put off by the idea of a Christmas quilt, but I think I have enough quilts in regular use now that I can justify making some specifically seasonal ones. Also, once again, I should be able to cut most of the shapes for the blocks with my Accuquilt Go! cutter.
I was a little let down by some of the shop quilts this year; I’ve been spoiled, I suppose, by some of the absolutely virtuoso efforts of previous years, so the fact that so many seemed to default to just a straight-set, lowest common denominator, let’s get this finished basic quilt was somewhat disappointing. But there were still some showstoppers in the mix, and who knows? Perhaps some beginning quilters get intimidated by the more ambitious quilts and can more easily envision themselves completing a simpler one. Just my perspective, which is what this blog is for.
-

- In Stitches, Womelsdorf
-

- Ladyfingers Sewing Studio, Oley
-

- Allentown Sewing Machine Outlet, Allentown
-

- Pocono Sew & Vac, Stroudsburg
-

- American Ribbon Outlet, Stroudsburg
-

- At Piece Quiltery, Easton
-

- 118 Fabrics & More, Sweet Valley
-

- Rose of Sharin’, Danville
-

- Wooden Bridge Drygoods, Kutztown
-

- The Country Quilterie, Effort
-

- The Quilted Crow, Lehighton
We started with one of the new shops, In Stitches. It’s a little off the beaten path for the geography of the shop hop, but not ridiculously, and appears to be a good, solid, local shop. They carry a lovely variety of fabric as well as notions, batting, patterns, and silly fun stuff like quilting-related car decals. They do in-house longarm quilting and I was intrigued to learn that they also run a longarm quilting guild. I bought some wool batting for my challenge quilt (more on that coming soon.)

This is how I managed to shop in less stroller-friendly places.
A week later we had worked our way to the other new shop, Rose of Sharin’. It’s a densely-packed shop that leads shoppers on a circuitous path from a well stocked front window display area back past books and notions to a discount back room. I greatly enjoyed the shop models, the friendly staff, and the quirky items available such as the “It’s all fun and games until the bobbin runs out” sign that I couldn’t help but purchase. Another definite reason to visit this shop is its location right across the street from the Old Forge Brewing Company, which boasts a tasty menu featuring their homemade soft pretzel appetizer.

My shop hop haul
Returning to the other familiar shops is always pleasant. I did end up buying (as usual!) more fabric than I had intended, but it was nearly all deeply discounted. I picked up some panels, including the vintage Mickey Mouse from The Country Quilterie and the Christmas teddy bear from At Piece Quiltery. Ladyfingers had charm packs from several of the Andover lines for very low prices, and The Quilted Crow granted me the opportunity to buy the purple Gypsy chain-piecing cutter I needed to replace my dear, departed, discontinued Fons & Porter standing seam ripper that Ronan broke. There I also bought a bag pattern, another category I’d vowed to stay away from until I had actually made some of the many bags I own patterns for, but the Flying Geese Tote Bag has such exhaustively detailed instructions, and the shop models were so very cute, that I couldn’t resist. Someday…

Allentown Sewing Machine Outlet had a great open area for Finley to scoot around.
We had a great time driving around in the mostly beautiful fall weather, with lots to look at and talk about; I got some fun stuff that will help finish some existing projects as well as starting new ones; and my mom won a huge door prize basket from Pocono Sew & Vac. I was equivocal about going on the shop hop this year; after all, I don’t actually need anything new and I don’t have much time to quilt at this point in my life anyway. However, it’s always an inspiring experience that gets the creative centers of my brain humming and my fingers itching to get some quilting in. And hopefully, I’ll have at least one more completed shop hop quilt to show off before the next one comes around!
2013 Challenge Quilt — Solids!

Bright color camouflage! Can you find the hidden child?
Once again, part of why my blog went dark in the latter part of last year was that I couldn’t show you what I was primarily working on. This year’s challenge was announced in May and was solid fabrics, at least six different shades/hues. My initial reaction was very negative: basically, “eww, I’m not doing that!” After all, the fabrics I love are prints and batiks, and I have a houseful of them. Doing a solid fabric challenge would entail buying new fabric at a time when I’m desperately trying to use up my stash, as my stash decidedly lacks solids.

Finley helped me assess my feather coverage partway through the quilting.
However, when I told my mom about the challenge and how much I was NOT inspired by it, two things happened. First, she reminded me that the first quilts I fell in love with, the quilts that inspired me to start quilting, and indeed my first several quilts, were all made of solid fabrics. And second, she gave me a bag of twelve solid half-yards for my birthday. I subsequently added some neutrals, and the game was afoot. Besides, in retrospect, if my reaction to a challenge is “eww!” then that suggests that it really will be a challenge, not just an excuse to make a quilt I would’ve made anyway.
Early on in the process, I decided that the biggest advantage working with solids would give me is how well quilting shows up on solid fabric. Therefore, I wanted to keep the piecing simple. Since I love pinwheels, and have been planning for years to make a quilt that incorporates different sizes of pinwheels, I settled on the idea of making a quilt similar to this one of Kaffe Fassett‘s:

From _Country Garden Quilts_
I started the cutting at my mini-retreat in late July with Rhonda and Diane, and didn’t really work up a strict plan. I decided to just run all the solid fabric through my Accuquilt GO! cutter (after all, I really wasn’t looking to start a solid stash) and make the quilt however big it turned out. I had a lot of fun cranking out all those triangles. I then paired them off into blocks using my standard concept of quilt entropy, trying to get the colors as mixed up as possible. I don’t know whether I will ever be capable of leaving things up to chance sufficiently to make a “brown bag” quilt, but I did have fun free-associating about the various bright color combinations: green and purple is the Hulk, orange and fuchsia is the beach, red and brown is a robin, yellow and purple is Easter. The colors all coordinate with one another because there are so many of them; as Alex Anderson says, if the colors in your quilt aren’t going together, add more colors and they will.

You know you’re really chain piecing when you can barely see the baby
I sewed all the large 12″ blocks together and had paired up the triangles for the 6″ blocks when I realized I’d goofed. In the original quilt, the smaller blocks are 1/3 the size of the larger blocks, not 1/2. Oops. Time for a new plan. I liked the idea of keeping the center of the quilt set on point, so I just sewed the large blocks together and planned on making the smaller blocks into a border. And that’s when I got seriously sidetracked with other projects (they’re in the next post.) That’s also when I fully internalized just how large a quilt (84″ x 84″!) I was ending up with, which hadn’t really been in the plan.

Just the center
The primary problem with having the challenge meeting in January is that I didn’t get back to the challenge quilt until after Christmas: even though we actually had more time between the announcement of the challenge and the meeting, I would have had to have the quilt virtually finished before Thanksgiving to have truly been on-time with it, and my brain doesn’t work that way. I very nearly packed it in and turned it into another UFO, but Dan was my cheerleader and encouraged me to finish it. Fortunately, the rest of the quilt top went together smoothly and the children more or less cooperated to get me some sewing time.

Some days, this is what cooperation looks like
I wound up working in Danville, PA for a military dental event the weekend before the guild meeting, so I made certain I had the quilt basted and the quilting started before I left so I could get some dedicated quilting time in my motel room. I made the most of it and had the entire outer border and 1/4 of the center quilted by the time I got home. Once again, working under deadline really helped me make decisions as to what quilting designs went where. Feathers are favorites of mine to stitch without a great deal of marking and they always look fancy, so I put Patsy Thompson-style soft heart feathers in the outer border and Kimmy Brunner “twirly whirly” feathers in the center. I was able to get away with only marking the spines in all cases; the seam lines for the borders and the X through the center gave me all the other guidelines I needed. This was definitely not a project for subtlety, so I used neon green Brytes by Superior Threads for all of it. I managed to get the remainder of the center quilted and the outside edge zigzagged and trimmed in time for the meeting, so even though it wasn’t finished, it was finished-ish.

Before and after hyperquilting
The inner border was reserved for my fanciest quilting, since it would show the best there. I think it also helped me finish this quilt, as I was really looking forward to quilting that border; otherwise, I probably would have lost momentum once the meeting was past and I no longer had a deadline. I rewatched Patsy Thompson’s Free-Motion Fun with Feathers Vol. 4 DVD again for inspiration and quilted a hyperquilted, symmetrical border flowing from corner motifs that started as Quilter’s Rule Dragon Scales template and evolved from there.

Detail, corner quilting design
I used orange Brytes for the original feather and hyperquilted it with Superior Threads Metallic in variegated gold. I also shook up my standard machine binding protocol to add a little more embellishment by trading the stitching in the ditch for a decorative stitch in a variegated King Tut:

Detail, binding stitching
What would I do differently? Well, much as I love wool batting, it definitely increased the difficulty level on this quilt. I think as long as I’m quilting on my home machine, I need to reserve wool for the smaller projects. It doesn’t spray baste as nicely as the cotton blends, and I got more pleats and tucks on the back than usual. I didn’t have any problems with skipped stitches or shredded threads (even with the Metallic! That stuff worked like a charm and I will most certainly be using it more often from here on out) but I had more “nests” on the back than I normally do. I’m not sure why. I didn’t let it stop me (another benefit of being on a strict deadline) but I will be keeping my eye out for future problems along these lines and possible causes/solutions.
For a happy dance, I’m mining the classic movie musicals again. The bright colors in this quilt made me think of the old movies that would advertise being shot “in Glorious TECHNICOLOR!” including “On The Town.” Enjoy!
Did I Just Make A Modern Quilt?
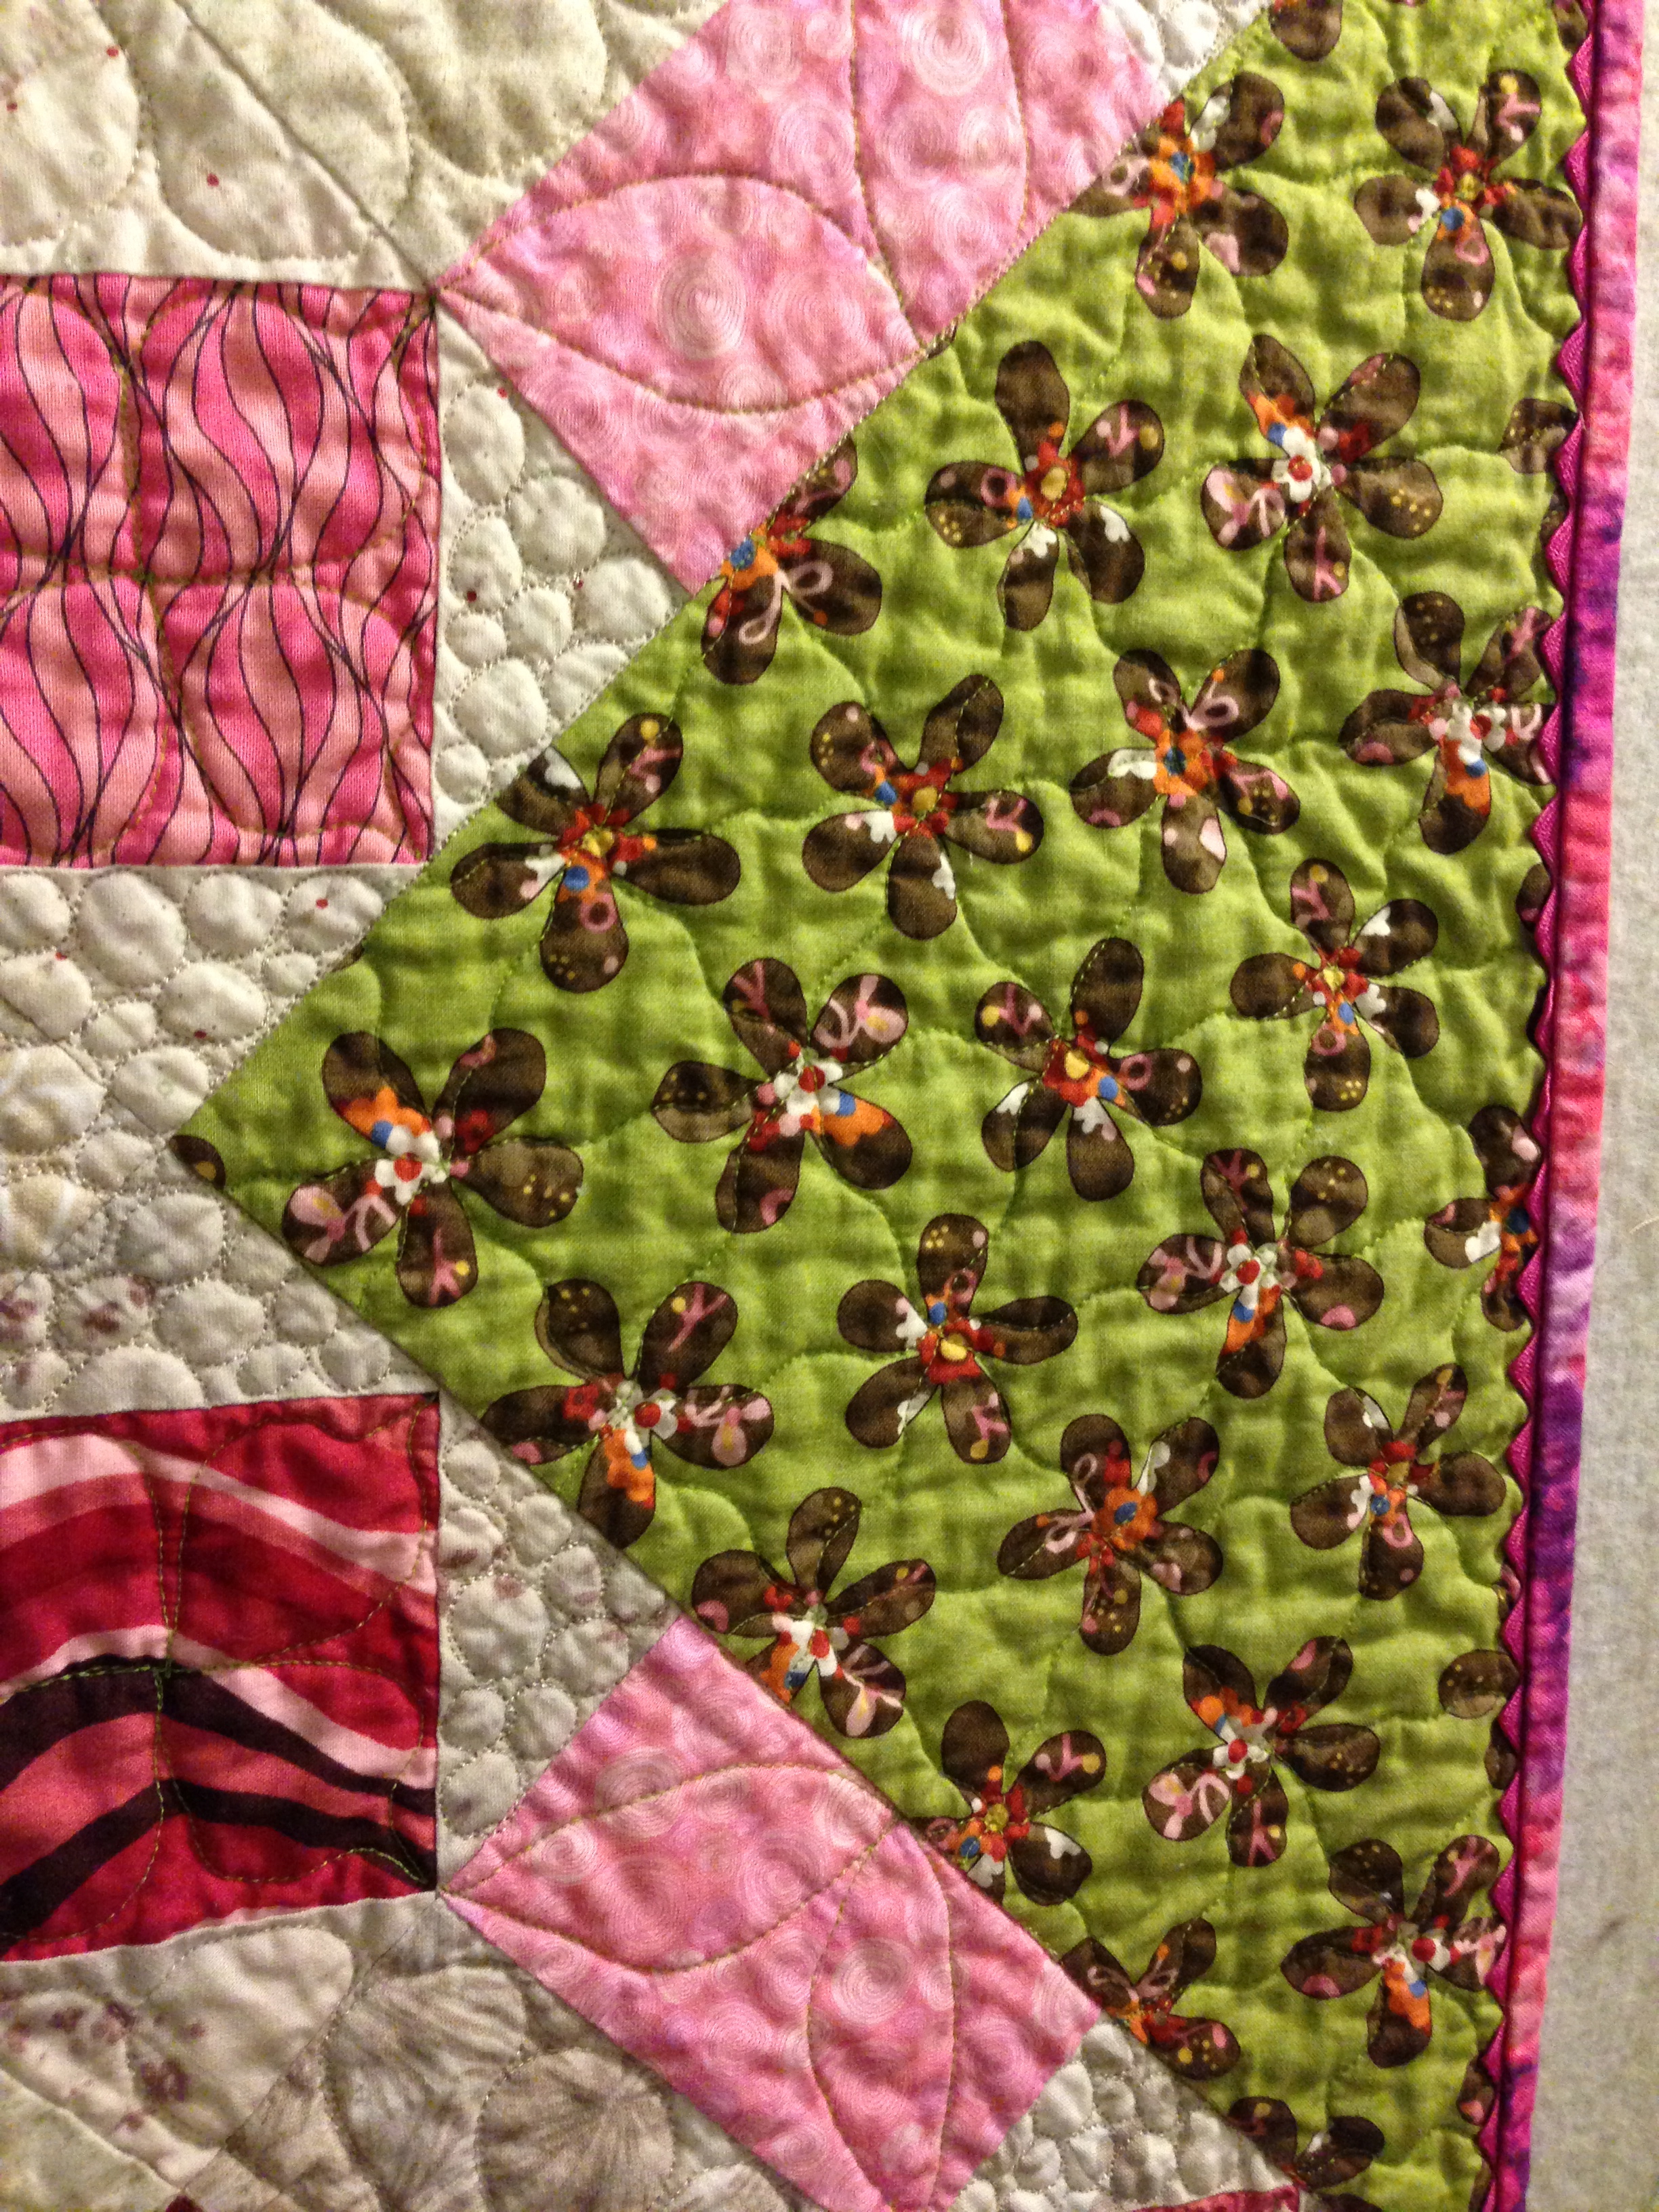
I made this quilt for my youngest sister’s baby boy, who is expected any minute now:
 Eleanore isn’t a quilter, but she has a very good eye for color and design; the fact that she’s decorated the nursery in mushroom gray with accents of orange testifies that the standard blue, green, and cream baby quilt wasn’t going to cut it for her. I found the big border stripe (aptly named “Big Stripe,” from Michael Miller) at Smile Spinners‘ booth at Quilt Odyssey and used it as the source for the overall color palette. The solid orange, the gray and aqua ant farm print, the border, and the back were the only new fabrics purchased for the project; the rest were all pulled from my stash, demonstrating that a) I have a fantastic stash, especially where orange, taupe-y gray, and cute little animal prints are concerned, and b) that I have wa-a-a-ay too much fabric.
 It wasn’t till I finished the top that it occurred to me that this quilt, moreso than any other I’ve ever made, looks an awful lot like the quilts I’ve been seeing in books and magazines described as “modern” quilts. Which leads me to a bit of a sticking point for me over the past few years: I’m not exactly sure what a “modern” quilt is.
[From this point forward in this post, I’ve decided to capitalize the word Modern when referring to this concept because part of my problem with the term up to this point is the ambiguity of it: no matter what my quilts look like, I myself (and all my quilting contemporaries) are modern quilters, in that we are definitely 21st century women who choose to participate in a fiber art form that dates back several hundred years, but we do so not as historical reenactors, but as full participants in our culture as it exists now, using the tools and technologies that would have been science fiction to our foremothers. I realize this is a matter of semantics; after all, some “modern” art is now well over 100 years old, yet we still use the term. But I admit it rankles me to potentially exclude myself from the umbrella of modernity because I choose to make quilts, albeit on a computerized sewing machine with all the latest in gadgetry, that follow a more traditional structure. And using quotation marks makes me look snarky or sarcastic.]
In search of a definition, I went to the source. Here’s what the Modern Quilt Guild has to say on the subject:
“Modern quilts are primarily functional and inspired by modern design. Modern quilters work in different styles and define modern quilting in different ways, but several characteristics often appear which may help identify a modern quilt. These include, but are not limited to: the use of bold colors and prints, high contrast and graphic areas of solid color, improvisational piecing, minimalism, expansive negative space, and alternate grid work.”
From this definition, I get the impression that even self-described Modern quilters tend to differ a little bit in what they call Modern. I definitely recognize that Modern quilters may somewhat be separating themselves out as a generational or attitudinal divide, especially as Modern Quilt Guild chapters spring up around the country. I’ve heard enough horror stories about quilters who are younger or new to an area that has a very rigid, insular quilt guild being frozen out or run off by Quilt Police types; if the solution to that is to start your own chapter of quilters who share a wish to breathe some fresh air into that environment. then more power to them.
But ultimately, I guess I’m too much of a quilting generalist to want to limit myself to one label, whether it be traditional, Modern, art, etc. I guess I’m a big tent quilter: I believe quilting is big enough that there’s room for whatever you or I like to do, even if we wouldn’t want to trade projects with each other. I’m reminded of the saying, attributed to Louis Armstrong (among others), that “there are only two kinds of music, good and bad.” So while I’m not willing to place a label on what I like, I know when I like it.
And I like this quilt, that I made for my nephew. It has some Modern elements, with the solid orange. negative space, and large graphic prints, but it uses the Tumbler shape, which is very traditional. I used my Accuquilt Go cutter with the Mini Tumbler and Baby, Baby dies, which definitely sped up both the cutting and piecing process. Those precise shapes and engineered corners meant everything went together beautifully with very little pinning. So far, the cutter continues to live up to its “better cuts make better quilts” hype and I continue to be very pleased with the purchase.
 I got a little fancy and fussy with the Big Stripe border. I knew I wanted those gorgeous mitered corners, but with a rectangular quilt, it took some doing to make the same spot in the repeat show up in the corners. I had to very precisely measure and invisibly piece the stripe so the corners reflected properly, but it was worth the effort and I get a little thrill of pride looking at it.
 The quilting was fun: I knew nothing would really show up in the pieced areas, so I just used Wendy Sheppard’s Jester Hat texture. Considering this was the first time I’d stitched it, it flowed very naturally and I only got “stuck” a few times. I used Superior Threads Rainbows #812 Western Sunset, which coincidentally contained most of the colors in my palette, for that and for the little serpentine/sine waves I quilted into the colored stripes of the border. I used orange Bottom Line to quilt the solid orange section behind the duckies in waves and circles; I wanted it to look like a bubble bath.
 And I had the quilt finished for the baby shower! It almost made me look like one of those organized quilters who thinks ahead. However, I’m not quite done with the baby quilt for my sister-in-law’s baby girl who was born last month, so I don’t have to worry about that reputation sticking.
For a happy dance, here’s a ducky video I shot at the York Fair a few years ago. It seems apropos:
Finished! Denim Rag Quilt

The way we get around, we need rugged quilts!
This was a fun little project.

Denim rag quilt, 40″ x 40″
My mom and I had taken a class, probably ten years ago, on flannel rag quilts at Ladyfingers. I’m not even sure where that project bag is at this point. Suffice to say, I was not a fan. The instructor kept emphasizing how this was a quilt for people who didn’t care about accuracy, that “anything goes” with rag quilts, and if things didn’t line up, don’t worry because it wouldn’t matter. And while this approach may set some beginning quilters at ease, it was simply not what I wanted to hear at that stage of my quilting journey. I was just starting to feel like a decently competent piecer, achieving a fairly consistent 1/4″ seam and matching my intersections most of the time. The last thing I needed was a project in which precision was not only NOT a goal, it was a liability. (The ridiculous stretchiness of the flannel I was using meant that nothing stayed square, straight, or remotely the same size, even with a walking foot.) Throw in the fact that I was really not looking forward to clipping all those seams once the darn thing was finished, and this was a project born to become a UFO.
*Little bit of a tangent here: although the instructor for the flannel rag quilt class was very nice and very competent as an instructor, it was clear she and I were not on the same quilting wavelength. While we were working on our squares, she talked about how she designs quilts for fabric companies, incorporating entire lines of fabric for them. All well and good and very interesting. However, she then went on to say that she plans everything out in advance for all her quilts, not just those, and that she has NO STASH. Let that sink in for a minute. In fact, she said she had recently purchased 3 yards of a fabric that she planned to use as a border, and when it became clear that it would not indeed work as the border for this particular quilt, she was very upset because “now what am I going to do with it?” I absolutely could not relate.
After that experience, I can confidently state that I had given absolutely no thought to ever making another rag quilt until I started researching the purchase of my GO! cutter. Accuquilt makes rag dies that precut the fringes on the edges of the squares so that all you have to do is sew the blocks together and then wash the quilt: no hand-crippling, mind-numbing seam clipping to do! I still was in no hurry to work with flannel again, but I knew I had a stack of Dan’s worn-out jeans in the basement that were guilt-tripping me and making me feel like a hoarder, and the wheels started turning.

A stack of die cut squares, 8.5″ jeans and 6.5″ batting
I had started saving the jeans after seeing a show on DIY or HGTV in which they discussed sustainable building practices including the use of recycled denim to make housing insulation. On the show, they promoted a recycling program that was doing drives throughout the country to collect the jeans. However, by the time I had any to contribute, the website said that drives were temporarily suspended for the year, and would I like to get on an email list for when they restarted? I did, but that was an email that never came. Since then, the only comparable program I’ve been able to find is Cotton: From Blue to Green, which only accepts mail-in denim donations. And they’re in Phoenix. I can’t imagine how expensive it would be to ship a big cardboard box of jeans to Phoenix, and I can’t imagine the carbon footprint of that decision would end up being particularly sustainable. So the jeans sat in my basement.
I had seen a magazine photo several years ago of a large denim picnic quilt, but had dismissed the idea for my own projects because the denim would be so heavy and difficult to work with. The die cutting definitely solved part of the problem; I had initially envisioned making the quilt much larger, but I only had six pairs of jeans to work with. (I think there are more in the basement somewhere, but these were the ones I could put my hands on.) In the event, I was fortunate to have the size limited by the amount of materials, because the 6 x 6 block quilt was heavy enough that my arms felt fatigued after putting it through the machine to join the last rows together.
I love the idea of a denim quilt for outdoors. I don’t scruple to take my regular quilts outside; I made them for my kids and I would rather they use and enjoy them, even if it means the quilts occasionally get a little dirty or abraded. However, a denim quilt is durable, HEAVY (having trouble keeping the child in bed? Lay one of these puppies on top of him!) and only improves with washing and wear, so it’s a natural for more rough-and-tumble settings. We really enjoyed attending some of the free outdoor family movies shown in Farquhar Park this summer, and quilts always came with us.

This one got to make its useful debut as a roll-around quilt for Finley as we ate our picnic lunch at Knoebel’s:

As to the actual construction of the quilt, I “deboned” the jeans, cutting each pair with dressmaker’s shears into two leg fronts and two leg backs by just cutting along the seam lines. I then removed the fly and the back pockets. (I had wanted to keep the pockets on the squares and thus have some blocks with usable pockets on the quilt, but the pockets on these jeans were too large and too close to the back yoke seam for that to work on this project. A future quilt made with different jeans, perhaps some of Ronan’s, will have pockets.) I then fed the resulting long denim pieces through the die cutter, only cutting one layer at a time since the fabric is so heavy. While cutting the squares individually and having to pull denim threads out of the die after each cut made this process much more time consuming than the typical die-cut project, it was still orders of magnitude faster than cutting all those fringes by hand. I was able to get 14 8.5″ squares (6.5″ finished due to the 1″ seam allowance), or 7 blocks, from each pair of jeans. Although there were plenty of oddly-shaped scraps that couldn’t be utilized for this project, I was also able to save 4 pieces (including the 2 back pockets) from each pair big enough to cut a 5.25″ rag square from once I purchase that die.
I was able to die cut the 6.5″ batting squares as well; this is a perfect project for using up those long odd leftover pieces of batting. I also cut 6 squares of the orange batik, and then die cut the Funky Flower out of the corresponding denim squares for a raggy reverse applique. I used a cute primary variegated YLI Jeans Stitch I’d had for years for the quilting, simple X’s in the plain blocks and echo quilting around the flowers. I used the walking foot for the quilting, but I found I had to switch back to my regular foot for joining the blocks because I skipped too many stitches otherwise. All those layers of denim are no joke: I even broke two #100 denim needles on this project.
The amount of lint when I washed it was ridiculous. I had heard that you should always clean the dryer lint filter mid-cycle when washing a flannel rag quilt. However, even pulling this one out of the washer involved handfuls of wet lint and a moment of panic that the whole quilt might have somehow disintegrated in the wash cycle.

This is not even all of the denim lint.
Now to wrap this post up on an appropriately bizarre note, my sister Eleanore sent me the following text yesterday morning:

And some people think quilting is a boring hobby for mousy little homebodies. I like to think I’m keeping them guessing.
I Got An AccuQuilt GO! Cutter!
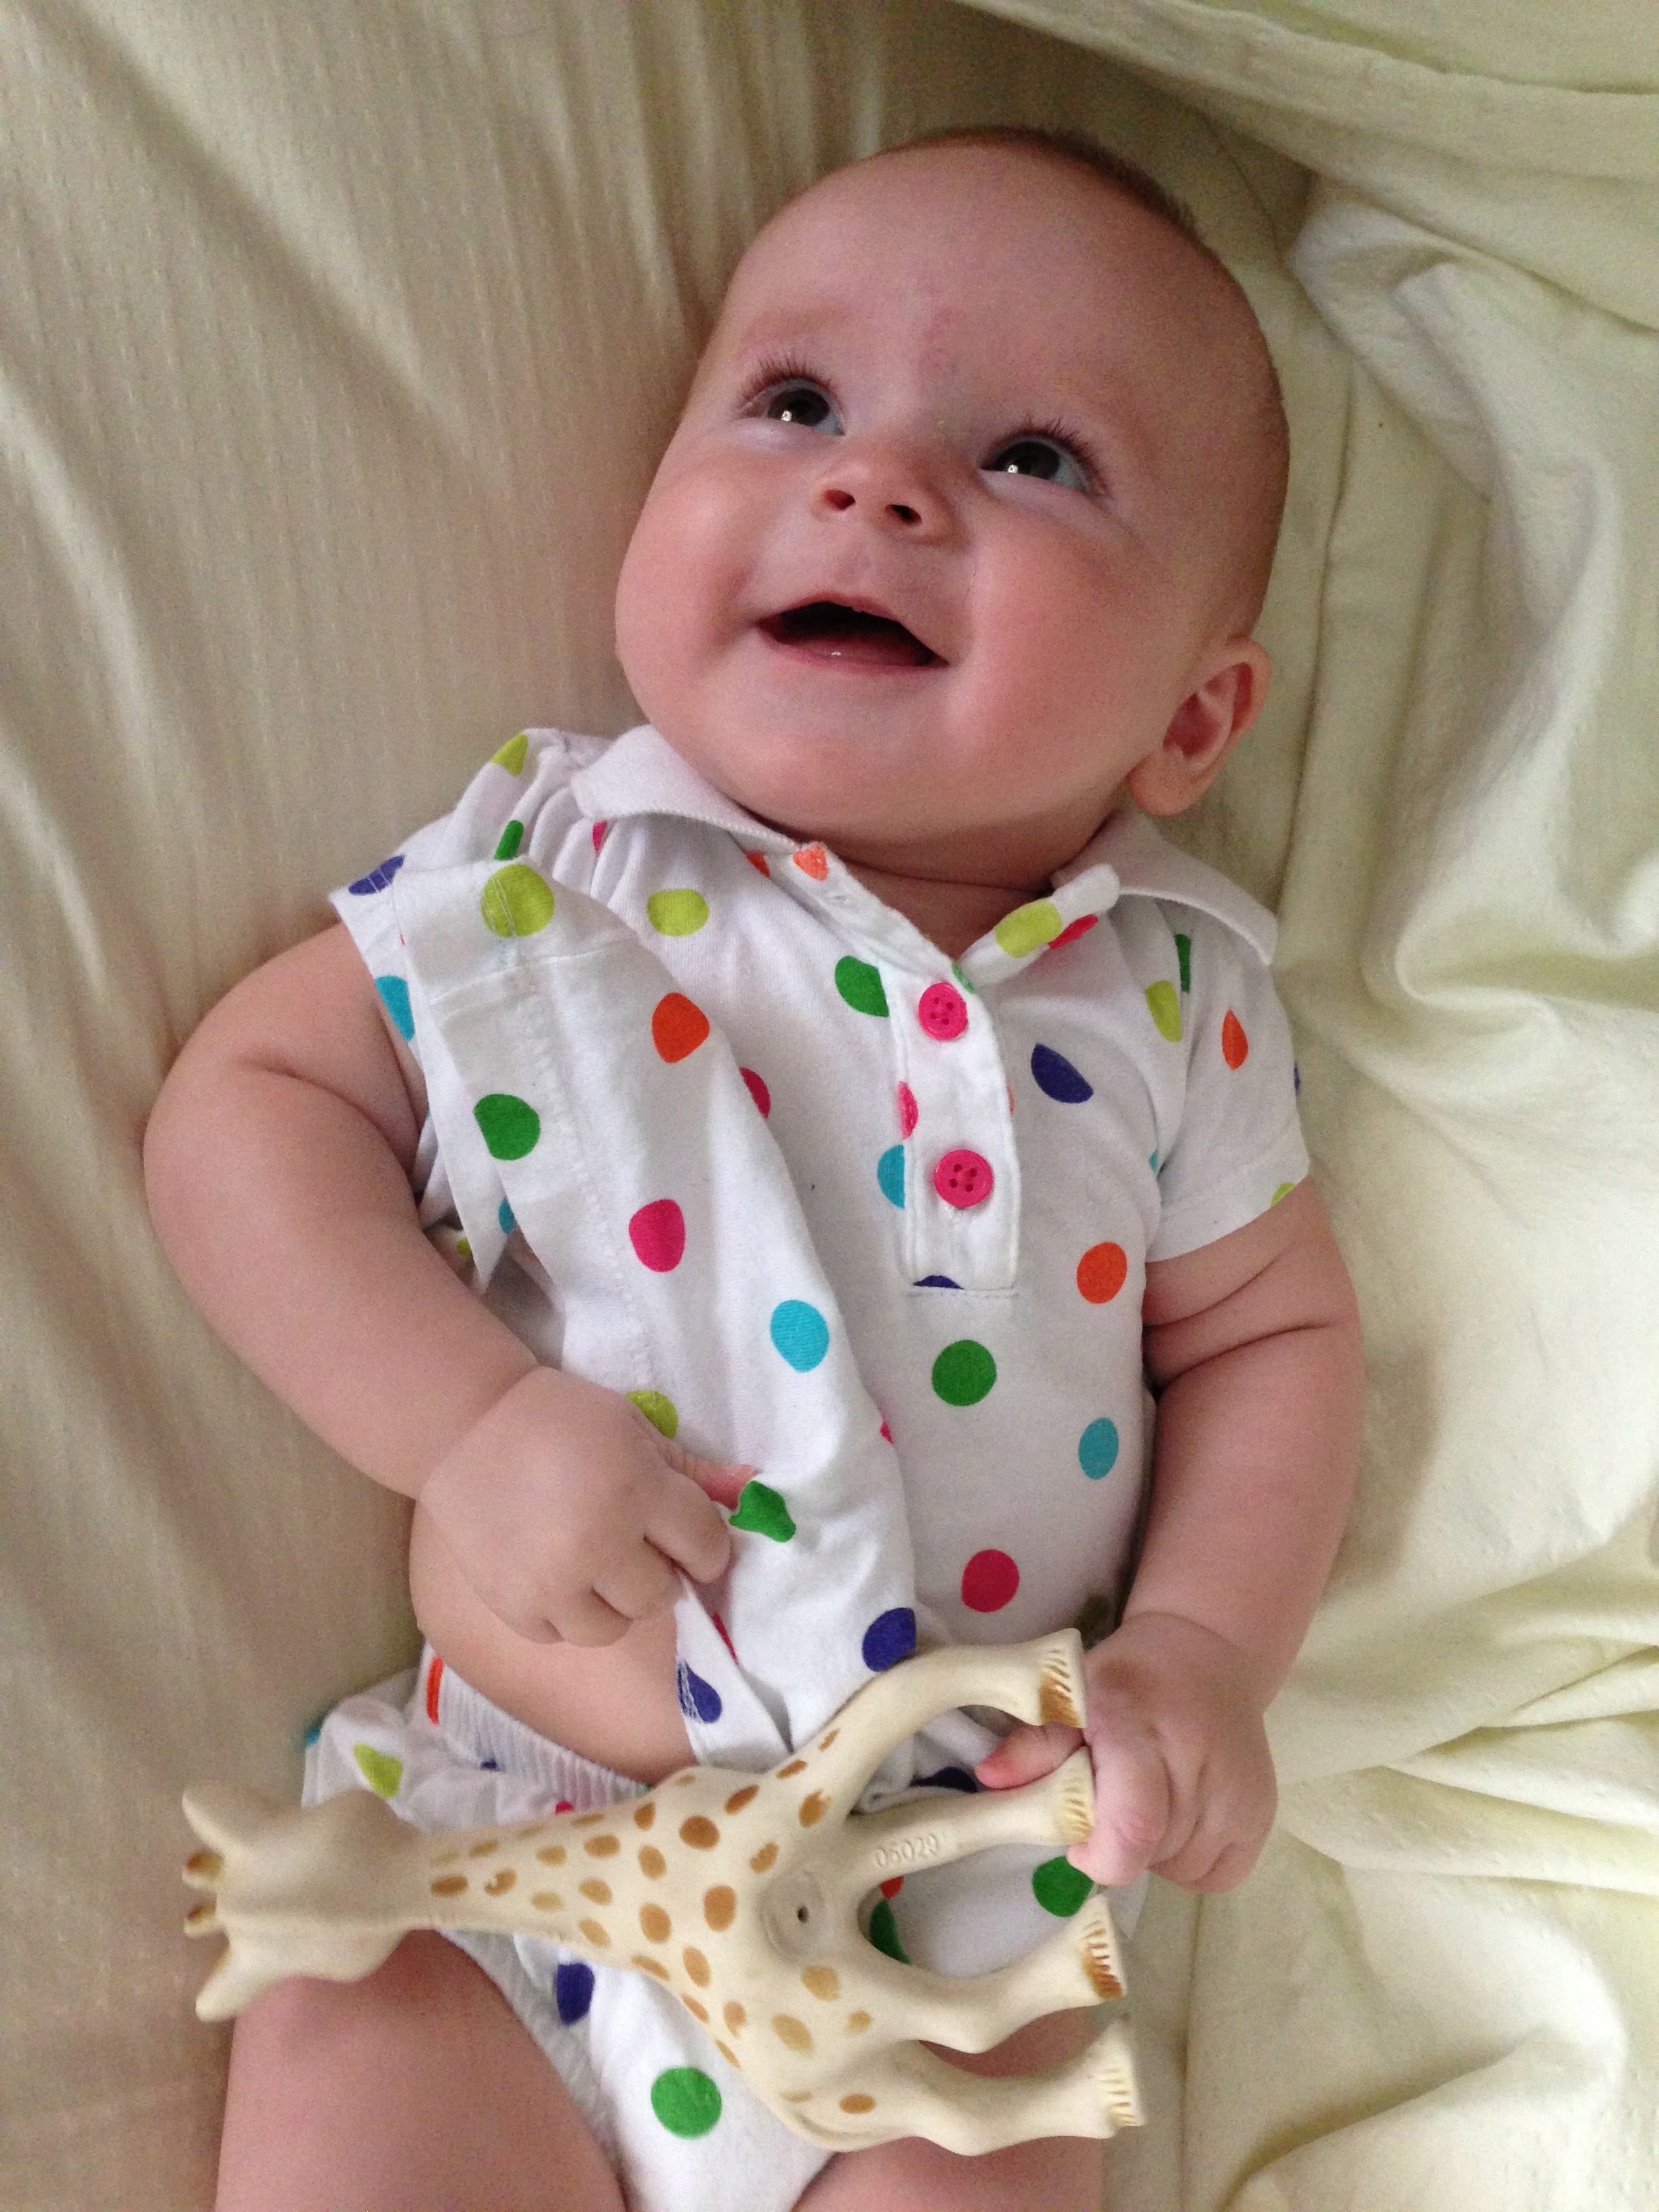 And just like Finley here, I’m so excited about my toy!
I had heard a lot about the GO! cutter when it first came out, because Alex Anderson and Ricky Tims are spokespeople for it, with promotional videos on The Quilt Show site. While I’ve long been intrigued by fabric die cutters, ever since first visiting the fabulous home quilting studio of a guild friend who has the Accuquilt Studio cutter, I didn’t really think of it as being a priority item for me. I thought maybe it might be worthwhile for someone who does an awful lot of applique, but I don’t, and on the odd occasion when I do, I tend to design my own. So while I was glad to know there were die cutters in the world, I didn’t really covet one.
 Until… I had stopped by The Finishing Stitch on my way home from a wedding the day before Mother’s Day, and they had a Studio cutter and dies for sale for $600, listed as a $1500 value. A discount that steep is always going to pique my interest, but Finley was getting fussy so I didn’t investigate in depth. However, I started thinking about it more on the way home, and therefore spent some time on the Accuquilt website over the rest of the weekend. The main thing that I learned was how many piecing dies are available. As I am primarily a piecer, and cutting fabric has always struck me as tedious, this was very intriguing. Although a separate die is necessary for each different size or shape, I certainly tend to use certain shapes and sizes repeatedly in my projects (2″ finished half-square triangles certainly spring to mind.) And the idea, reiterated over and over on the website, that die cutting is “up to 90% faster than rotary cutting,” was extremely attractive to a full-time-working mom of two children under 3.
After all, although I know it’s an all-too-temporary stage, I don’t have a whole lot of free time to quilt right now. It’s a trade-off I’m more than happy to make to be involved in Ronan’s and Finley’s young childhood, but I don’t want to completely swear off quilting right now. (And several of the quilts I’ve made in the last few years have been for them, and they enjoy using them!) So anything that speeds the process without decreasing my artistic freedom or my enjoyment of the process is a good thing. I have no interest in using pre-cut kits because my favorite part of quilting is selecting the fabrics, but if I can choose my own fabric and then fast forward to the construction stage without spending such a long time cutting the fabric into pieceable shapes, I will get a lot more done. Additionally, I haven’t wanted to do much cutting when Ronan is awake, because I have an absolute paranoia that he could get hold of the rotary cutter. While there are still blades in the die boards, he would have to do handstands on them in order to hurt himself with them.
 So Monday morning, I called Jean… and she told me that she was sorry, she should have taken the signs down, because she was selling the Studio cutter to the new owner of the shop as part of the shop sale. Having just spent the last 36 hours convincing myself that I desperately wanted this thing, it was definitely a letdown. But like Aesop’s fox with the grapes, I quickly recovered by realizing that the Studio would not have been the right choice for me. While it can cut more layers at once, and the dies are more numerous, varied, and larger, the dies are more expensive and the cutter requires a dedicated space, as it is heavy and does not fold up. It really seems like the good folks at Accuquilt really thought about all the factors that prevent quilters from buying a Studio cutter, and designed the GO! to meet those needs. I took my time researching the products and prices (another GO! advantage, as the Studio and its dies are only available through Accuquilt), then finally pulled the trigger in mid-July.
 My GO! came in the mail July 23, the Tuesday before my mini-retreat at my house with Rhonda and Diane. I bought it from quilting-warehouse.com which offers significant discounts (30-50%) on the GO! and several selected dies, and although the shipping was expensive and the order took longer than their stated estimate to process, I cannot complain in light of the overall value. I got the 12″ block “mix and match” bundle, which is a collection of eight dies for shapes commonly found in 12″ pieced blocks. I also got some extra cutting mats, the 8.5″ rag square, which precuts the fringes for rag quilts (more on that later), the Funky Flower applique shape, and the 3.5″ mini tumbler, since I’m getting a new niece and a new nephew this fall who will each be in need of a baby quilt. With shipping, this all came to less than $450; accuquilt.com lists the cutter with the 12″ bundle alone at $581.90.
 I spent all my work time at the retreat cutting: I cut almost all the pieces for the 2011 Shop Hop blocks; cut down several pairs of Dan’s old worn-out jeans to make a denim rag quilt; and cut 17.5 yards of solids into triangles for the guild challenge this winter. Although I didn’t get to work uninterrupted (see above re: two children under 3), I estimate that it took me less than 3 hours to cut all that solid fabric, so I stand convinced.

This happened within minutes of taking the picture above. Technology may change, but some other things never do.
I’ve only started piecing the shapes I cut, so I can’t say anything definitive, but so far the accuracy seems excellent. There’s definitely a learning curve to using the cutter, but I’ve caught on quickly. And if using it means I get to spend more of my admittedly limited time on the parts of quilting I enjoy more than cutting fabric, I’m all for it.
Next up, a project I’ve already started and completed with my GO!
FINISHED!!! Finley’s Quilt

Finley on her quilt, Nixon Park, 6/22/13
I managed to finish Finley’s quilt before she was four months old!

Finley’s Quilt, 2013, 53″ x 53″
I can technically claim I started this quilt while in the process of giving birth to her. When I was in a holding pattern at Labor and Delivery, hooked up to the monitors with my IV started, I found myself all worked up with nothing to do. I had filled out all the forms they had given me; I had handed off my phone to Dan so it wouldn’t go missing (no pockets in a hospital gown, go figure); and I had no one to talk to, because Dan and my parents were working out the logistics of who would be with Ronan at various points throughout the day’s events. So, to keep myself amused and centered, I started to do math longhand.
 I had seen this Rolling Stone quilt (Emeralds, by Mary Fons) on the cover of Fons and Porter’s Love of Quilting magazine, and thought it would be perfect. I wanted to use stash fabric, and I didn’t have an appropriate focus print handy like I had for Ronan’s quilt. However, I didn’t want to make it exactly as written, because as I’ve stated previously, I try to avoid the “corner cutter” methods when possible; I find them to be wasteful of fabric, and I’m an accurate enough piecer for my purposes that I don’t need to avoid cutting triangles. So I did my calculations for the pieces I would need to cut, and kept my mind largely occupied until they were ready to wheel me to the operating room.
 Needless to say, I didn’t start to actually cut and piece the quilt until Finley was a few weeks old. Since I was making thirteen blocks, I pulled twenty-six pink and purple fabrics from my stash and cut 2 rectangles and 2 square-in-a-square pieces from each. Then from half of them, I cut an additional square for the block centers. I cut the background triangles and rectangles from eight light taupe fabrics, and then pieced everything together into component units. I didn’t plan the individual blocks until I had already pieced all the square-in-a-square units and rectangle squares, so when I laid out the blocks (my favorite part!) I couldn’t always achieve my goal of keeping similar fabrics as far apart from one another as possible. Still, most of the blocks avoid repeating fabrics.

That’s not it…
Originally, I had imagined using another light taupe for the setting triangles, but when I actually tried it on the design wall, it really washed out the blocks. From there I tried a taupe and wasabi green floral on a light background, and if anything, that was worse. But that inspired me to try a very odd fabric that I’d bought some time ago to coordinate with some of my dark taupes that had wasabi green highlights. It’s from the Odyssea collection by Moda, and as soon as I put it up on the design wall with the blocks I knew I had a winner.

That’s it!
The only downside was that I didn’t have enough for the corner triangles. However, even that became an opportunity because it gave me a place for applique. This was the only new fabric I bought for this quilt, as I didn’t have a tone-on-tone or solid in the same green. Searching for that was the impetus behind Finley’s and my first Mommy-daughter trip to the fabric store.

She was great until I got to the cutting table, then melted down.
I appliqued Finley’s initials, as I had done with Ronan’s quilt, in the upper left corner, and used the remaining three corners for her birthdate and two swirly hearts based on the design on a yoga t-shirt I have. In the interests of time I just did fusible applique with a mini zigzag in matching thread, and then quilted the daylights out of them. Those appliques are not going anywhere.

Applique detail, Finley’s Quilt
I managed to finish piecing the quilt before my maternity leave ended April 8th and I went back to work. I used the rejected taupe and green floral for the back (after all, it matches!) using the remnants of the green from the corners and a rejected green pin dot to stretch it to fit. The quilting was a mix of my old standbys and some new techniques; I did freehand flowers and leaves in the pink and purple rectangles and square-in-a-squares. I wanted to emphasize the illusion of circles created by the straight line piecing of the Rolling Stone block, so I quilted freehand feather wreaths in the center of each block, marking only the circular spines. I then filled in the other background shapes with pebble filler. I quilted the setting triangles with a 60-degree grid of serpentine lines, using the centers of the flowers in the fabric print as my guides. The corners got freehand mini Baptist fans with strings of pearls in the applique.

Quilting detail, Finley’s Quilt
I left the center squares unquilted, both to avoid obscuring the print and because I couldn’t decide what the best design for them would be. I’ve been heavily influenced lately by Wendy Sheppard’s Ivory Spring quilting blog; she does gorgeous, creative, prolific work on a domestic sewing machine. She frequently leaves much larger pieced areas unquilted than I’m used to seeing, adjacent to elaborately quilted designs, so I thought I could do a lot worse than to emulate this in my own work. As of now, I think it’s successful! And there’s the additional advantage that if at any future point I change my mind, I can always add more quilting. After all, I learned my lesson from Alice in Wonderland:
`I’ve had nothing yet,’ Alice replied in an offended tone, `so I can’t take more.’
`You mean you can’t take LESS,’ said the Hatter: `it’s very easy to take MORE than nothing.’
I finished the quilt with a binding with inserted rickrack, using Susan Cleveland‘s technique, as I thought it added an appropriate element of whimsy.
Quilting and binding detail, Finley’s Quilt
And the quilt was done in time for Show & Tell at the June quilt guild meeting, a full week before Finley turned four months old. I think a happy dance is in order, don’t you?
I’ve gone to the Silly Symphonies well before for these video links, and this one from 1933 is esthetically beautiful, delightfully bizarre and, appropriately for this post, baby themed:
Another Shop Hop Quilt, 2008, Part 1

“Everyone seated? Then let’s begin.”
[Editor’s Note: I started this post in January, while working on this quilt top. However, due to major recent life events named Finley, I delayed finishing it. The top has been done since before she was born, so although I think I changed all the time references to reflect that they happened in the past, if I missed any and it sounds weird, that’s why.]
I was very proud to finish my 2007 Shop Hop quilt, Liddle Lamzy Divey, in time for our guild show in June 2012:

Liddle Lamzy Divey (2007 Shop Hop quilt,) 2010
However, spending time with that set of blocks brought painfully to mind the fact that sitting behind them in my studio closet were the block kits from the 2008, 2009, and 2011 Eastern PA Shop Hops. And of course, in November my mom, Ronan, and I completed the 2012 Shop Hop, which meant I brought home yet another set of block kits. So when considering which piecing project I should bring to the guild retreat last December, I loaded up all four years’ worth of kits.
Of course, I had grand ideas of entering some sort of cutting and piecing flow state in which I would power through multiple years’ kits and leave with stacks and stacks of completed blocks. Naturally, reality was far different. I decided to start with the 2008 blocks, which were from the English Rose collection by Jo Morton for Andover Fabrics. Once again, although I am pleased with the result so far, this was not a collection or color palette I would have instinctively been drawn to. The focus print, an extremely large-scale floral featuring huge overblown cabbage roses, is just not my style at all, and the resulting palette, heavy on the hunter greens and burgundies, just strikes me as dull, dark, and dreary. The individual coordinating prints, however, are very attractive and varied, including a couple colorways of an interesting triangular leaf print, some Dimples, a really unusual curvy coral stripe (my favorite fabric in the collection,) and some smaller floral prints. And fortunately, the blocks themselves were designed with a nicely balanced amount of light cream background, and enough of the quilts at the individual shops featured light sashing or borders that kept them from getting ponderous. (Otherwise, I wouldn’t have chosen to invest in the kits.)
Here’s a gallery of the shop quilts (as always, click to enlarge):
-

- Sew Smart Fabrics, Doylestown, PA
-

- At Piece Quiltery, Easton, PA
-

- Quilt Back, At Piece Quiltery, Easton, PA
-

- Allentown Sewing Machine Outlet, Allentown, PA
-

- Wooden Bridge Drygoods, Kutztown, PA
-

- The Quiltery, Weissport, PA
-

- The Country Quilterie, Effort, PA
-

- Side 1, Pocono Sew & Vac, East Stroudsburg, PA
-

- Side 2, Pocono Sew & Vac, East Stroudsburg, PA
-

- American Ribbon Outlet, East Stroudsburg, PA
-

- J&B Fabrics, Nescopeck, PA
-

- 118 Fabrics and More, Sweet Valley, PA
-

- Endless Mountains Quiltworks, Tunkhannock, PA
-

- Quilting in the Valley, Hegins, PA
-

- The Happy Sewing Room, Hamburg, PA
-

- The Quilters’ Palette, Fleetwood, PA
-

- Ladyfingers Sewing Studio, Oley, PA
I had started cutting the fabrics for the blocks several years ago, shortly after finishing the 2007 blocks, but got bogged down in the planning. The block kits are extremely generous, including fat eighths (9″ x 22″) of each fabric called for in the block, which is why I ended up with all those flying geese for the vertical borders of Liddle Lamzy Divey. However, such largesse doesn’t mean I want to waste fabric unnecessarily, and the block instructions are all written for people who prefer to avoid cutting triangles: all half-square-triangle squares are done via the “easy sandwich method” with the drawn diagonal line, and all flying geese units are done using the “stitch and flip method” with a rectangle, 2 squares, and leftover “bonus triangles.” I have tried these methods and found them to be, in my hands, no more precise (in fact, sometimes less so) than cutting the triangles, especially when I use rulers such as the Easy Angle and the Fons & Porter Flying Geese ruler. Plus, the rulers allow me to cut my triangles from strips with nice, normal, non- +7/8″ measurements, and give me pretrimmed triangle points resulting in fewer dogears.
Contrary to my initial attempt, rather than trying to come up with a Grand Unified Theory of Everything where I came up with a master list of every shape and size that needed to be cut, I pulled out all the instruction sheets and cut the components for each block separately, but from a single pool of fabrics. This may have taken a little longer, but the vast majority of shapes could be cut from 2 1/2″ strips, so it was fairly simple to keep everything organized, and I was left with roughly 4 3/4 total yards of leftover fabric, in fat eighths, after all the blocks were kitted up. More on what I did with that later.
The blocks themselves were significantly less varied in their design than the 2007 blocks. In fact, there were really only three basic variations: whether the corners were a standard four-patch, a four-patch with 2 squares and 2 half-square triangle squares, or a Birds in the Air unit . The closest analogue for the basic block I could find in the Encyclopedia of Pieced Quilt Patterns by Barbara Brackman was BB1661, “Big T.”

All blocks shared the other elements of a central 4″ square of the large floral focus print surrounded along its sides by units consisting of a 2″ x 4″ rectangle sewn to a 2″ x 4″ flying geese unit. However, this apparent simplicity was contradicted by how much variation was introduced by subtle changes in the position of those flying geese, and by varying the value and fabric choices. From a distance, all you see in these Shop Hop quilts are samplers: you have to really study to see just how similar the piecing is. I had mentioned briefly in an earlier post that it would be interesting to do a quilt of “piecing twin” blocks where the piecing was all the same but the blocks looked different from one another due to fabric and value placement. Well, without trying to, I’ve now made that quilt.
There were 16 blocks that year, fifteen shops plus the kit that came with the passport. And despite working on them for pretty much all retreat weekend, I didn’t quite finish them all. (Needless to say, none of the other years’ kits even came out of the bag.) But the blocks were finished within a few days of the retreat’s end, and I decided to keep it simple and just do a straight 4×4 set with light sashing and cornerstones made from the large floral focus print:

Center, 2008 Shop Hop quilt
This was a particularly tricky set of blocks to lay out, as I wanted to not only distribute the most eye-catching fabrics evenly across the quilt surface, but also keep blocks of overly-similar construction away from each other, and keep the three different colors of Dimples fabrics used in the corners of each block assorted. Ultimately, I made the corner colors my primary guide, and did my best with the other two considerations. As the top hung on my design wall, I had some mild regrets on some of the block placements I chose, but not enough to rip anything out. And the fancy borders I put on will probably be distracting enough to keep me from obsessing much longer on the blocks. More to come!
The Ugliest Fabric I’ve Ever Seen
Having just posted about the fabulous “After Dark” fabric that I bought at the QU show, which may indeed be “the best fabric ever produced,” I started thinking about ugly fabric. Now “ugly,” just like “light” or “dark,” can be subjective in the context of quilting: it can depend on what any given fabric is next to. It’s absolutely a matter of taste, as well; ugly is in the eye of the beholder just like beauty. And I’ve certainly seen demonstrated the truth behind Bonnie Hunter‘s famous line, “if the fabric’s still ugly, you just haven’t cut it small enough.”

Remember, “Kyoto Ink,” one of my favorite quilts I’ve made, started as an “ugly” fabric challenge.
HOWEVER.
I have seen a fabric so ugly that I think it would have to be cut down to near-molecular size before it ceased to be ugly. At least with most other ugly fabrics, I can imagine a collection they might have been part of, or an era in which they would have been in style — some context in which they might not be so ugly. But this one? I have nothing.
And I have purposely padded out the beginning of this post so that on most monitors you would have to scroll down to see the ugly fabric. I don’t want people just accidentally encountering an image like this. It’s NSFE: not safe for esthetics.
Brace yourselves…

Why yes, those ARE 3″ chocolate brown roses on a neon green background!
I found this gem at Fabrics by Allan in Allentown in 2009, and to date I haven’t seen anything to rival it. I didn’t buy any, because I really couldn’t imagine ever using it for anything except perhaps to scare other quilters. It’s too loud and bizarre to even be the subject of an ugly fabric challenge. Plus, I would have been embarrassed to have it cut for me. And as for any of the standard uses for those “what was I thinking?” fabrics:
I couldn’t use it as the back of a bed quilt… it would keep people up at night.
I couldn’t use it as the back of a wallhanging… it might peel the paint.
I couldn’t use it in a charity quilt… they’d give it back.
I couldn’t use it to practice machine quilting… it’d throw off my tension.
I couldn’t even use it to line the cats’ bed… I like my cats.
I would even be afraid to store it with my other fabrics. One of the excuses we’ve all used when adding to our stashes is that fabric doesn’t go bad, but with this one I wouldn’t be entirely sure. If anything could cause fabric to curdle, it would be the waves of ugly radiating off of this hideous fabric.
So I left it there. And for all I know, it’s still there, resistant to all attempts to discount it. Unless, that is, the perfect customer came along one day, swooned, and said, “I’ll take the bolt.” I hope the sales staff served her with a smile… while hitting the silent alarm button.
People that disturbed can’t be allowed to just wander around unsupervised.
Still Here, Still Quilting!
I haven’t dropped off the face of the earth! Even with a 2 1/2 year old and a 3 month old, I’m still managing to get into the studio from time to time — even if some of that time is spent buried under children:

After all, sometimes the planets align such that they’re both asleep at the same time. And now that Ronan’s old enough to be trusted to explore the button tin, we can frequently spend time in the studio together without him defaulting to his standard behaviors of pushing buttons on the sewing machine, unplugging the sewing machine, turning off the power strip, pulling out the knee lift lever…

Even Finley sometimes hangs out in there with me like a little friend:

So what have I been doing with my quilting time? I have made a quilt for Finley; I’m just now getting the binding handsewn to the back, so it will be the topic of a future post. Here’s a preview:

I’ve also been playing with a technique from Anita Grossman Solomon’s Rotary Cutting Revolution. She’s the visionary who developed the Unbiased Block that I used in Alexander’s quilt last year. I caught up on a bunch of The Quilt Show episodes while up in the middle of the night with Finley those first few weeks, and the episode where she’s the guest just set the cogs turning. I’ll be featuring that quilt-in-progress in its own post soon, but you’ll get a sneak peek at it if you watch my video.
Because I also just made a technique video that I posted to YouTube on how to use Quilter’s Rule’s nested square rulers to square up quilt blocks:
The “X-Centric” block from Anita’s book calls for squaring up the component blocks to 7.5″, and that is just not a size that exists from the standard ruler sources. But these nested squares from Quilter’s Rule have a lot of potential. I got them at their booth at the Quilters Unlimited show last weekend, when Finley and I met Diane there. It was a great show as usual, with lots of quilts and vendors of high enough quality (in both categories) to make the drive worthwhile. Here are some highlights (click to enlarge):
-

- Detail, Vertigo by Suzie Buck
-

- Detail, Rings and Things by Kay A. Lettau
-
- Detail, Fade to Red by Martha Bush
-

- Detail, Trains by Amy S. Lancaster
-

- Detail, Winding Ways by Shirley R. Winn
-

- Detail, Beauty of the Old Dominion by Amy Flenniken
-

- Detail, Quilting the Bases by Dian Epp
-

- Detail, Ribbon Stars in Taupe by Martha Bush
-

- Detail, Black and White and Cats All Over by Judy Kozlowski
-

- When Flowers Party by Linda T. Cooper
I also succumbed to buying (gasp) full price fabric! Alexander Henry struck again, designing what I referred to in an overexcited text to my mom as “quite possibly the best fabric ever produced.” While that may have been laying it on a little thick, my inner goth girl rejoiced at this fabric, called “After Dark”:

That black widow spider is 12.5″ tall.
From a practical standpoint, I do have TWO people in my regular gift-giving rotation who are hardcore Edgar Allen Poe aficionados. This was one of many featured fabrics at the Some Art Fabric booth that I could have happily wrapped myself in yards of, but at $12.45 a yard (I wince as I type) I was able to restrain myself.
So I have one quilt (Finley’s) all but finished, another top (2008 Shop Hop blocks!) completed, a third (Christmas X-centric blocks) well under way, and they just announced the challenge (solids) at guild last month. And that’s not addressing any of the UFOs! Oh well. At least I’m sewing, creating, and enjoying the process, which is far more important than finishing anything at this stage in my life.
I just have to finish convincing myself of that.
My Newest Little Project
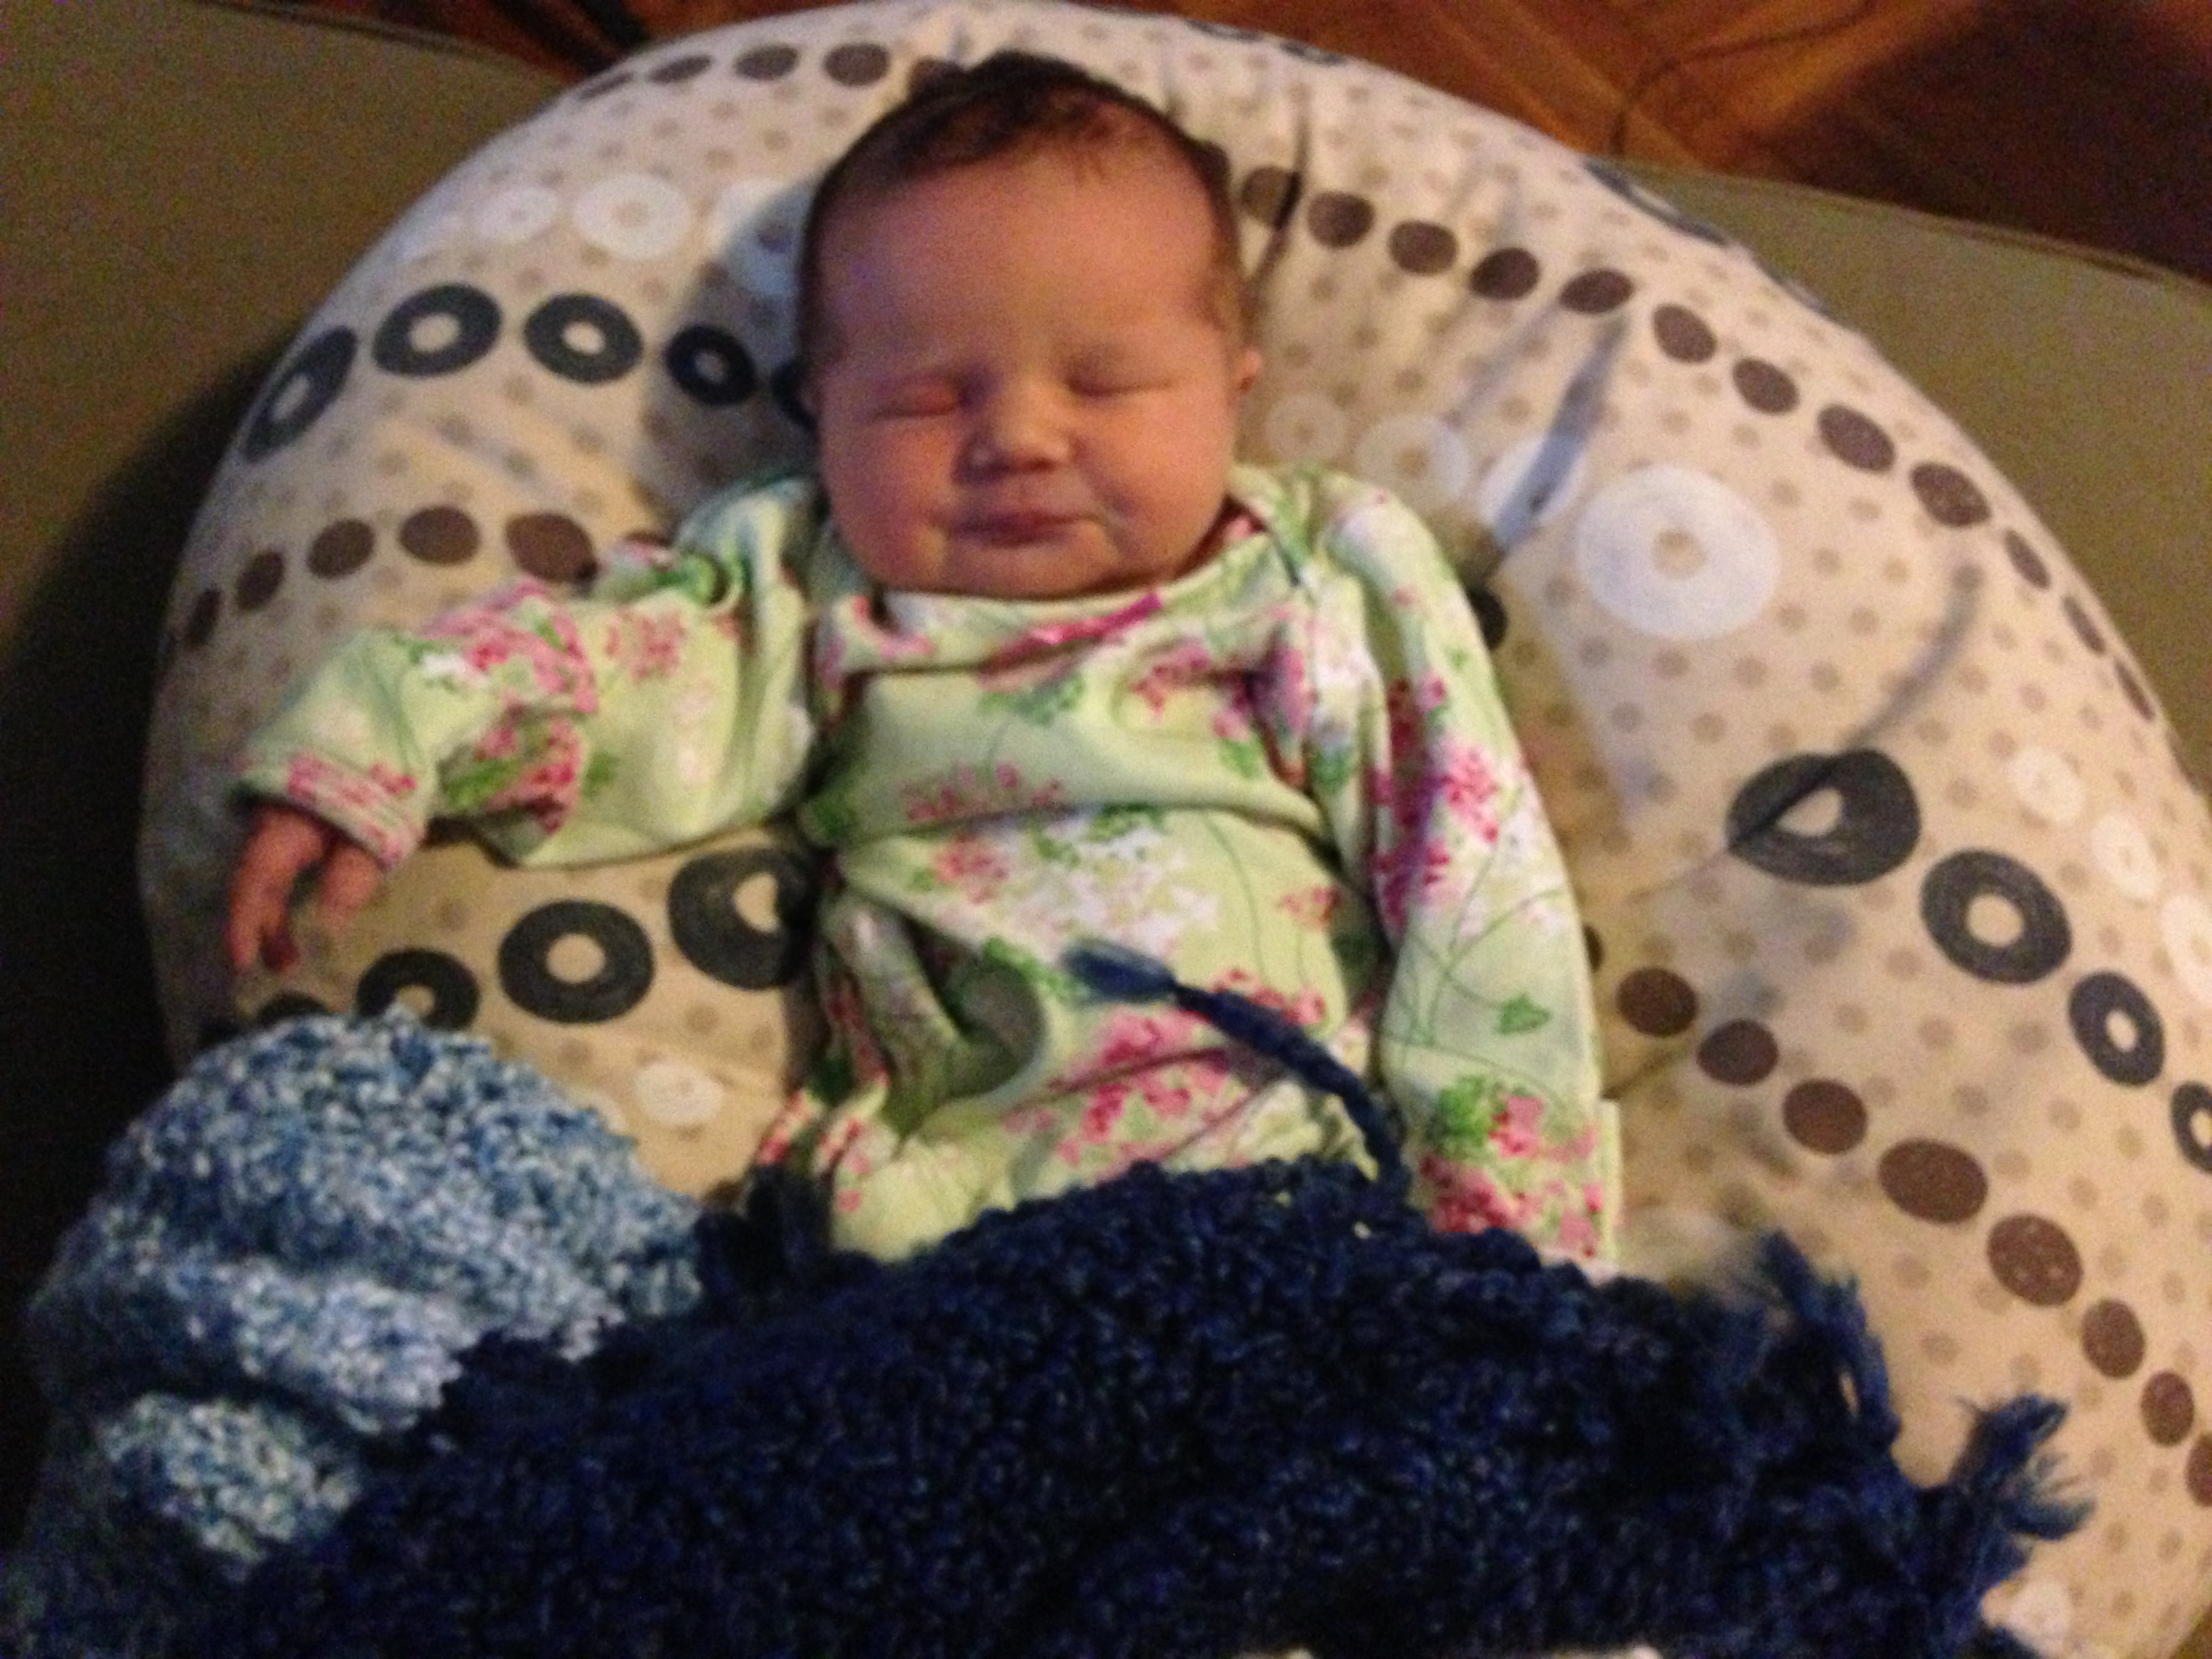
 I had my baby girl!
 Finley Nichole Paddock was born February 26, 2013 at 1:55pm, weighing 9 lbs., 6 oz. and measuring 19.5″ long. She came out yelling and bright red, with a full head of dark brown hair.
 She looks startlingly like her brother, which surprised everyone: Ronan’s features are very much a mix of different family members, so that when people ask me who he looks like, I always say he just looks like Ronan. Now Finley also looks like Ronan, to the point that when they brought her to me, I thought, “Didn’t I already have this baby?” Her face is a little rounder, her forehead a little less prominent, and I think her eyes will be brown. But I also think they will look strongly alike as brother and sister, which can only be a good thing.
 She’s a snuggly little girl who loves to be held, and knowing that she’s my last baby, I’m trying to cherish every moment of cuddling her. It’s a good thing I’ve always been told that you can’t spoil a newborn, because otherwise I’m spoiling the daylights out of this child.
 I’m still getting used to the word “daughter.” Before we had children, if I ever pictured myself as a mother, I saw myself with little girls. After all, I have three younger sisters; my brother wasn’t born until I was 14. Having spent the last two years and three months as the mother of a boy, however, has changed that perspective. I think I’m doing a good job so far with Ronan; I hope I can give them both what they need from me.
 We’re also trying to make this transition as easy as possible for Ronan. He never really grasped the concept of a baby coming despite all our efforts to discuss the topic with him over the last several months, so he has been a little spun by this major life change. My mom stayed with me in the hospital so Dan could be at home with Ronan to normalize things as much as possible those first few days. Nevertheless, he’s been somewhat clingy and oppositional since we got home from the hospital, but I make sure I do storytime and bedtime with him every night, just the two of us, and he’s gradually coming around. He likes Finley a lot, so at least he’s not holding a grudge against her.
So while I’m still in the early, bleary-eyed, weepy phase of new-baby-having, I wanted to introduce my new little treasure here. I’m still getting to know her, and still getting to know myself with her in my life. But she represents a very welcome new chapter, a new adventure, a blessing, and a promise.
 Welcome to the world, baby girl.

