Posts tagged ‘finished!’
2013 Challenge Quilt — Solids!

Bright color camouflage! Can you find the hidden child?
Once again, part of why my blog went dark in the latter part of last year was that I couldn’t show you what I was primarily working on. This year’s challenge was announced in May and was solid fabrics, at least six different shades/hues. My initial reaction was very negative: basically, “eww, I’m not doing that!” After all, the fabrics I love are prints and batiks, and I have a houseful of them. Doing a solid fabric challenge would entail buying new fabric at a time when I’m desperately trying to use up my stash, as my stash decidedly lacks solids.

Finley helped me assess my feather coverage partway through the quilting.
However, when I told my mom about the challenge and how much I was NOT inspired by it, two things happened. First, she reminded me that the first quilts I fell in love with, the quilts that inspired me to start quilting, and indeed my first several quilts, were all made of solid fabrics. And second, she gave me a bag of twelve solid half-yards for my birthday. I subsequently added some neutrals, and the game was afoot. Besides, in retrospect, if my reaction to a challenge is “eww!” then that suggests that it really will be a challenge, not just an excuse to make a quilt I would’ve made anyway.
Early on in the process, I decided that the biggest advantage working with solids would give me is how well quilting shows up on solid fabric. Therefore, I wanted to keep the piecing simple. Since I love pinwheels, and have been planning for years to make a quilt that incorporates different sizes of pinwheels, I settled on the idea of making a quilt similar to this one of Kaffe Fassett‘s:

From _Country Garden Quilts_
I started the cutting at my mini-retreat in late July with Rhonda and Diane, and didn’t really work up a strict plan. I decided to just run all the solid fabric through my Accuquilt GO! cutter (after all, I really wasn’t looking to start a solid stash) and make the quilt however big it turned out. I had a lot of fun cranking out all those triangles. I then paired them off into blocks using my standard concept of quilt entropy, trying to get the colors as mixed up as possible. I don’t know whether I will ever be capable of leaving things up to chance sufficiently to make a “brown bag” quilt, but I did have fun free-associating about the various bright color combinations: green and purple is the Hulk, orange and fuchsia is the beach, red and brown is a robin, yellow and purple is Easter. The colors all coordinate with one another because there are so many of them; as Alex Anderson says, if the colors in your quilt aren’t going together, add more colors and they will.

You know you’re really chain piecing when you can barely see the baby
I sewed all the large 12″ blocks together and had paired up the triangles for the 6″ blocks when I realized I’d goofed. In the original quilt, the smaller blocks are 1/3 the size of the larger blocks, not 1/2. Oops. Time for a new plan. I liked the idea of keeping the center of the quilt set on point, so I just sewed the large blocks together and planned on making the smaller blocks into a border. And that’s when I got seriously sidetracked with other projects (they’re in the next post.) That’s also when I fully internalized just how large a quilt (84″ x 84″!) I was ending up with, which hadn’t really been in the plan.

Just the center
The primary problem with having the challenge meeting in January is that I didn’t get back to the challenge quilt until after Christmas: even though we actually had more time between the announcement of the challenge and the meeting, I would have had to have the quilt virtually finished before Thanksgiving to have truly been on-time with it, and my brain doesn’t work that way. I very nearly packed it in and turned it into another UFO, but Dan was my cheerleader and encouraged me to finish it. Fortunately, the rest of the quilt top went together smoothly and the children more or less cooperated to get me some sewing time.

Some days, this is what cooperation looks like
I wound up working in Danville, PA for a military dental event the weekend before the guild meeting, so I made certain I had the quilt basted and the quilting started before I left so I could get some dedicated quilting time in my motel room. I made the most of it and had the entire outer border and 1/4 of the center quilted by the time I got home. Once again, working under deadline really helped me make decisions as to what quilting designs went where. Feathers are favorites of mine to stitch without a great deal of marking and they always look fancy, so I put Patsy Thompson-style soft heart feathers in the outer border and Kimmy Brunner “twirly whirly” feathers in the center. I was able to get away with only marking the spines in all cases; the seam lines for the borders and the X through the center gave me all the other guidelines I needed. This was definitely not a project for subtlety, so I used neon green Brytes by Superior Threads for all of it. I managed to get the remainder of the center quilted and the outside edge zigzagged and trimmed in time for the meeting, so even though it wasn’t finished, it was finished-ish.

Before and after hyperquilting
The inner border was reserved for my fanciest quilting, since it would show the best there. I think it also helped me finish this quilt, as I was really looking forward to quilting that border; otherwise, I probably would have lost momentum once the meeting was past and I no longer had a deadline. I rewatched Patsy Thompson’s Free-Motion Fun with Feathers Vol. 4 DVD again for inspiration and quilted a hyperquilted, symmetrical border flowing from corner motifs that started as Quilter’s Rule Dragon Scales template and evolved from there.

Detail, corner quilting design
I used orange Brytes for the original feather and hyperquilted it with Superior Threads Metallic in variegated gold. I also shook up my standard machine binding protocol to add a little more embellishment by trading the stitching in the ditch for a decorative stitch in a variegated King Tut:

Detail, binding stitching
What would I do differently? Well, much as I love wool batting, it definitely increased the difficulty level on this quilt. I think as long as I’m quilting on my home machine, I need to reserve wool for the smaller projects. It doesn’t spray baste as nicely as the cotton blends, and I got more pleats and tucks on the back than usual. I didn’t have any problems with skipped stitches or shredded threads (even with the Metallic! That stuff worked like a charm and I will most certainly be using it more often from here on out) but I had more “nests” on the back than I normally do. I’m not sure why. I didn’t let it stop me (another benefit of being on a strict deadline) but I will be keeping my eye out for future problems along these lines and possible causes/solutions.
For a happy dance, I’m mining the classic movie musicals again. The bright colors in this quilt made me think of the old movies that would advertise being shot “in Glorious TECHNICOLOR!” including “On The Town.” Enjoy!
Did I Just Make A Modern Quilt?
I made this quilt for my youngest sister’s baby boy, who is expected any minute now:
 Eleanore isn’t a quilter, but she has a very good eye for color and design; the fact that she’s decorated the nursery in mushroom gray with accents of orange testifies that the standard blue, green, and cream baby quilt wasn’t going to cut it for her. I found the big border stripe (aptly named “Big Stripe,” from Michael Miller) at Smile Spinners‘ booth at Quilt Odyssey and used it as the source for the overall color palette. The solid orange, the gray and aqua ant farm print, the border, and the back were the only new fabrics purchased for the project; the rest were all pulled from my stash, demonstrating that a) I have a fantastic stash, especially where orange, taupe-y gray, and cute little animal prints are concerned, and b) that I have wa-a-a-ay too much fabric.
 It wasn’t till I finished the top that it occurred to me that this quilt, moreso than any other I’ve ever made, looks an awful lot like the quilts I’ve been seeing in books and magazines described as “modern” quilts. Which leads me to a bit of a sticking point for me over the past few years: I’m not exactly sure what a “modern” quilt is.
[From this point forward in this post, I’ve decided to capitalize the word Modern when referring to this concept because part of my problem with the term up to this point is the ambiguity of it: no matter what my quilts look like, I myself (and all my quilting contemporaries) are modern quilters, in that we are definitely 21st century women who choose to participate in a fiber art form that dates back several hundred years, but we do so not as historical reenactors, but as full participants in our culture as it exists now, using the tools and technologies that would have been science fiction to our foremothers. I realize this is a matter of semantics; after all, some “modern” art is now well over 100 years old, yet we still use the term. But I admit it rankles me to potentially exclude myself from the umbrella of modernity because I choose to make quilts, albeit on a computerized sewing machine with all the latest in gadgetry, that follow a more traditional structure. And using quotation marks makes me look snarky or sarcastic.]
In search of a definition, I went to the source. Here’s what the Modern Quilt Guild has to say on the subject:
“Modern quilts are primarily functional and inspired by modern design. Modern quilters work in different styles and define modern quilting in different ways, but several characteristics often appear which may help identify a modern quilt. These include, but are not limited to: the use of bold colors and prints, high contrast and graphic areas of solid color, improvisational piecing, minimalism, expansive negative space, and alternate grid work.”
From this definition, I get the impression that even self-described Modern quilters tend to differ a little bit in what they call Modern. I definitely recognize that Modern quilters may somewhat be separating themselves out as a generational or attitudinal divide, especially as Modern Quilt Guild chapters spring up around the country. I’ve heard enough horror stories about quilters who are younger or new to an area that has a very rigid, insular quilt guild being frozen out or run off by Quilt Police types; if the solution to that is to start your own chapter of quilters who share a wish to breathe some fresh air into that environment. then more power to them.
But ultimately, I guess I’m too much of a quilting generalist to want to limit myself to one label, whether it be traditional, Modern, art, etc. I guess I’m a big tent quilter: I believe quilting is big enough that there’s room for whatever you or I like to do, even if we wouldn’t want to trade projects with each other. I’m reminded of the saying, attributed to Louis Armstrong (among others), that “there are only two kinds of music, good and bad.” So while I’m not willing to place a label on what I like, I know when I like it.
And I like this quilt, that I made for my nephew. It has some Modern elements, with the solid orange. negative space, and large graphic prints, but it uses the Tumbler shape, which is very traditional. I used my Accuquilt Go cutter with the Mini Tumbler and Baby, Baby dies, which definitely sped up both the cutting and piecing process. Those precise shapes and engineered corners meant everything went together beautifully with very little pinning. So far, the cutter continues to live up to its “better cuts make better quilts” hype and I continue to be very pleased with the purchase.
 I got a little fancy and fussy with the Big Stripe border. I knew I wanted those gorgeous mitered corners, but with a rectangular quilt, it took some doing to make the same spot in the repeat show up in the corners. I had to very precisely measure and invisibly piece the stripe so the corners reflected properly, but it was worth the effort and I get a little thrill of pride looking at it.
 The quilting was fun: I knew nothing would really show up in the pieced areas, so I just used Wendy Sheppard’s Jester Hat texture. Considering this was the first time I’d stitched it, it flowed very naturally and I only got “stuck” a few times. I used Superior Threads Rainbows #812 Western Sunset, which coincidentally contained most of the colors in my palette, for that and for the little serpentine/sine waves I quilted into the colored stripes of the border. I used orange Bottom Line to quilt the solid orange section behind the duckies in waves and circles; I wanted it to look like a bubble bath.
 And I had the quilt finished for the baby shower! It almost made me look like one of those organized quilters who thinks ahead. However, I’m not quite done with the baby quilt for my sister-in-law’s baby girl who was born last month, so I don’t have to worry about that reputation sticking.
For a happy dance, here’s a ducky video I shot at the York Fair a few years ago. It seems apropos:
Finished! Denim Rag Quilt

The way we get around, we need rugged quilts!
This was a fun little project.

Denim rag quilt, 40″ x 40″
My mom and I had taken a class, probably ten years ago, on flannel rag quilts at Ladyfingers. I’m not even sure where that project bag is at this point. Suffice to say, I was not a fan. The instructor kept emphasizing how this was a quilt for people who didn’t care about accuracy, that “anything goes” with rag quilts, and if things didn’t line up, don’t worry because it wouldn’t matter. And while this approach may set some beginning quilters at ease, it was simply not what I wanted to hear at that stage of my quilting journey. I was just starting to feel like a decently competent piecer, achieving a fairly consistent 1/4″ seam and matching my intersections most of the time. The last thing I needed was a project in which precision was not only NOT a goal, it was a liability. (The ridiculous stretchiness of the flannel I was using meant that nothing stayed square, straight, or remotely the same size, even with a walking foot.) Throw in the fact that I was really not looking forward to clipping all those seams once the darn thing was finished, and this was a project born to become a UFO.
*Little bit of a tangent here: although the instructor for the flannel rag quilt class was very nice and very competent as an instructor, it was clear she and I were not on the same quilting wavelength. While we were working on our squares, she talked about how she designs quilts for fabric companies, incorporating entire lines of fabric for them. All well and good and very interesting. However, she then went on to say that she plans everything out in advance for all her quilts, not just those, and that she has NO STASH. Let that sink in for a minute. In fact, she said she had recently purchased 3 yards of a fabric that she planned to use as a border, and when it became clear that it would not indeed work as the border for this particular quilt, she was very upset because “now what am I going to do with it?” I absolutely could not relate.
After that experience, I can confidently state that I had given absolutely no thought to ever making another rag quilt until I started researching the purchase of my GO! cutter. Accuquilt makes rag dies that precut the fringes on the edges of the squares so that all you have to do is sew the blocks together and then wash the quilt: no hand-crippling, mind-numbing seam clipping to do! I still was in no hurry to work with flannel again, but I knew I had a stack of Dan’s worn-out jeans in the basement that were guilt-tripping me and making me feel like a hoarder, and the wheels started turning.

A stack of die cut squares, 8.5″ jeans and 6.5″ batting
I had started saving the jeans after seeing a show on DIY or HGTV in which they discussed sustainable building practices including the use of recycled denim to make housing insulation. On the show, they promoted a recycling program that was doing drives throughout the country to collect the jeans. However, by the time I had any to contribute, the website said that drives were temporarily suspended for the year, and would I like to get on an email list for when they restarted? I did, but that was an email that never came. Since then, the only comparable program I’ve been able to find is Cotton: From Blue to Green, which only accepts mail-in denim donations. And they’re in Phoenix. I can’t imagine how expensive it would be to ship a big cardboard box of jeans to Phoenix, and I can’t imagine the carbon footprint of that decision would end up being particularly sustainable. So the jeans sat in my basement.
I had seen a magazine photo several years ago of a large denim picnic quilt, but had dismissed the idea for my own projects because the denim would be so heavy and difficult to work with. The die cutting definitely solved part of the problem; I had initially envisioned making the quilt much larger, but I only had six pairs of jeans to work with. (I think there are more in the basement somewhere, but these were the ones I could put my hands on.) In the event, I was fortunate to have the size limited by the amount of materials, because the 6 x 6 block quilt was heavy enough that my arms felt fatigued after putting it through the machine to join the last rows together.
I love the idea of a denim quilt for outdoors. I don’t scruple to take my regular quilts outside; I made them for my kids and I would rather they use and enjoy them, even if it means the quilts occasionally get a little dirty or abraded. However, a denim quilt is durable, HEAVY (having trouble keeping the child in bed? Lay one of these puppies on top of him!) and only improves with washing and wear, so it’s a natural for more rough-and-tumble settings. We really enjoyed attending some of the free outdoor family movies shown in Farquhar Park this summer, and quilts always came with us.

This one got to make its useful debut as a roll-around quilt for Finley as we ate our picnic lunch at Knoebel’s:

As to the actual construction of the quilt, I “deboned” the jeans, cutting each pair with dressmaker’s shears into two leg fronts and two leg backs by just cutting along the seam lines. I then removed the fly and the back pockets. (I had wanted to keep the pockets on the squares and thus have some blocks with usable pockets on the quilt, but the pockets on these jeans were too large and too close to the back yoke seam for that to work on this project. A future quilt made with different jeans, perhaps some of Ronan’s, will have pockets.) I then fed the resulting long denim pieces through the die cutter, only cutting one layer at a time since the fabric is so heavy. While cutting the squares individually and having to pull denim threads out of the die after each cut made this process much more time consuming than the typical die-cut project, it was still orders of magnitude faster than cutting all those fringes by hand. I was able to get 14 8.5″ squares (6.5″ finished due to the 1″ seam allowance), or 7 blocks, from each pair of jeans. Although there were plenty of oddly-shaped scraps that couldn’t be utilized for this project, I was also able to save 4 pieces (including the 2 back pockets) from each pair big enough to cut a 5.25″ rag square from once I purchase that die.
I was able to die cut the 6.5″ batting squares as well; this is a perfect project for using up those long odd leftover pieces of batting. I also cut 6 squares of the orange batik, and then die cut the Funky Flower out of the corresponding denim squares for a raggy reverse applique. I used a cute primary variegated YLI Jeans Stitch I’d had for years for the quilting, simple X’s in the plain blocks and echo quilting around the flowers. I used the walking foot for the quilting, but I found I had to switch back to my regular foot for joining the blocks because I skipped too many stitches otherwise. All those layers of denim are no joke: I even broke two #100 denim needles on this project.
The amount of lint when I washed it was ridiculous. I had heard that you should always clean the dryer lint filter mid-cycle when washing a flannel rag quilt. However, even pulling this one out of the washer involved handfuls of wet lint and a moment of panic that the whole quilt might have somehow disintegrated in the wash cycle.

This is not even all of the denim lint.
Now to wrap this post up on an appropriately bizarre note, my sister Eleanore sent me the following text yesterday morning:

And some people think quilting is a boring hobby for mousy little homebodies. I like to think I’m keeping them guessing.
FINISHED!!! Finley’s Quilt

Finley on her quilt, Nixon Park, 6/22/13
I managed to finish Finley’s quilt before she was four months old!

Finley’s Quilt, 2013, 53″ x 53″
I can technically claim I started this quilt while in the process of giving birth to her. When I was in a holding pattern at Labor and Delivery, hooked up to the monitors with my IV started, I found myself all worked up with nothing to do. I had filled out all the forms they had given me; I had handed off my phone to Dan so it wouldn’t go missing (no pockets in a hospital gown, go figure); and I had no one to talk to, because Dan and my parents were working out the logistics of who would be with Ronan at various points throughout the day’s events. So, to keep myself amused and centered, I started to do math longhand.
 I had seen this Rolling Stone quilt (Emeralds, by Mary Fons) on the cover of Fons and Porter’s Love of Quilting magazine, and thought it would be perfect. I wanted to use stash fabric, and I didn’t have an appropriate focus print handy like I had for Ronan’s quilt. However, I didn’t want to make it exactly as written, because as I’ve stated previously, I try to avoid the “corner cutter” methods when possible; I find them to be wasteful of fabric, and I’m an accurate enough piecer for my purposes that I don’t need to avoid cutting triangles. So I did my calculations for the pieces I would need to cut, and kept my mind largely occupied until they were ready to wheel me to the operating room.
 Needless to say, I didn’t start to actually cut and piece the quilt until Finley was a few weeks old. Since I was making thirteen blocks, I pulled twenty-six pink and purple fabrics from my stash and cut 2 rectangles and 2 square-in-a-square pieces from each. Then from half of them, I cut an additional square for the block centers. I cut the background triangles and rectangles from eight light taupe fabrics, and then pieced everything together into component units. I didn’t plan the individual blocks until I had already pieced all the square-in-a-square units and rectangle squares, so when I laid out the blocks (my favorite part!) I couldn’t always achieve my goal of keeping similar fabrics as far apart from one another as possible. Still, most of the blocks avoid repeating fabrics.

That’s not it…
Originally, I had imagined using another light taupe for the setting triangles, but when I actually tried it on the design wall, it really washed out the blocks. From there I tried a taupe and wasabi green floral on a light background, and if anything, that was worse. But that inspired me to try a very odd fabric that I’d bought some time ago to coordinate with some of my dark taupes that had wasabi green highlights. It’s from the Odyssea collection by Moda, and as soon as I put it up on the design wall with the blocks I knew I had a winner.

That’s it!
The only downside was that I didn’t have enough for the corner triangles. However, even that became an opportunity because it gave me a place for applique. This was the only new fabric I bought for this quilt, as I didn’t have a tone-on-tone or solid in the same green. Searching for that was the impetus behind Finley’s and my first Mommy-daughter trip to the fabric store.

She was great until I got to the cutting table, then melted down.
I appliqued Finley’s initials, as I had done with Ronan’s quilt, in the upper left corner, and used the remaining three corners for her birthdate and two swirly hearts based on the design on a yoga t-shirt I have. In the interests of time I just did fusible applique with a mini zigzag in matching thread, and then quilted the daylights out of them. Those appliques are not going anywhere.

Applique detail, Finley’s Quilt
I managed to finish piecing the quilt before my maternity leave ended April 8th and I went back to work. I used the rejected taupe and green floral for the back (after all, it matches!) using the remnants of the green from the corners and a rejected green pin dot to stretch it to fit. The quilting was a mix of my old standbys and some new techniques; I did freehand flowers and leaves in the pink and purple rectangles and square-in-a-squares. I wanted to emphasize the illusion of circles created by the straight line piecing of the Rolling Stone block, so I quilted freehand feather wreaths in the center of each block, marking only the circular spines. I then filled in the other background shapes with pebble filler. I quilted the setting triangles with a 60-degree grid of serpentine lines, using the centers of the flowers in the fabric print as my guides. The corners got freehand mini Baptist fans with strings of pearls in the applique.

Quilting detail, Finley’s Quilt
I left the center squares unquilted, both to avoid obscuring the print and because I couldn’t decide what the best design for them would be. I’ve been heavily influenced lately by Wendy Sheppard’s Ivory Spring quilting blog; she does gorgeous, creative, prolific work on a domestic sewing machine. She frequently leaves much larger pieced areas unquilted than I’m used to seeing, adjacent to elaborately quilted designs, so I thought I could do a lot worse than to emulate this in my own work. As of now, I think it’s successful! And there’s the additional advantage that if at any future point I change my mind, I can always add more quilting. After all, I learned my lesson from Alice in Wonderland:
`I’ve had nothing yet,’ Alice replied in an offended tone, `so I can’t take more.’
`You mean you can’t take LESS,’ said the Hatter: `it’s very easy to take MORE than nothing.’
I finished the quilt with a binding with inserted rickrack, using Susan Cleveland‘s technique, as I thought it added an appropriate element of whimsy.
Quilting and binding detail, Finley’s Quilt
And the quilt was done in time for Show & Tell at the June quilt guild meeting, a full week before Finley turned four months old. I think a happy dance is in order, don’t you?
I’ve gone to the Silly Symphonies well before for these video links, and this one from 1933 is esthetically beautiful, delightfully bizarre and, appropriately for this post, baby themed:
Finished! Evelyn’s Quilt

A clean start to the new year!
So, half a UFO is complete! As I posted before, I still have the other 72 matching Broken Dishes blocks in the UFO box. But I finished piecing the complete set, made a quilt top with the first 72, and I produced a pink quilt to give to a baby girl for Christmas.
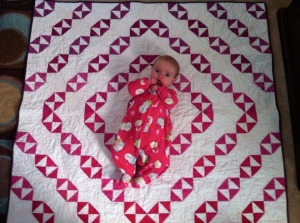
Evelyn on Evelyn’s Quilt, 48″ x 48″
The particular strain of Murphy’s law that has afflicted this project was still in effect, though: when I basted it, I pretrimmed the batting and discovered that no matter what the packaging says in regard to dimensions,
Oops
I still need to measure twice and cut once. Thank goodness for the Pellon fusible batting tape I bought at the Lancaster show last year!

Good stuff to have around.
Since I always like to get some contrast between the piecing and the quilting design, I knew I wanted to quilt curves. I had originally planned to keep the quilting formal, perhaps with a lacy Spinal Twist design from Megan Best in the white “pathways” and then something less elaborate but still following the Barn Raising-style concentric diamonds created by the fuchsia and purple triangles. If I had been trying to make an heirloom quilt, that probably would have been the way to go. However, despite the formal setting and all the white in this top, I wanted to make a quilt that would be put down on the floor for the baby to play on and spit up on, for the cat to lay on and for her parents to feel comfortable stuffing in the beach bag and then tossing in the washing machine. Therefore, I decided to take the quilting in a decidedly non-traditional direction.
I’m trying to become more comfortable with all-over quilting designs that disregard not only piecing lines but also the “pathways” created by contiguous areas of the same color or value of fabric. While I’m certainly not a fan of the overuse of lowest-common-demoninator, just hold the three layers together pantograph quilting, there is definitely a time and place for an all-over design. Hopefully this quilt falls into that category.

Quilting Detail, Evelyn’s Quilt
I’ve been reading Leah Day’s blog a lot lately, and her recent design “Flower Power” really captured my imagination. I thought it would add some youthful feminine whimsy to this quilt without getting too crazy. I further attempted to keep things upbeat and casual by choosing a Superior Threads Rainbows variegated thread in neon pink, orange, yellow, and lime green. And although I planned out a general strategy for the placement of the giant daisies, I did them completely freehand and without marking. I purposely kept them “consistently inconsistent” so I could vary the size and degree of symmetry as the top dictated, without making any one stand out. And I think overall, I was successful.
Not that I didn’t have problems. I originally planned to get all the quilting done at my recent guild retreat, but I made the mistake of only bringing along some pink Wonderfil thread for the bobbin that absolutely did not play well with the Rainbows on top; after quilting three daisies and having the thread break for the sixth or seventh time, I packed it in and made Shop Hop blocks from 2008 (more on that later.) Not that my quilting was completely free of frustrations when I tried again at home: although Bottom Line was much more successful in the bobbin, I still had trouble with occasional breakage when I’d go through heavy seam allowance convergence areas.
Also, this design really showcased a continuing weakness in my machine quilting because the extremely large petals are essentially long straight lines that require at least one, sometimes more, stops to reposition my hands as I stitch them. (Fortunately I have managed to break myself of the habit of trying to stitch beyond the area of my hands’ control, which has most definitely improved my quilting.) But while I do continue to take Karen Kay Buckley‘s advice from her long-ago class, to only stop a straight line at an intersection to hide any wobbles when restarting (I tried to use seams whenever possible,) my stitch length is still noticeably inconsistent when restarting; I tend to have a few shorter stitches till I get going again. Also, I need to be more cognizant of approaching seam intersections to help prevent short stitches or wobbly lines resulting from the foot getting hung up or deflected by the increased bulk. I think stitching over complex piecing is one of the areas in which domestic machine quilting really has a handicap compared to longarm. It’s not that it can’t be done, obviously, just that I still need a lot of practice to do it well.
But that’s the beauty of a quilt like this: it was far more important to finish this quilt than to try to make it perfect. I’m great at doing but lousy at practicing; the prospect of making a bunch of muslin quilt sandwiches to practice my quilting before embarking on a big project would just drive me away from the sewing machine. Instead, I practice by quilting actual quilts that will serve actual purposes, rather than just being thrown away or stuffed in a drawer. (And no, I am NOT making my practice sandwiches into placemats. If anyone wants to torture me, they can force me to attach binding to a whole bunch of small pieces I don’t like very much.) This isn’t a practice quilt, but a real quilt with a real destiny that allowed me to try something different without too much pressure to make something perfect. And I think the result is pretty, functional, and FINISHED!!!

Back detail, Evelyn’s Quilt
The back was bought at a discount on the most recent shop hop, and I don’t think I could have found a more perfect match for the fuchsia and purple at any price (not that I brought the blocks with me, so my freaky superpower for color memory persists.) The binding was a stash fabric, and although I briefly flirted with a wild impulse to bind this quilt in lime green, cooler heads prevailed. Maybe that’s what I’ll do for the remaining set of blocks.
For a happy dance, I’ll go with “Almost There” from Disney’s “The Princess and the Frog.” Cassandra gave the DVD to Ronan this Christmas, and I love it! Funny how the one genre where classic movie musicals never went out of style was in animation aimed at children. I also got an education when I researched this number, in that the animators were specifically inspired by the work of Harlem Renaissance painter Aaron Douglas, whose gorgeous work I wasn’t familiar with till now. Enjoy!
UFO Status Report, End of November 2012
First of all, I finished a UFO!

Cassandra’s Purse, November 2012
I wouldn’t previously have called a project I hadn’t even touched shears to fabric for a UFO, but I’ve been reading Leah Day’s blog lately and she defines any project that you’ve kitted up as a WIP/UFO. While this nearly infinitely expands my UFO list (and I am not comfortable with that) I will take it as a fair description for this particular project.
Remember when I made my sister Sian’s Star Wars purse?

Sian’s Star Wars Purse, July 2010
Even in that blog post from two years ago, I had mentioned that my sister Cassandra had also requested a purse from that pattern (Huntington Hobo by Pink Sand Beach Designs.) However, her birthday is November 15, and two years ago I was preparing for a much bigger project in November than making a purse: namely, the birth of Ronan. The main reason I hadn’t even started it in advance of her birthday, though, was the fact that Cassandra is… particular. It’s not that she doesn’t like handmade things, it’s just that she needs to be a bit more of a collaborator or at least a consultant on the project if she is going to be happy with the final product. (Of course, that means I’m less likely to make stuff for her than for some of my less particular relatives and friends, but so be it.) So rather than trying to use some of my precious pre-baby quilting time to make her something I wasn’t convinced she’d be thrilled with, I got her something else for her birthday and brought along a selection of fabrics for the purse that she could choose among. She liked the primary fabric I had chosen very much, as she had specified turquoise and purple and I had found a gorgeous sari-inspired print in those exact colors, but she made some different selections for the accents (corner patches, handle, pockets) and I dutifully noted them all down. Then the pattern and stack of fabric were unceremoniously shoved into the closet for two years.

All fabrics placed per instructions
This became my Hurricane Sandy project. We were fortunate enough not to lose power at home, but I was unexpectedly off work for two days, so I started the purse. Fortunately, I had made very clear notes to myself in 2010 as to what went where fabric-wise, and the directions in the pattern were as thorough as I remembered: even with a two-year gap since I’d made the last one, this one did seem to go together more smoothly as if I really had learned something the first time. I was very pleased with the result, and more importantly, so was Cassandra:

A satisfied recipient!
The second UFO to warrant mention in this post was supposed to be a quick quilt, and it has not worked out that way. In 2006 or 2007, Diane and I spent a fun weekend in my backyard dyeing fabric. The project left me with a fat quarter bag full of gorgeous, one-of-a-kind fabrics that I was frankly terrified to cut. In an attempt to get over myself, I shortly thereafter started making 4″ finished size Broken Dishes blocks using the fuchsia-to-purple 6-step gradation we had dyed both a regular white muslin and a stipply white-on-white print. I decided to use triangle papers to further ease construction, and I had made 24 blocks of each step of the first three steps of the gradation before putting the project aside for what I’m sure was a good reason at the time. I didn’t pull it out to work on again until this summer’s mini home retreat, when I wasn’t quite ready to start the challenge quilt but wanted some simple piecing to do.
That’s when I found out that I was inexplicably missing two half-square triangle squares from Step 3, and that I hadn’t cut the fabric for Step 5. Oh well, that’s what happens when you put a project aside for multiple years. It occurred to me that this was in its essence the makings of a pink quilt, and since Alyssa was having a second daughter in October, I would have a good motivation to finish this otherwise stalled UFO. After finishing the challenge quilt, I picked this project back up, thinking it would be relatively simple to put together. But I ran into weird difficulties. First of all, despite all my careful work with the triangle papers, the blocks were still inconsistent in size; the 4.5″ squares of white Kona cotton I used as alternating squares showed me that most effectively. Second, although the gradation is very plainly obvious in the finished top and when comparing large pieces of the fabric, I had to be extremely vigilant in keeping the blocks organized because individual blocks from adjacent steps became virtually identical to one another if, for example, they fell off the design wall onto the studio floor (like that would ever happen.) And third, I had gotten 5/6 of the way through assembling the top when I discovered that I had made the solid, but not the stipply white-on-white, blocks from Step 6, so I had to stop my momentum and go back to piecing before I could continue. Since I didn’t feel like figuring out where I’d put the leftover triangle papers, I just used my Easy Angle ruler. And wouldn’t you know it? Those six blocks were more square and truer to size than any other blocks in the whole quilt. Lesson learned, that in my hands, for some reason, the Easy Angle technique, cut biases and all, is more accurate than using triangle papers.

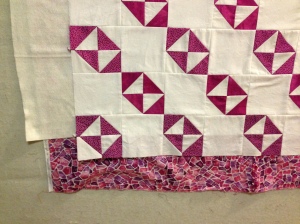
The top that will soon be Evelyn’s Quilt
But after all that, I do have a very pretty quilt top to show for it, and a sense of accomplishment that I killed two quilting birds with one stone by turning a UFO into a baby quilt. I’d get a real sense of accomplishment if I got to peel the label off the UFO box, but unfortunately, I only used half the blocks for this top: I still have 72, 4″ Broken Dishes blocks in search of another quilt. Then again, I myself am having a baby girl in March, so I don’t think they’ll be searching for long. And at least now they really are all finished and nicely sorted into labeled baggies, from whence hopefully none of them will decide to re-sort themselves or vanish while in the box. We’ll see…
Orphan Block Guild Challenge

It’s always summer when you’ve got shades!
Obviously, it’s been a really long time since I posted. I had intended on taking the summer off from blogging, but I didn’t mean to let it drag so far into fall. However, Hurricane Sandy closed my office on Monday, and since the power at home stayed on, I got some good momentum going on this post before normal life resumed.
Part of what has kept me quiet was the fact that until very recently I literally couldn’t talk about the main project that has occupied me since July: the guild challenge. This year’s theme was orphan blocks. We randomly drew bags that contained anything from a single orphan block to a collection of blocks or precut pieces, and then had to make something new out of the bag’s contents. My bag had just one single block in it, and it had issues:

The original orphan block
In the plus column, it’s a 54-40-or-Fight block, which I’ve always liked the looks of but had never made; the basic color palette had promise, since purple and green are two of my favorite colors; and the fact that it was primarily made of solids meant that finding coordinating prints would be relatively simple. HOWEVER, I completely understand why this block ended up an orphan. It’s hand pieced, and the seam allowances were positively enormous, in the 1/2″ to 5/8″ range. There were rust stains, probably from being stored with needles or pins in it, and this block did not have a single 90-degree angle to its name. If I had made a block like this, I would have stopped at one, too. I salute the brave quilter who not only held onto this block for some years, but offered it up for public consumption. And I have to say, it inspired me to make something I’m very proud of, that I never would have conceived of otherwise.
My first thought was to just rip out the seams and use the individual pieces for applique. Heck, with those seam allowances, I certainly would have ended up with plenty of fabric! But ultimately, I decided I really wanted to maintain the sharp points of the original block and riff off of those for my final design.

The finished product, “Aurora Borealis,” 36″ x 36″
A brief aside regarding my conflicted relationship with foundation paper piecing. I absolutely love “sharp pointies” designs such as New York Beauty and Mariner’s Compass, and paper piecing definitely seems to be the way to go to achieve satisfactory results with these blocks. However, I really don’t enjoy the process that much. I’ve tried several different books’ and teachers’ methods for paper piecing, I’ve tried several different types of paper foundations, and I still just find it to be tedious. I don’t like sewing on paper because the presser foot slips around, I despise having to trim after each seam, and I HATE having to tear the paper off afterwards. But in order to achieve the results I want with those super-sharp points, it’s what I have to do, and I’ve made peace with that. It will just never be my favorite technique.
I’ve had a book in my collection for many years, “Quilt Mavens: Perfect Paper Piecing” by Deb Karasik and Janet Mednick, whose pictures I have (metaphorically) drooled over for as long as I’ve had it. Up until now, though, I’ve never had occasion to make any of the patterns from it. But strangely enough, their pattern “Spike Redux,” which is essentially a giant Lemoyne Star by way of the Chrysler Building, seemed to echo the sharp points of the 54-40 or Fight block while introducing new design elements. I just changed the color and value distribution to suit myself, and swapped out the corner New York Beauty-style blocks for the orphan block.
I had bought the beautiful, hand-dyed-look, gradated purple and green fabric, “Glacier Lake” by Caryl Bryer Fallert, at least eight years ago. (I found it on the enclosed porch of the old location of Endless Mountains Quiltworks, so it’s been a while.) It was love at first sight, but it’s been one of those “too good to cut” fabrics for me all these years. With this color palette pre-established, I had finally found its showcase in the big setting triangles and curving center pieces. I only had a yard and a half, so I had to cut carefully, and I only have a few scraps left after just barely having enough to make the binding, but it was the perfect fabric for the job. In fact, most of the fabrics for this project came from my stash; the only ones I had to shop for were the pale lavender and pale chartreuse, because I needed lights for value contrast, and these are not shades that naturally occur in my collection. Fortunately, my mini-retreat with Rhonda and Kathy occurred just when I was about to embark on this project, so a shopping trip to Sauder’s did the trick.

Detail, “Aurora Borealis”
The only part of the quilt that I hadn’t completely pre-planned before starting to cut fabric was the corner blocks. Initially I had considered leaving the block intact and just making three more like it (obviously machine pieced and with new fabrics), but I was concerned that wasn’t changing it enough for the spirit of the challenge. Also, having three identical blocks and one “vintage” block would probably tend to draw focus to the odd one out, like that old song from Sesame Street:
So I tried cutting the blocks in half diagonally, although I flipped the orientation after playing around on the design wall. I experienced a great deal of stress when finally rotary cutting that block, because it was the only one I had — normally the worst thing that could happen is that I’d have to recut or repiece, but the stakes were high on this! Plus, those hand-pieced seams really wanted to spring apart until I sewed across them. I had fun making my own new 54-40 or Fight block for the other two corners. I finally used the Tri-Recs ruler I’d bought years ago, and was very happy with the result.

Quilting detail, “Aurora Borealis”
For quilting designs, I mostly fell back on my old standbys: freehand feathers in the Glacier Lake pieces and parallel lines in the paper pieced areas. The stroke of genius was Dan’s, as he came up with the idea to quilt the corner setting triangles as if the piecing continued for complete blocks. Doing the dense pebbling filler pattern not only created contrast in the solid areas, but also gave me some additional peace of mind regarding the hand-pieced blocks, that they wouldn’t be going anywhere.
And all my work and soul-searching was very well rewarded at our guild meeting, when my quilt got the highest number of votes at the big challenge reveal! I got a lovely prize bag and the grateful satisfaction of knowing my work is appreciated by a group of quilters I love and respect so much. Priceless.
For the happy dance, I had to go with Gilles Marini’s Bollywood dance from DWTS All-Stars. It just makes me smile:
Finished! Liddle Lamzy Divey

Ronan Loves Fabric, too!
It’s the 2007 shop hop sampler quilt, finally finished!

“Liddle Lamzy Divey,” 2012, 86″ x 102″, only 1/4 visible because it’s hanging on my back porch.
I decided the name for this quilt had to reference the lambs in the focus print from the Jo Morton collection used for the shop hop blocks. After all, that was what made me buy the block kits — especially the little pugnacious lamb in the back:

Making this quilt created a multitude of fun challenges for me, and the overall design of the top just evolved organically as I solved each one. First, rather than making each block separately from its kit, I counted up how many of each shape and unit from each fabric needed to be made in order to make all 19 (18 shops + the kit included with the passport purchase) blocks. I then opened all the kits and only used what I needed. Since each kit included width-of-fabric strips, they were extremely generous, and I was left with a large quantity of excess fabric once all the blocks were made.
 A desire to use up this excess fabric was the genesis of the idea for the flying geese borders, because I had stacks of 3 1/2″ strips crying out to have something made from them. I used the Fons & Porter Flying Geese Ruler for the first time, and was very pleased with the result. I also fell in love with the plaid, which was a part of Jo Morton’s collection but not used in any of the blocks. The owner of (the since closed) Quilting in the Valley in Hegins had used it in the center of her shop hop quilt, and I knew I had to have it. Setting triangles seemed like the way to go, and since most of the blocks had light backgrounds, I put the narrow dark borders around them so they wouldn’t bleed into the plaid. (Fabric selection for those was based entirely on what was still left from all those strips.)

Long before I knew what the quilt top would look like, I bought the acid green tone-on-tone print because I knew I would likely need additional yardage of one of the “neutrals” and it was my favorite from that category. Due to just how huge the top ended up, I wound up having to piece the long vertical borders, but it still worked. Once again, a cutting error ended up making the quilt more interesting: I had initially planned for the outer borders to be solid 6″ strips with the extra flying geese pieced in to break it up. However, I got distracted and ended up cutting all my remaining yardage into 3 1/2″ strips. After storming around for a while, I got practical and decided to piece in the narrow strip of the focus fabric to make it look like an intentional design choice. As usual, the process of fixing my mistake led me to a more complex and compelling design.
 I didn’t do anything earth-shattering with the quilting, just variations on what I’ve been doing with most of my quilting lately: Pam Clarke and DeLoa Jones-inspired continuous curve variations and no-mark motifs following the piecing lines in the sampler blocks and flying geese; Patsy Thompson and Kimmy Brunner-style freehand feathers in the plaid setting triangles; and that Megan Best “Onions and Garlic” filler in the green vertical borders. I also quilted a little “half-hearted” design in the accent stripe in the outer borders and in the borders of the sampler blocks; it’s a variation on Sally Terry‘s “signature” sashing design that I thought complemented the feathers nicely.
 Overall, despite the sheer acreage this quilt represented, I tried to concentrate on making the quilting patterns echo and call back to one another so they looked like part of the same “family.” I also attempted once again to achieve Sue Patten’s “three densities,” with the densest area being the green vertical borders and the poofiest areas being the setting triangles. I did all the quilting with just two colors of Superior Threads’ So Fine!, orange and green, with tan Bottom Line in the bobbin. Other than a few isolated incidents of thread breakage after going through some very solid spots of converging seams, everything behaved beautifully. After this quilt, I think I can finally detect some visible improvement in my stitch length consistency, but that remains to be seen.
 I used the 19th block on the back as my label, and added a hanging sleeve made of the only fabric not from the shop hop collection in the quilt. (I didn’t have a big enough scrap left over to make a sleeve without doing a ridiculous amount of piecing, which didn’t seem worthwhile.) And it’s finished, a full week before I have to drop it off for the guild show. I washed it and am keeping it in a plastic storage tub until next week, so it doesn’t get cat hair on it, because this is what repeatedly happened while I was sewing on the binding:

They’re very lucky they’re cute.
For a happy dance, here’s the song that’s been running through my head ever since I hit upon the name for this quilt:
Alexander’s Quilt

“So, I see we both like quilts!”
My sister Sian had her third son, Alexander Jackson Bailey, on September 26, 2011. As they live in Massachusetts, I didn’t get to meet him until they came down for Ronan’s birthday party in November, but I sent him a set of little fleece pajamas with pumpkins on them and a pumpkin hat with matching booties. She sent me these wonderfully styled photos of him wearing them:

(By the way, both of the pretty pretty quilts in the above pictures were made by my mom.)
I had made wallhangings for each of Sian’s older sons when they were baptized, incorporating photos of them as infants. Here’s Bruce’s, from 2004:

And Luke’s, from 2009:

As the youngest of three boys, I imagine Alexander will have quite a few hand-me-downs of clothes, books, and toys. I wanted to make sure that, even though my life circumstances have changed quite a bit since his older brothers were born, he still had a quilt from me that was made just for him and was at least the equal of the ones I’d made for his brothers.

Alexander’s Quilt, 38″ x 38″
It’s nice to have a reason to make a little quilt from time to time. My projects tend to suffer from gigantism, as regular readers well know; if I hadn’t wanted to conform to the same general size range as the other two wallhangings, who knows what this might have grown into? Especially because the block technique I had wanted to try anyway, Anita Grossman Solomon’s Unbiased Block from the April/May 2012 issue of Quilters Newsletter, turned out to be so addicting that I might have just kept going. She has you use strips of fusible interfacing on two identical squares of striped fabric to create this handy-dandy hourglass/pinwheel block that does not distort, despite the bias edges on the outside. It’s way too much fun. If you, like I, have a big collection of striped fabric, this technique is an excellent excuse to spend an afternoon playing. One pleasant surprise was that the wiggly, uneven, painterly stripes created more successful blocks to my eye than the traditional, regular stripes.

Corner detail, Alexander’s Quilt
This was entirely a stash quilt. The only purchase I made was the batting, and only because I didn’t want to cut up a queen-sized piece. Inspired by the fall colors in the photo, I pulled all the autumnal stripes from my collection and decided to make nine blocks from five different fabrics. I did have one nonstarter; while I loved this corn fabric (and it really is functionally a stripe):

No. Just no.
it was WAY too busy when I put it up on the design wall with the others. In a bed-size quilt I might have gotten away with it, but not in a small quilt like this. I wanted to use the gold fossil fern fabric for the sashing, but I didn’t have enough of it, so I used it for cornerstones and chose the orangey stone-veined fabric to pad it out. As with virtually any other instance in my quilting career where I’ve made a decision to include more fabric in a project, I think it is an improvement over my original idea. I will make it a point to use low-contrast cornerstones in future projects where I might otherwise have just used straight sashing.

Center detail, Alexander’s Quilt
Once everything was pieced, I fused the transferred photo and some simple leaf shapes and appliqued them down with a machine buttonhole stitch in a variegated heavy thread. (I’m purposely skipping over the step where I obsessed over leaf placement for multiple evenings in a row, consulting Dan to the point of exhaustion, then accidentally let the fan blow half of them off onto the floor.) I quilted an overall design of leaves and tendrils over the entire top, ignoring seam lines but tying in the appliqued leaves as if they were part of the edge-to-edge quilting design. This was the first time I’d ever done anything like this, especially freehand, and it was a fun puzzle challenge to decide on the fly what I should quilt where. It was also the first time I’d quilted details into my appliques, rather than just quilting around them or going over them with a filler pattern, and I was very pleased with the faux-trapunto result. The photo also looked much more defined with some simple outlining quilted in.
I’ve been handstitching more of my bindings lately, but this quilt got a Sew Precise, Sew Fast machine binding out of the fabric I used for the center square, and with a sleeve and label attached, it’s done in plenty of time for his June 10 baptism:

Label detail, Alexander’s Quilt
I’m still plugging away on the shop hop sampler quilt, but barring major upheaval or disaster in either the quilt or my life, it should be done for the show without necessitating any sleepless nights. I’ve also been tapped to demonstrate freehand feather quilting at the guild quilt show, so I need to gather my samples and my thoughts to prepare for that. And the guild challenge is impatiently tugging at a corner of my subconscious, asking for attention to be paid to it. The beat goes on…
Finished! Spumoni Spring

I WANT TO TOUCH ALL YOUR FABRIC
Five quilts down, one to go:

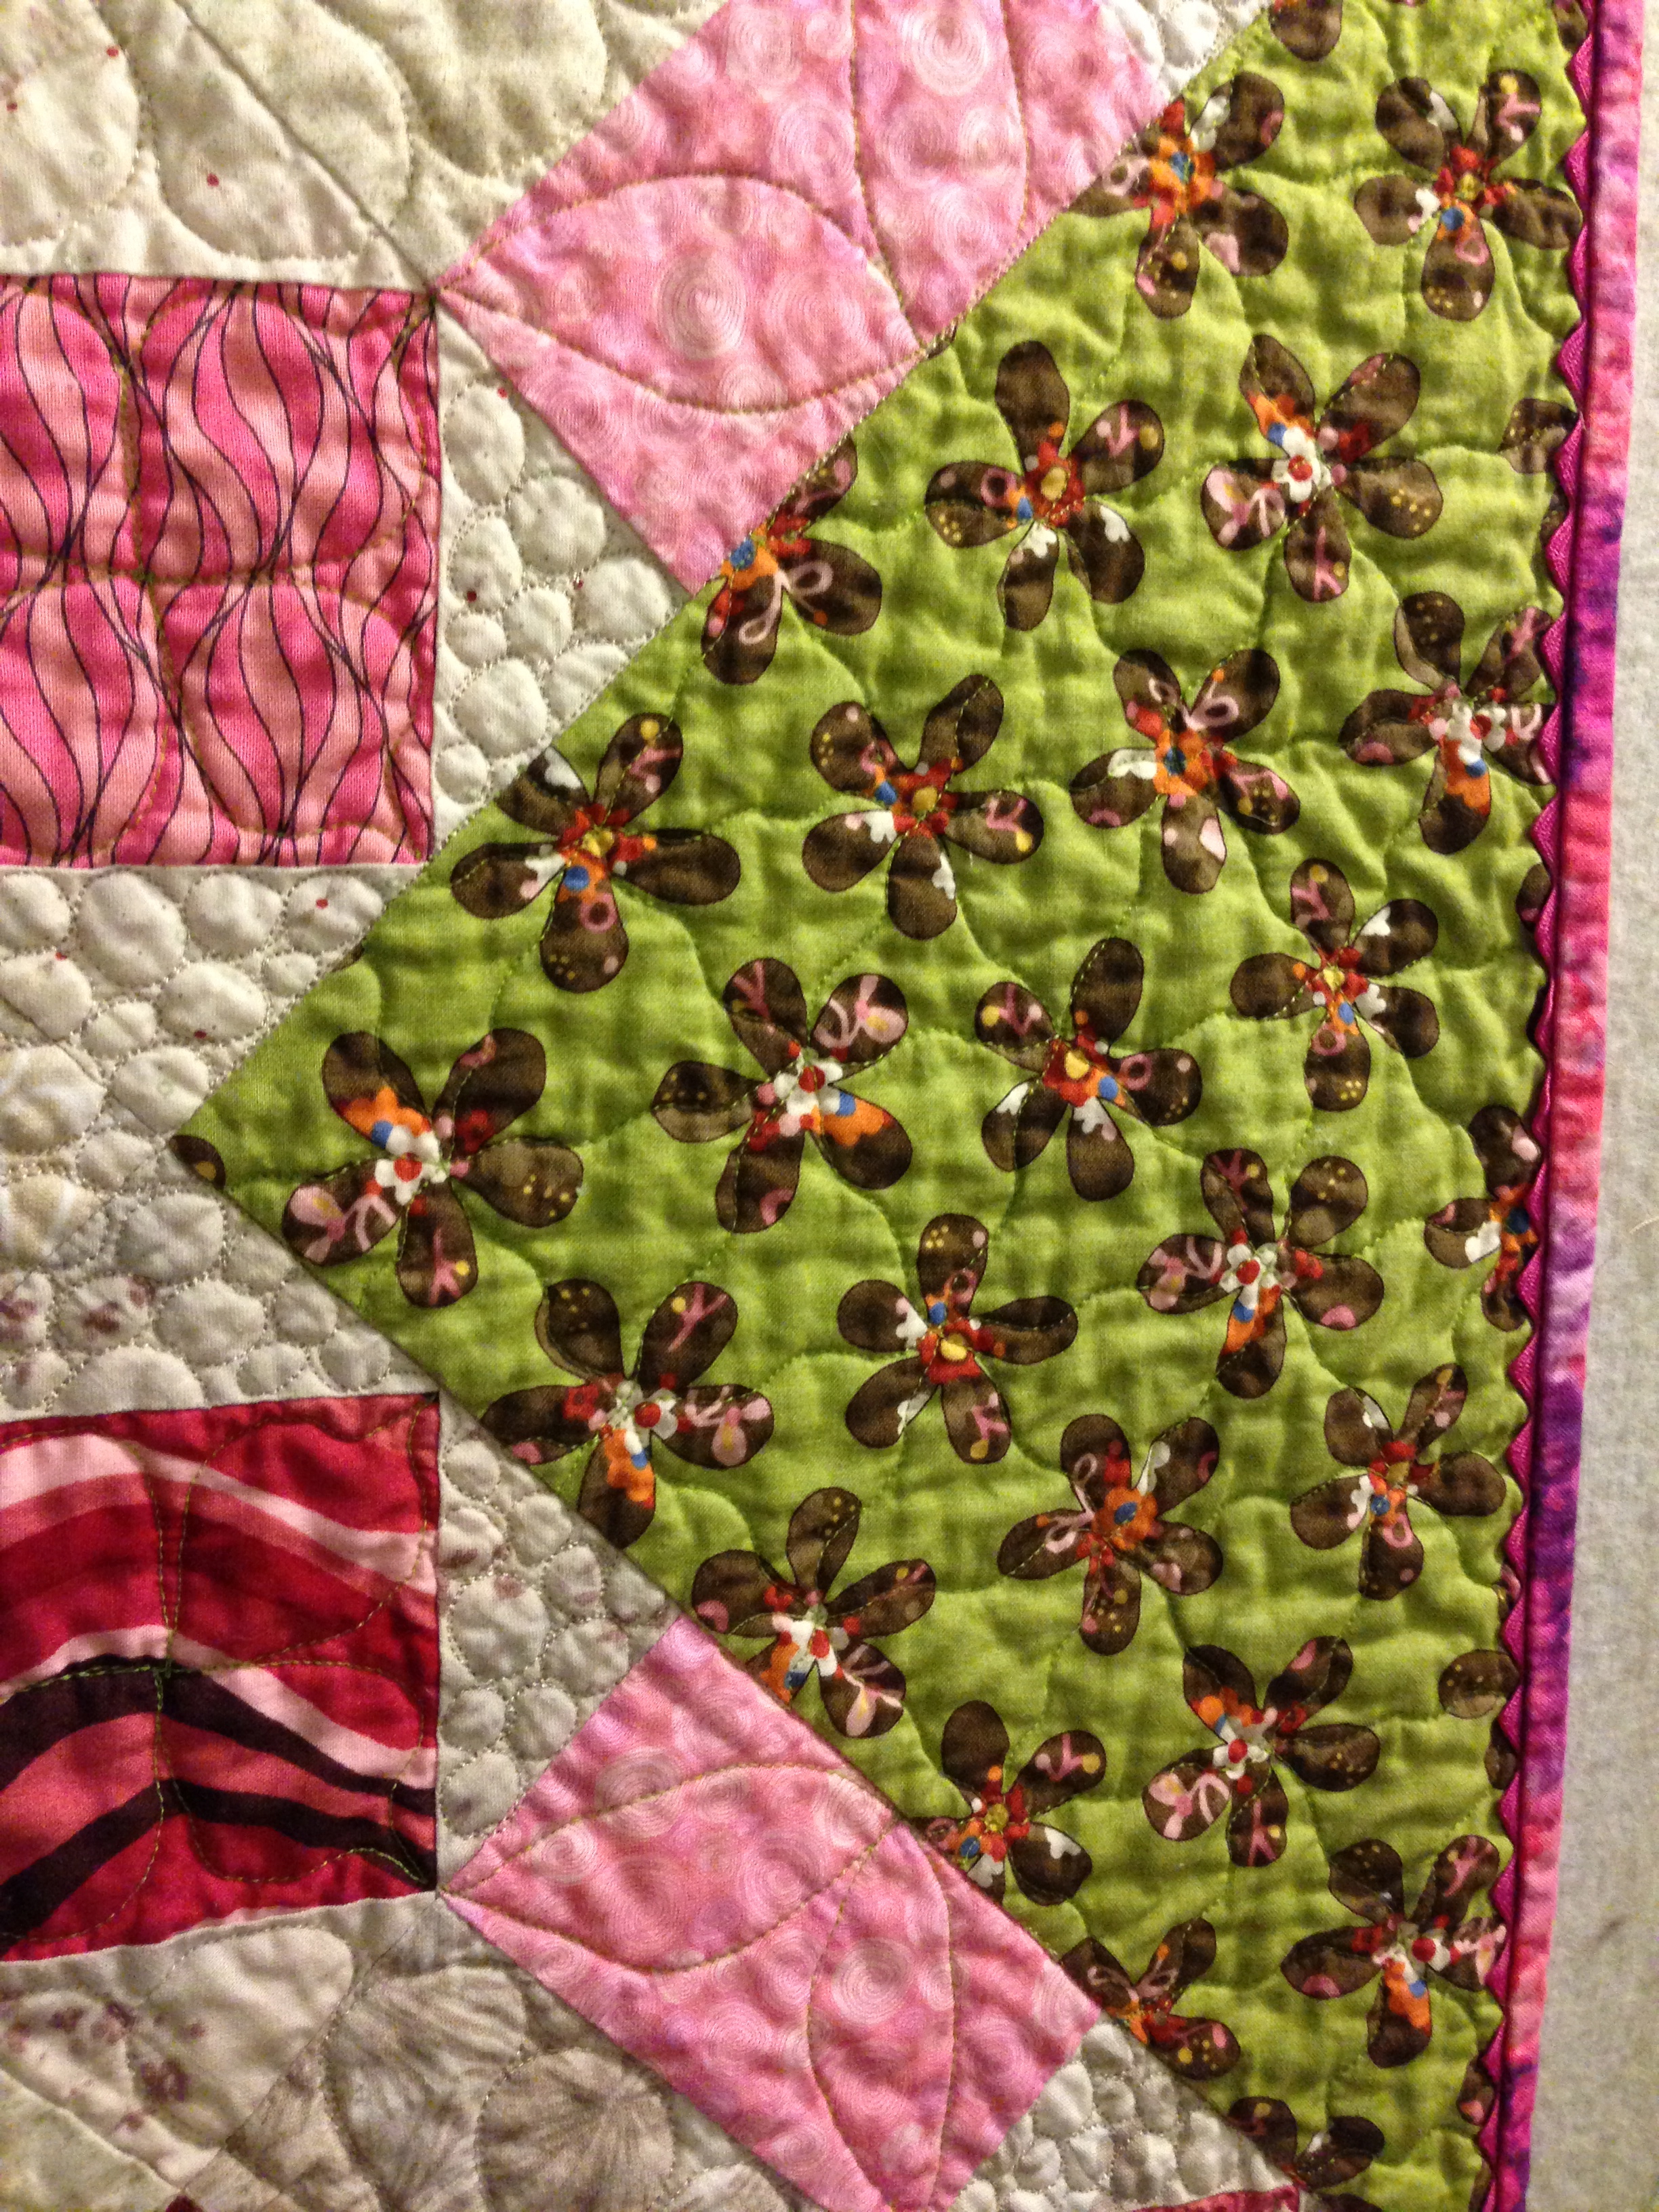
“Spumoni Spring” 2012, 72″ x 72″
I have submitted my entry forms for the guild quilt show, now only a month away, and I am entering six quilts: Welcome Ronan, AKA Ronan’s Quilt; The Very Hungry Caterpillar; Dragons Galore, AKA Minkee Dragons; Halloween Buzz Saw; Spumoni Spring, AKA Pink and Brown; and the shop hop sampler quilt. That final one is still on the sewing table, still being quilted. BUT! It’s mostly complete, I know what I’m doing with the rest of it, and I already have the binding made. AND! The other five are completely finished, including hanging sleeves. I think that’s a personal best; I’m usually sewing on hanging sleeves into the wee hours of Wednesday morning before the show, when we have to bring our quilts to the fairgrounds.
So, back to Spumoni Spring. The title presented itself once I added that green:

Block detail, “Spumoni Spring”
The blocks are quilted in a Pam Clarke-inspired design, for which I used her Basic 8 stencil and a blue chalk pounce to just give me some temporary guidelines to work with. This was a really satisfying technique: no blue marker to wash out, but definitely more consistent results than I can achieve by just eyeballing it. The blue chalk was highly visible on all my fabrics, but it brushes off very quickly, so I couldn’t mark more than one block at a time. I was also trying to use as few thread starts and stops as possible. Therefore, as I prepared to enter each block, I had to use my big 16 1/2″ square plexiglass ruler as a table to slide under the quilt and give me a surface on which to mark my blue chalk asterisk. Not the most graceful technique in the world, but I’m not arguing with the finished product.

Border quilting detail, Spumoni Spring
The two center vertical strippy borders were such a busy print that I knew nothing would show up, so I just echoed the print to create the appropriate quilting density. The two outer vertical strippy borders were not quite as busy, but with that large floral, I still didn’t want to exert myself particularly; if I’m going to do something fancy, I want to be able to see it! Therefore, I selected a design I’d been meaning to try: Onions and Garlic from Megan Best’s “Spinal Twist” book. It’s simple but creates a beautiful texture, which (like many of my favorite freehand designs) benefits from being somewhat imprecise. This is one I will definitely use again.
The outermost pinwheel border was the area I selected to get the least dense quilting design. I’ve mentioned before how I like Sue Patten‘s principle that a quilt should have three densities of quilting to create depth and contrast, the same way the top should have three values of fabric. Since this is definitely a lap/cuddle quilt, rather than a wall quilt, I thought having a nice soft poofy border where your face would go might work out well. We’ll see, because currently I feel like it needs something more. Oh well, it’s a learning experience! I just did a looping continuous curve variation, following the seam lines as if they were hourglass blocks:

Feather quilting detail, Spumoni Spring
In contrast, the densest quilting was in the green border, where I did one of Patsy Thompson‘s feather wave borders. I broke down and mail-ordered the 40″ flexible curve ruler, which made marking the spine VERY easy. I used a variegated pink thread from Fil-Tec that behaved beautifully; I will definitely be exploring more of their threads.

Label detail, Spumoni Spring
The binding seemed to need to be green as well, and I used a spare pinwheel block as the label. And after five years in the UFO box, it’s finished! It feels so good to be racking up a list of these. Of course, the next “Finished!” post will be about a new (though small) project that I’m taking to Show & Tell at guild tonight, and I’m already mentally making my challenge quilt for next fall, so the UFO completion rate will probably slip a bit in the near future. But at the same time, the confidence I’ve built over the last several projects is really encouraging me to take a deep breath and quilt Ruby Wedding. Now THAT would alleviate some quilt guilt and free up some brainspace!
This quilt’s happy dance really couldn’t be to any other song, and Gerard Darmon’s version of it for this video made me smile:

