Posts filed under ‘Time Management’
I Got An AccuQuilt GO! Cutter!
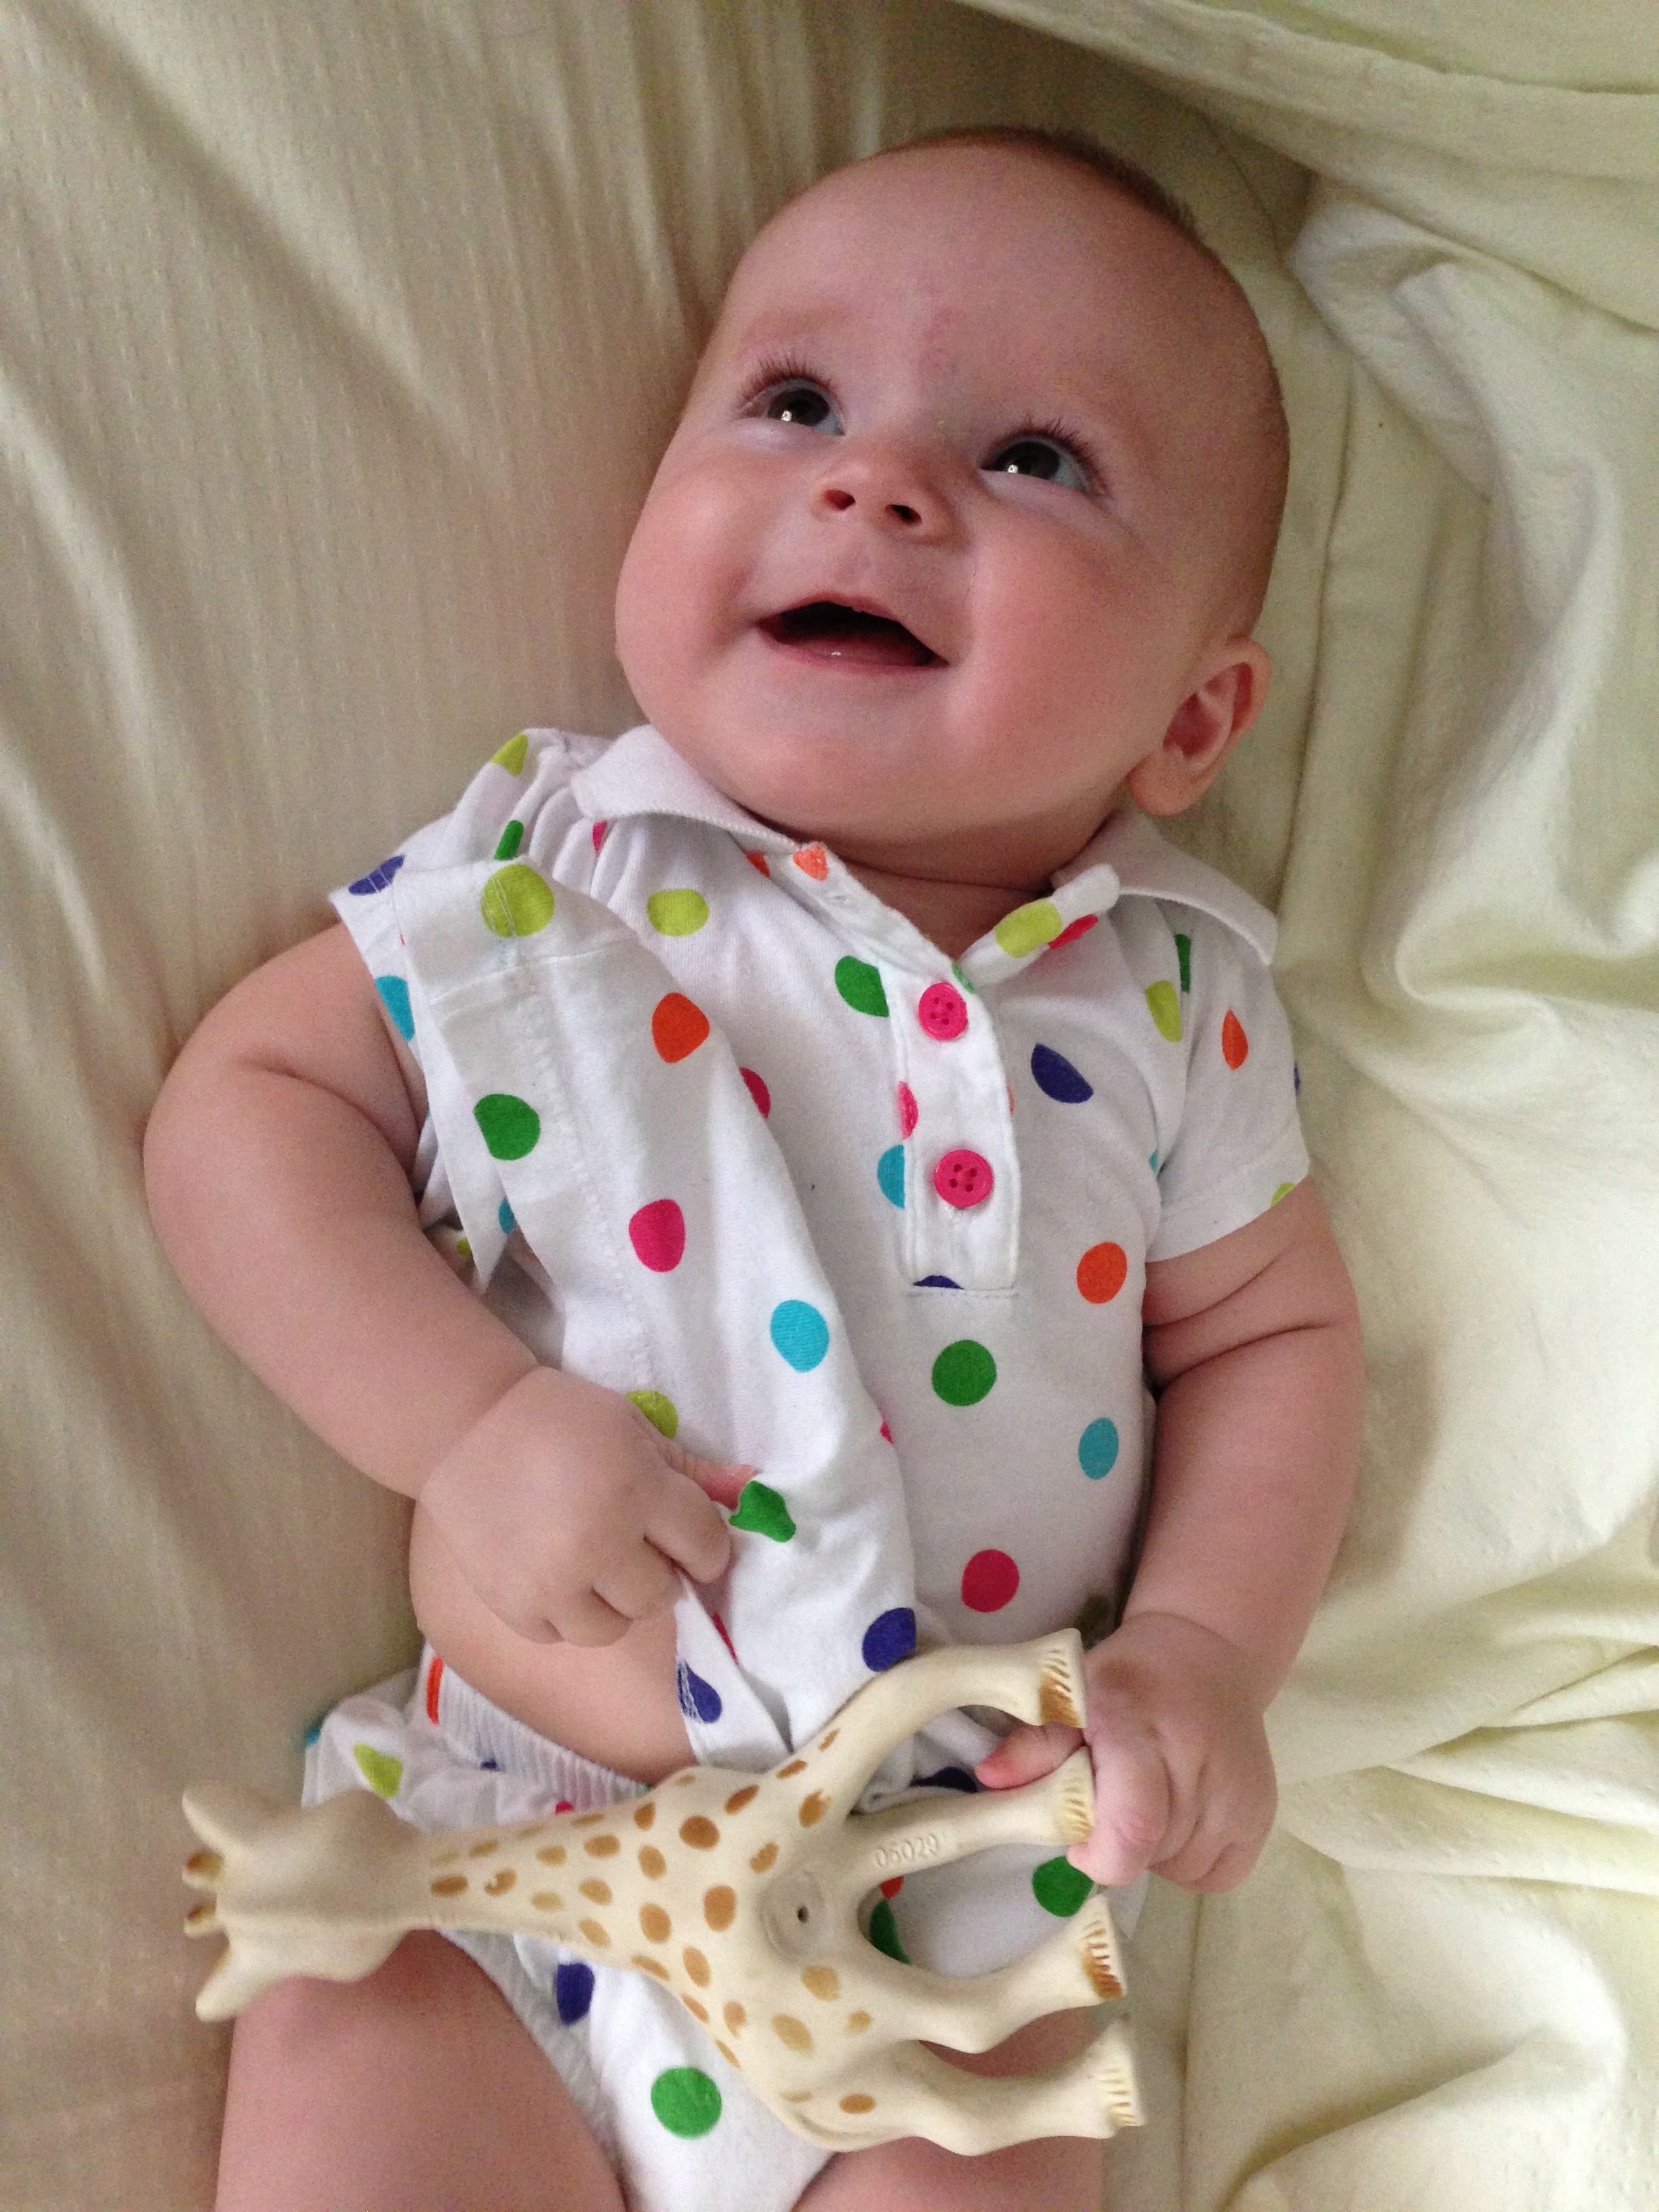 And just like Finley here, I’m so excited about my toy!
I had heard a lot about the GO! cutter when it first came out, because Alex Anderson and Ricky Tims are spokespeople for it, with promotional videos on The Quilt Show site. While I’ve long been intrigued by fabric die cutters, ever since first visiting the fabulous home quilting studio of a guild friend who has the Accuquilt Studio cutter, I didn’t really think of it as being a priority item for me. I thought maybe it might be worthwhile for someone who does an awful lot of applique, but I don’t, and on the odd occasion when I do, I tend to design my own. So while I was glad to know there were die cutters in the world, I didn’t really covet one.
 Until… I had stopped by The Finishing Stitch on my way home from a wedding the day before Mother’s Day, and they had a Studio cutter and dies for sale for $600, listed as a $1500 value. A discount that steep is always going to pique my interest, but Finley was getting fussy so I didn’t investigate in depth. However, I started thinking about it more on the way home, and therefore spent some time on the Accuquilt website over the rest of the weekend. The main thing that I learned was how many piecing dies are available. As I am primarily a piecer, and cutting fabric has always struck me as tedious, this was very intriguing. Although a separate die is necessary for each different size or shape, I certainly tend to use certain shapes and sizes repeatedly in my projects (2″ finished half-square triangles certainly spring to mind.) And the idea, reiterated over and over on the website, that die cutting is “up to 90% faster than rotary cutting,” was extremely attractive to a full-time-working mom of two children under 3.
After all, although I know it’s an all-too-temporary stage, I don’t have a whole lot of free time to quilt right now. It’s a trade-off I’m more than happy to make to be involved in Ronan’s and Finley’s young childhood, but I don’t want to completely swear off quilting right now. (And several of the quilts I’ve made in the last few years have been for them, and they enjoy using them!) So anything that speeds the process without decreasing my artistic freedom or my enjoyment of the process is a good thing. I have no interest in using pre-cut kits because my favorite part of quilting is selecting the fabrics, but if I can choose my own fabric and then fast forward to the construction stage without spending such a long time cutting the fabric into pieceable shapes, I will get a lot more done. Additionally, I haven’t wanted to do much cutting when Ronan is awake, because I have an absolute paranoia that he could get hold of the rotary cutter. While there are still blades in the die boards, he would have to do handstands on them in order to hurt himself with them.
 So Monday morning, I called Jean… and she told me that she was sorry, she should have taken the signs down, because she was selling the Studio cutter to the new owner of the shop as part of the shop sale. Having just spent the last 36 hours convincing myself that I desperately wanted this thing, it was definitely a letdown. But like Aesop’s fox with the grapes, I quickly recovered by realizing that the Studio would not have been the right choice for me. While it can cut more layers at once, and the dies are more numerous, varied, and larger, the dies are more expensive and the cutter requires a dedicated space, as it is heavy and does not fold up. It really seems like the good folks at Accuquilt really thought about all the factors that prevent quilters from buying a Studio cutter, and designed the GO! to meet those needs. I took my time researching the products and prices (another GO! advantage, as the Studio and its dies are only available through Accuquilt), then finally pulled the trigger in mid-July.
 My GO! came in the mail July 23, the Tuesday before my mini-retreat at my house with Rhonda and Diane. I bought it from quilting-warehouse.com which offers significant discounts (30-50%) on the GO! and several selected dies, and although the shipping was expensive and the order took longer than their stated estimate to process, I cannot complain in light of the overall value. I got the 12″ block “mix and match” bundle, which is a collection of eight dies for shapes commonly found in 12″ pieced blocks. I also got some extra cutting mats, the 8.5″ rag square, which precuts the fringes for rag quilts (more on that later), the Funky Flower applique shape, and the 3.5″ mini tumbler, since I’m getting a new niece and a new nephew this fall who will each be in need of a baby quilt. With shipping, this all came to less than $450; accuquilt.com lists the cutter with the 12″ bundle alone at $581.90.
 I spent all my work time at the retreat cutting: I cut almost all the pieces for the 2011 Shop Hop blocks; cut down several pairs of Dan’s old worn-out jeans to make a denim rag quilt; and cut 17.5 yards of solids into triangles for the guild challenge this winter. Although I didn’t get to work uninterrupted (see above re: two children under 3), I estimate that it took me less than 3 hours to cut all that solid fabric, so I stand convinced.

This happened within minutes of taking the picture above. Technology may change, but some other things never do.
I’ve only started piecing the shapes I cut, so I can’t say anything definitive, but so far the accuracy seems excellent. There’s definitely a learning curve to using the cutter, but I’ve caught on quickly. And if using it means I get to spend more of my admittedly limited time on the parts of quilting I enjoy more than cutting fabric, I’m all for it.
Next up, a project I’ve already started and completed with my GO!
Still Here, Still Quilting!
I haven’t dropped off the face of the earth! Even with a 2 1/2 year old and a 3 month old, I’m still managing to get into the studio from time to time — even if some of that time is spent buried under children:

After all, sometimes the planets align such that they’re both asleep at the same time. And now that Ronan’s old enough to be trusted to explore the button tin, we can frequently spend time in the studio together without him defaulting to his standard behaviors of pushing buttons on the sewing machine, unplugging the sewing machine, turning off the power strip, pulling out the knee lift lever…

Even Finley sometimes hangs out in there with me like a little friend:

So what have I been doing with my quilting time? I have made a quilt for Finley; I’m just now getting the binding handsewn to the back, so it will be the topic of a future post. Here’s a preview:

I’ve also been playing with a technique from Anita Grossman Solomon’s Rotary Cutting Revolution. She’s the visionary who developed the Unbiased Block that I used in Alexander’s quilt last year. I caught up on a bunch of The Quilt Show episodes while up in the middle of the night with Finley those first few weeks, and the episode where she’s the guest just set the cogs turning. I’ll be featuring that quilt-in-progress in its own post soon, but you’ll get a sneak peek at it if you watch my video.
Because I also just made a technique video that I posted to YouTube on how to use Quilter’s Rule’s nested square rulers to square up quilt blocks:
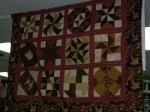
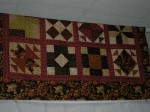
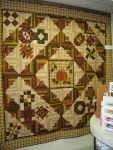
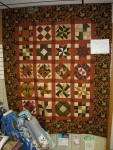
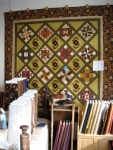
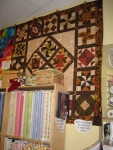
The “X-Centric” block from Anita’s book calls for squaring up the component blocks to 7.5″, and that is just not a size that exists from the standard ruler sources. But these nested squares from Quilter’s Rule have a lot of potential. I got them at their booth at the Quilters Unlimited show last weekend, when Finley and I met Diane there. It was a great show as usual, with lots of quilts and vendors of high enough quality (in both categories) to make the drive worthwhile. Here are some highlights (click to enlarge):
-

- Detail, Vertigo by Suzie Buck
-

- Detail, Rings and Things by Kay A. Lettau
-
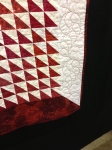
- Detail, Fade to Red by Martha Bush
-

- Detail, Trains by Amy S. Lancaster
-

- Detail, Winding Ways by Shirley R. Winn
-

- Detail, Beauty of the Old Dominion by Amy Flenniken
-

- Detail, Quilting the Bases by Dian Epp
-

- Detail, Ribbon Stars in Taupe by Martha Bush
-

- Detail, Black and White and Cats All Over by Judy Kozlowski
-

- When Flowers Party by Linda T. Cooper
I also succumbed to buying (gasp) full price fabric! Alexander Henry struck again, designing what I referred to in an overexcited text to my mom as “quite possibly the best fabric ever produced.” While that may have been laying it on a little thick, my inner goth girl rejoiced at this fabric, called “After Dark”:

That black widow spider is 12.5″ tall.
From a practical standpoint, I do have TWO people in my regular gift-giving rotation who are hardcore Edgar Allen Poe aficionados. This was one of many featured fabrics at the Some Art Fabric booth that I could have happily wrapped myself in yards of, but at $12.45 a yard (I wince as I type) I was able to restrain myself.
So I have one quilt (Finley’s) all but finished, another top (2008 Shop Hop blocks!) completed, a third (Christmas X-centric blocks) well under way, and they just announced the challenge (solids) at guild last month. And that’s not addressing any of the UFOs! Oh well. At least I’m sewing, creating, and enjoying the process, which is far more important than finishing anything at this stage in my life.
I just have to finish convincing myself of that.
Almost There…
It’s all over but the shouting!
Or the binding, which in my life normally elicits some shouting.
I don’t know why I dislike sewing binding on so much. I don’t know if I’m still at heart a bratty child who’s too impatient, seeing the finish line but resenting still having one more task to perform. I don’t know if it’s the handwork aspect, that having executed all the piecing and quilting on the machine, it seems retrograde to sit with a needle in my hand. I don’t know if it’s my perfectionist tendencies that make me tense up over wanting every stitch to be invisible and ideally placed, yet wanting to finish sometime this century. All I know is that binding the quilt is my least favorite part of the process. I’d rather pick out stitches than sew on binding.
But the end is in sight, and I am definitely on target to finish in plenty of time for the show. (I also have to make and add the hanging sleeve, and sew on the label, and launder the quilt to get rid of the water-soluble basting thread… ok, maybe I should be sewing rather than blogging right now.)
I do have to say that as far as bindings go, I’m rather fond of this one. It’s the lovely plaid from the setting triangles again, because I can’t resist a plaid or striped binding, especially set on the bias. However, since the setting triangles go straight to the edge of the quilt, I wanted something to make the binding stand out. I didn’t think I had time to do one of Susan Cleveland‘s Piping Hot Bindings before the quilt show, so I cheated by using brown 1/2″ rick rack. I did use Susan’s technique, though, of attaching the rick rack first using a contrasting bobbin thread, then attaching the binding to the front of the quilt by sewing with the back of the quilt facing up, so I could follow that bright orange bobbin thread and sew just to the left of it. Hand sewing the binding down was incredibly tedious on such a large quilt, especially facing a deadline and during an unusually warm late spring, but the result appears so far to be worth it. And on the hot days, I just wore shorts and posed like Angelina Jolie at the Oscars.
Here’s a little preview for the “finished!” post that I’ll hopefully be publishing soon. Just as I did during this year’s shop hop, in 2007 I took a picture of the quilt at each shop:
-

- Red Barn Quilts
-

- Quilters Quarter
-

- J&B Fabrics, part 1
-

- J&B Fabrics, part 2
-

- 118 Fabrics & More
-

- Endless Mountains Quiltworks
-

- American Ribbon Outlet
-
- Pocono Sew & Vac, side 1
-
- Pocono Sew & Vac, side 2
-

- The Quiltery
-

- The Country Quilterie
-

- The Happy Sewing Room
-
- Quilting In The Valley
-
- Wooden Bridge Drygoods
-
- Quilter’s Palette
-

- Ladyfingers Sewing Studio
-
- The Quilted Cat
-
- At Piece Quiltery
-

- Quilter’s Haven
-

- Allentown Sewing Machine Outlet
While the different settings and designs were extremely inspiring, and I have certainly gleaned some ideas from them for future sampler quilts, ultimately I went my own way. The big reveal should be coming soon…`
Finished! Matt and Alyssa’s Wedding Quilt
The baby’s asleep — I can get a post up here!
 You know what they say about good intentions… and what they’re used to pave…
When my friend Alyssa asked me, roughly a month before her November 2009 wedding, if I knew anyone who’d be willing to make a wedding signature quilt for hire, I jumped at the opportunity: “Let me do this as my wedding present to you.” I was very sincere in this. Despite having already planned for 2010 to be my Year of the UFO, I thought this project would make a worthy exception. I love signature/album quilts; they’re such a wonderful tradition, and speak to me so volubly of Why We Quilt — they are literally a way for the recipients to wrap themselves in the good wishes of people who care about them. Besides, it was going to be a simple quilt: big blocks, straight-line piecing, nothing fancy. This wouldn’t take much time.
Ha. Ha. Ha. Because this became Murphy’s Quilt.
Everything started well: I prepared a basketful of precut 4 1/2″ squares of the JoAnn Fabrics Kona cotton in a nice cream, prewashed and ironed onto freezer paper, with a 1/2″ seam allowance premarked with blue washout marker. (I figured, mostly correctly, that a marked 1/2″ seam allowance would probably yield a useably empty 1/4″ seam allowance.) As their wedding colors were dark blue and chocolate brown, I brought along fine-tip Sharpies in navy and brown, which I had pretested for colorfastness. Dan made a nice sign for the table at the reception, explaining the project, and the guests did a nice job leaving signatures, notes, wishes, and even some artwork on the squares.
 I had planned the quilt to encompass 25 Air Castle blocks, measuring 12″ each, as I wanted it to be big enough for them to share as a couch/cuddle quilt. I chose the Air Castle block because it’s simple, attractive, and contains 5 solid squares; thus the quilt could accommodate up to 125 signed squares. Projected attendance was roughly 100, and I made sure I had plenty of extra squares available to allow for mistakes, but as most couples and families signed just one square to represent them all, and some guests didn’t sign at all, I ended up with only 39 signed squares. This was fine; it meant that I could put a signed square in the center of each block, with a second one in the lower right hand corner of slightly more than half the blocks. It also gave me room to make an additional square to place in the center of the quilt with their names, wedding date, and details.
I had warned Alyssa when I offered to take this project on that it wouldn’t be finished anytime soon; there was no way I could start it before the new year, and she was fine with that. I was able to pull all the necessary brown fabrics from the leftovers from Window on Whimsey, but the not-quite-navy of the bridesmaids’ dresses wasn’t really represented in my stash, so it gave me something to look for on the Shop Hop last year. I then bundled up the fabrics, the sketch, my copy of Marsha McCloskey’s Block Party book, and set them aside. And then my life got complicated. I started this blog; I found out I was pregnant; three weeks later, I found out I was losing my job; and two months after that, I lost said job. Then I started traveling so I could work for the military dental contractor, and next thing I knew, it was the middle of summer and I hadn’t yet started this quilt. (Hello, quilt guilt!) I had taken the supplies to the April guild retreat, but didn’t actually work on it. In fact, I didn’t start the quilt until the weekend before my mini home retreat with Rhonda and Diane; I had started the cutting at my parents’ house during a quilting day with my mom, thinking I’d be able to knock out the whole top the following weekend.
Again: Ha. Ha. Ha.
As regular readers may recall, that was when I mistakenly cut a large portion of my fabric into the wrong size triangles, having forgotten in the criminally long interval between planning and starting that I had changed the block size from the 9″ in the book to 12″. And I couldn’t just change my mind and make either more blocks or a smaller quilt, because the signed squares were 4 1/2″ and could not be cut down. All I could do was get over myself and recut the pieces. Fortunately, I had enough of the brown and blue fabrics, and the cream was a standard solid from JoAnn’s, easy to procure more of, right? Right???
The first time I looked for more of the solid cream fabric was when my mom and I were in Pittsburgh to hear Bonnie Hunter speak, and we stopped into a local JoAnn’s to kill time before the meeting. I couldn’t find anything that looked like what I’d been working with, but I didn’t have a swatch with me for comparison so I didn’t worry. I started to worry, however, when I did take a swatch to my local JoAnn’s and still couldn’t find anything that matched. I remembered having bought Kona cotton, but I started to second-guess myself and looked at all their solids. Still nothing. Could they have discontinued an entire line of solids between November and July? Could there be a missing off-white that no one was stocking? I was really puzzled. I finally bought a yard each of the two closest matches, the Kona cotton and the Egyptian cotton, hoping that one or the other would look significantly different once it was washed.
And surprise, it did! Turns out, both fabrics apparently have so much sizing and finishing additives on them that they radically changed in appearance once they were washed and dried, and the Kona cotton was indeed the winner as I had remembered. Washed, it looked lighter in color, much more matte, and with nearly a seersucker texture even after pressing. If I needed a reminder of the importance of prewashing, this was it. Another obstacle surmounted.
I finished the top and also pieced the back. I’d found on last year’s shop hop not only a beautiful blue and brown large-scale Oriental floral perfect for this purpose on the bargain rack, but also a piece of Gail Kessler‘s life-size piano keyboard fabric, which I thought would be very appropriate to incorporate into a pianist’s quilt. It made the construction of the back somewhat more challenging, but I think it was worth it:
 I then basted the quilt and started quilting. And that’s when the final round of Murphyness raised its ugly head. As previously discussed here, I had unprecedented problems with skipped stitches and frayed threads, especially every time I crossed a heavy intersection of seam allowances. In a pieced quilt, there are a lot of these, and it made me nervous about my prospects for quilting both Ruby Wedding and Taupe Winding Ways. Manipulating tension and needle choice solved most of the problem, but I still had to periodically stop, rip out, and restitch throughout the project, which really ruined my momentum and greatly prolonged the process. I was happy with my choice of quilting design, though: a virtually no-mark, Pam Clarke-inspired combination of continuous curve quilting in the blue and brown triangles and in the signature squares, with additional loop and curl embellishments in the solid cream squares and triangles. The light blue thread created enough contrast for visibility without distracting from the primary focus of the top. I finished the quilt with a scrappy binding of all the blues, once again using the Sew Precise, Sew Fast machine binding technique.
 If this were a fictional story, this whole tale of woe would culminate with my putting the finished quilt in the washing machine to remove the washout blue marker and the water-soluble thread, and having all the Sharpie signatures inexplicably vanish off the fabric, thus ruining the entire project. Fortunately, this is real life, and I really had tested the markers first, so there was no final tragedy. I was able to give them their quilt on their first wedding anniversary, and they loved it. Despite all the roadblocks I encountered, I am happy I made this quilt for them, and it certainly was a learning experience! Therefore, I’ll leave this happy dance in the capable hands and feet of Mr. Gene Kelly, who danced happier than anyone:
So Quilty I Haven’t Quilted

I've been on the road!
quilty: quilt-y [kwil-tee] –adjective quilt-i-er, quilt-i-est.
1. Related to, but not specific to the act of, quilting.
2. Characterized by, connected to, or involving quilts.
That’s my made-up word of the day. I’ve been very wrapped up in quilty activities lately, to the point of being too busy to actually quilt! This has happened to me plenty of times before, and I know I’m not the only one: shop owners have frequently spoken to me about how they spend all day surrounded by quilts, thinking about quilts, but not finding time to make quilts. My free time has been consumed by some very quilty adventures, each of which is deserving of its own post, but I wanted to give you an overview:
Sept. 16: PA National Quilt Extravaganza and quilt guild meeting
Sept. 23-25: Quilting with Machines, Huron, OH
Oct. 2: The Airing of the Quilts, Tunkhannock, PA
In between, I’ve been working, traveling, and sometimes doing both simultaneously; I left the day after the PA show to work a weekend military dental event in Edinburgh, Indiana, then left again for Ohio two and a half days after getting home. I’ve also been trying to reorganize the studio, because machine quilting requires lots of space, and little things I hadn’t dealt with were piling up and getting pushed off the edge of the table as I quilted. (At least I didn’t do what I once did, and inadvertently quilted a piece of scrap fabric ONTO THE BACK OF the quilt I was quilting. That was damn unpretty.) I now have new thread racks on the wall, including one for cones, so I don’t have thread stacked precariously on the closet shelf any more.

I have also continued a project I started last spring, tracing my quilting stencil collection out onto paper so I have a hard copy of the designs I already own, without having to pull the big portfolio of stencils out of the closet and rifle through them for ideas.

I like the portfolio for storage (an idea I got from Karen McTavish when I took her wholecloth design class many years ago) but it’s a little unwieldy for casual browsing, and leads too often to my ignoring my stencils when choosing quilting designs.

Now I’m well on my way to having a full-size catalog of my stencils that will be much easier to deal with. I’m also flirting with the idea of photographing all the pages into a notebook on my phone so I have a portable reference for shopping; I have to investigate whether that would be a poor use of phone memory or not.
I’m also trying to get caught up with my magazine filing. [Warning: if descriptions of borderline OCD behavior disturb you, you may not want to read about how I organize my quilting magazines.] For the last approximately six years, I have made an effort to stay on top of my ever-increasing collection of quilting magazines by periodically going through them, tearing out the pertinent articles, photos, and patterns, and placing them in plastic page protectors. I then organize them in binders, with subject tabs separating them first into articles, patterns, and inspirations, then further subdividing the articles into topics such as how-tos, history, and interviews; the patterns into paper piecing, curved piecing, applique, big prints, holiday, etc.; and the inspiration photos just into roughly similar groupings. [Look, I warned you. I also sort my M&Ms by color before eating them, you got a problem with that?]

Every year or so I also purge the existing binders of things that no longer appeal to me or that I have better examples of, but the acquisitions far outweigh the deletions. Suffice to say I currently have four 3″ binders absolutely bursting at the seams. They are extremely useful references, though, and I consult them often. It’s much easier than having to sort through piles or magazine boxes full of intact but unindexed issues; and I’ve resigned myself to the idea that if I missed anything, it surely is counterbalanced by the usefulness of the system. (Not to mention, these days, no information is ever truly lost, even if I recycled the magazine it was in.) But as with so many other ongoing quilty projects, I’d gotten behind with it, and now I’m almost caught up.

And finally, before all this new learning had a chance to get old in my brain, I’ve organized all my handouts and class notes from Quilting with Machines into yet another binder. Once again, I had started this project last year, adding to a kind of half-assed “quilt class notes” binder that I’d started years ago but hadn’t given a good effort to. Now both years’ worth of QwM notes are in one binder, properly organized, to which I’m even adding photos I took of class samples.

So while I still don’t have any completely finished projects to brag about, I’ve been making the most of my last month of permitted travel before “my confinement.” All I mean is that the OB doesn’t want me to be more than an hour from the hospital as of 36 weeks, which falls October 23; I just like phrasing it that way because I sound like a character from Jane Austen or “Gone with the Wind.” And I now have a much better organized sewing space, which will allow me to spend more time quilting and less time trying to move or find things as I deal with significantly curtailed hobby time once the baby comes.
More on the actual shows and events soon! With pictures of quilts instead of binders! I promise!
Wonderful Things for Retreats
Writing my home retreat post had me thinking about a few of the items I own that make it a whole lot easier to quilt in places other than my studio. So if you’ll indulge me in some delusions of Oprah, here are two of my favorite things. And no, nobody’s getting a car.
Although I only participate in a few events per year that require me to have portable quilting supplies, the following products certainly were in use in my dining room for the home retreat weekend and are among my favorite and most highly valued sewing-related purchases of all time:
 Although I have a design wall in my studio, made of felt covering a piece of foam housing insulation and mounted to the wall, it’s only 4′ x 8′ because that’s how much wall space I have available in that tiny 9′ x 9′ room. It’s great for smaller projects or for individual blocks, but when it comes to a larger project it’s great to be able to break out the big gun. I actually bought the set of three Cheryl Ann’s Design Walls at Quilt Blossom Festival a few years ago: 6′ x 6′, 3′ x 3′, and 18″ x 18″. They came as a set for a show special price, which I recall being around $220. I probably should have just bought the 6′ x 6′, as it’s the only one I’ve used repeatedly, but I’m a sucker for a deal.
My initial thought was that I would use these for classes and retreats, plus the occasional setup in the upstairs hallway for a big quilt layout, but the sad reality is that my 6′ x 6′ design wall pretty much lives in my narrow little upstairs hallway full-time. I take it down only when someone is coming over for whom I like to maintain the pleasant fiction that I’ve grown up enough not to leave my toys out. The cats also enjoy it; we refer to it as the Fabulous Kitty Fun Tunnel. (I’ve written a jingle. And no, I’m not going to sing it.)
This design wall is one of those amazingly well-designed and -executed things with which I like to surround myself. It goes together and comes apart very easily; the corner pieces have a tendency to slip off but that’s easily fixed with a little wrap of electrical tape around the tips of the frame poles. The flannel came preshrunk and is washable, which is very nice considering one of my most frequent uses of the wall is for spray basting. And for the (rare) occasions when it isn’t standing in my hallway, it comes with its own carrying case and breaks down nicely into a portable package. The manufacturer has recently come out with a new accessory that they have made available as an add-on to previous purchasers, a move that always endears a manufacturer to me: stabilization rods that will help keep the easel-style support poles from slipping on wood or tile floors. I haven’t bought them, as I’ve only used the support poles once, for a workshop; I just assemble the frame and then lean it against the wall. But it’s nice that I could get them if I needed to.
 I coveted one of these for years, but the $249 price tag kept me away. Then I went to MAQ in 2007, spent all weekend sewing happy little taupe winding ways blocks with my sewing machine up on one of their tables, and came home with horribly sore shoulders, neck, and back. A few weeks later I attended Quilt Odyssey, bit the bullet, and made one of the wisest investments in my quilting ever. The Sew Ezi table is light, collapsible, portable, easily stored, and once again, very well engineered. It is customizable to any machine so that the acrylic insert surrounds the machine bed, creating a flat, smooth surface conducive to machine quilting and placing the machine bed at a very ergonomic height. On ordering, you tell the company what machine you have, and they custom-cut the acrylic insert based on information from the manufacturer; you don’t have to measure your machine. You can also get multiple inserts to use the table with multiple machines, as well as an insert to use the table as a lightbox.
It was very easy to initially assemble, and continues to be virtually effortless to set up and put away. The wheels make it very easy to transport to and from the car, but are tucked neatly out of the way during use. I use it at retreats, at classes, in order to sew in rooms of my own house other than my studio, to sew with my mom at their house, and I even set it up in front of my studio sewing table when I’m machine quilting a large quilt, for extra support. Love it!
It’s easy to fall into the trap of shopping for quilting supplies instead of actually quilting. There are plenty of quilters out there who manage to have the time and money to acquire all the state-of-the-art notions, tools, machines, and accessories, but never seem to get around to actually quilting. (I’m trying not to be one of them.) But at the same time, there is no denying that having the right tools makes quilting far more enjoyable. Perhaps our foremothers quilted by candlelight with just a needle, thread, and a pair of scissors, but I don’t think they’d have turned down an Ott-Light, a Bernina, and a rotary cutter!
A Tale of Two Purses
You know how sometimes, when you need to call or write a friend you’ve been out of touch with for a while, you catch yourself putting it off because there’s so much to say? Yet the longer you put it off, the more there is to cover, and you dig yourself a little deeper.
That’s where I’ve been with this blog. I’ve been back from Arkansas for almost a month, my guild show has come and gone, and each time I think about posting to the blog I think, Oh, but I still haven’t posted about the quilt shop in Arkansas, or the lecture and exhibit I went to at the Allentown Art Museum, or winning my first-ever blue ribbon, or going to New York City…
You see where I’m going with this. I’ve been doing the same thing with the blog lately that I’ve been doing with my UFOs, allowing the accumulated psychological weight of my perceived to-do list to paralyze me into inactivity. So perhaps I need to take a more measured approach to the blog, the way I’ve been attempting to do with the UFOs. Rather than trying to get all caught up, I’ll start with what I’m doing now. If I can manage to go “back in time” and catch up, great; if not, at least I’m not digging myself in deeper. Again.
So! What have I been working on lately? Purses! It most likely started here:

As I’ve doubtless mentioned before, I am totally in thrall to the Japanese quilters. I’m amazed by the idea that a culture with no history of quilting (technically, sashiko isn’t quilting, it’s embroidery to decorate and reinforce a single layer of fabric) and certainly no history of decorative patchwork, a culture which was only exposed to American quilting post-WWII, has managed to produce in just the last 60 years a community of quilters of unparalleled creativity and workmanship. I subscribe to two Japanese quilting magazines, Quilts Japan and Patchwork Quilt Tsushin, and am always happy for opportunities to see Japanese quilts in person. I love the design esthetic: the frequently muted colors (especially taupes!), the artful assymetries, the use of fabric printed with English or French text as purely a textural element much in the same way we use Chinese or Japanese logographic characters for decoration. Here we see the quintessential American craft, that is ours the same way jazz and rock and roll are, reinterpreted through a foreign lens in a breathtakingly beautiful fashion.
So every time I’m in or near New York City, I stop at Kinokuniya bookstore, located right across the street from Bryant Park, where they put on the Fashion Week shows (Hi, Tim Gunn!) and Sanseido bookstore, located in the Mitsuwa marketplace in Edgewater, NJ. There I spend some very happy hours browsing through quilt books that I can’t read, but the photographs are stunning and the directions have very helpful diagrams. Both the books and magazines are for me primarily sources of inspiration, rather than patterns I plan to follow faithfully, but I think I’d do OK once I converted all the measurements from metric to English, if I decided I had to make something exactly the way it appeared. I didn’t plan to just buy purse books, but these were the items that attracted me the most.
Then, hard on the heels of my NYC trip were several family birthdays. One of my sisters, when I asked her what she wanted for her birthday, said, “Oh please, don’t buy me anything.” I decided to honor the letter of the law, rather than the spirit, and made her a purse. Technically, the only thing I bought were the zippers and interfacing. She apparently forgives me this transgression, because she loved the purse:


I am inordinately proud of this zipper.
She and her family are big Star Wars fans, even having attended the Star Wars Celebration in Orlando, so I couldn’t think of a worthier recipient for something made from some of my precious vintage Star Wars fabric. My friend Joan was generous enough to share this with me last month, after I had quite openly coveted it at our guild retreat in December. She had bought the fabric when it was in the stores after Return of the Jedi came out in 1983, held onto it all these years, then made this quilt for her grown son’s “man cave”:

Joan's Star Wars quilt
I wound up quite unexpectedly being asked to hold an impromptu “Introduction to Star Wars” lecture at the retreat, explaining the story to those retreat-goers not familiar with it, based on the images in the quilt. (Fortunately, the regulars were all fully cognizant of what a big giant nerd I am, so I wasn’t outing myself.) It felt pretty much exactly like this:
(I couldn’t find a version of this scene without the added comedy title and subtitles, but you get the idea.)
So the purse is the Huntington Hobo by Pink Sand Beach Designs, and the directions were wonderful. Even the zippers were easy to do with her photos and instructions. The only drawback is that I wish I’d had a better quality zipper for the top opening; the big metal one from JoAnn’s hangs up too much. Hopefully as my sister uses the bag and possibly waxes the zipper, it will work more easily, but overall I have to call this one a great success. Which is good, since another of my sisters has already informed me that I’m permitted to make one, sans Star Wars, for her birthday in November.
Then this past weekend, we attended a birthday party for my 12-year-old niece. I got her a DVD she wanted (Up, probably my favorite Pixar movie yet, which is saying a lot) and some fingernail glitter, but I thought it would be fun to make her a purse as well:


This is Geisha Girl by Purse Strings, and the directions were great right up until it came time to put in the zipper. I’ll definitely make this purse again, and I’ll have to play with the zipper instructions then, but they just weren’t speaking to me this time, so I left the zipper out. But it turned out SOOOO CUTE! She was very happy with it. I wish I could have taken it to show and tell, but I missed my guild meeting last week due to an upset stomach — much as I wanted to share the purse, I didn’t want to risk sharing a nasty GI bug! Fortunately it was of short duration.
The skull fabric is called Skullfinity, by (you guessed it) Alexander Henry. I found this at JoAnn Fabrics of all places a couple years ago and bought 6 1/2 yards out of sheer love. (Yay coupons!) I have a Halloween UFO that this should be the back to.
I spent much of Sunday making the bias binding for Ruby Wedding. My parents’ 41st wedding anniversary was yesterday, and while I’m getting no pressure from them, thank goodness, I’m feeling the guilt considering the quilt is now a full year late. I haven’t basted it yet, but knowing the binding is there waiting for me somehow makes it easier to embark on the huge intimidating project that quilting this quilt represents. That’s what’s next…
The Featherweight And I
Even factoring in all the choir-singing we did for Easter and taking a trip out of state to see our nephew get baptized this past weekend, I’ve managed to put in a reasonable amount of studio time in the last couple of weeks. Which, of course, meant I was limited to activities that didn’t require the use of my workhorse Janome, since it’s been on the DL.
I managed to resist the urge to start anything new; after all, that kind of defeats the purpose of this whole project. Instead, I made what progress I could on the WIPs, such as making the binding for Convergence Birds:

Further motivation to get it finished for the show!
But primarily, I’ve been assembling Taupe Winding Ways. While that fits the bill of only requiring straight stitching, it has required an upsetting amount of UNstitching. Here’s the situation: I don’t know exactly how many fabrics are represented in those blocks, but there are MANY. So many, in fact, that one would think I wouldn’t have problems duplicating fabrics close together in a quilt top that contains 255 blocks. One would think that, even if I put the blocks together randomly, it would be highly unlikely that the same fabric would appear two blocks away from itself. And yet:

The EXACT SAME FABRIC, two blocks apart!
I have been very careful and deliberate in placing blocks, which is increasingly difficult as the quilt top gets bigger and bigger. Yet I keep finding places in which I have inadvertently put the same fabric (or the same print in a different colorway, or a separate fabric that looks way too much like the first one) nearly on top of itself.
As I explained when discussing this problem at a quilt show committee meeting last week, I can’t just let it go. I’ve been working on this quilt for so many years that when it’s finally finished, I want to be able to look at it and feel nothing but happiness. I don’t want to look at it and say, “Yeah, I should have ripped that out and moved it, but I convinced myself it didn’t matter.” I know myself well enough to know that once I’ve found an error, I become laser-focused on it until it’s rectified. It’s not a pleasant way to be, but it’s who I am.
Despite the two steps forward, one step back character of my progress, I do have something to show for my time. I have 5/8 of the bottom half of the quilt top, minus the border, sewn together (albeit in three separate pieces for ease of handling.) Since it’s so huge, I don’t have a design wall big enough to display the whole thing at once, which further complicates the attempt not to duplicate fabrics; I end up running back and forth between the upstairs hall and our bedroom, even trying to take pictures with my phone to make sure. Yet I still keep periodically pulling out the seam ripper. So is life. At least I’ve taken the time to seek out and try enough seam rippers that I’ve found my favorite:

My ideal seam ripper
But I got a phone call Saturday that my Janome is ready, so we’ll be up and quilting again soon! It’s been nice working on the Featherweight, with its beautiful stitch and its friendly little clackety-clack noise; I haven’t even burned myself that badly on the inconveniently placed light bulb this time out. However, ever since I typed the title for this post, I’ve had an earworm. And not just any earworm, but a Broadway earworm, which in my experience are the most persistent. Just like in “The Ring,” the only way to save myself is to expose someone else, so here you go:
There’s a Hole in my Heart…
…or at least in my sewing table.

No sewing machine!
I sat down yesterday to do some serious diagnostics on my sewing machine, trying to determine why I got the shredded thread on top and giant thread knots on the back when I tried to quilt Convergence Birds. I put in a new #80 titanium topstitch needle as recommended by the Thread Reference Guide for Home Sewing Machines on the Superior Threads website. I cleaned everything out really well, made sure the bobbin casing was seated correctly, and made up a new practice quilt sandwich.
That’s when I noticed that my free motion foot was actually pressing down on the fabric. When I tried to lighten the pressure on the presser foot, it didn’t move. In fact, the lever to lift the presser foot was acting up as well. I took the side panel off to inspect the mechanism, but there wasn’t any lint or any obvious impediment to its motion, so I closed it back up.
Here’s the part where I get annoyed with modern sewing machines. I love my computerized Janome MC6500; I bought it almost six years ago and we have made some beautiful quilts together. I love having needle down capability (I can’t imagine doing all the curved piecing on Taupe Winding Ways and Ruby Wedding without it) and being able to do buttonhole applique. I don’t use the programmable functions often, but it’s nice to know they’re there.
BUT: If this were a purely mechanical machine, I could do all the maintenance myself. I can field-strip my Featherweight, oil it, and reassemble it blindfolded (OK, I’m exaggerating, but isn’t that a cool mental image?) However, once they started introducing circuit boards, it got complicated. I’m not even supposed to oil my machine, according to the manual and the dealer; it has an internal oil reservoir and wicking system, and I’m just supposed to bring it in for scheduled tuneups, like a high-performance European sportscar.
So, defeated, I called the dealer. I bought the machine before we moved, but I still get it serviced 45 min. away because they certainly know the brand, and I’ve had excellent service from them ever since the purchase. My machine was due for maintenance anyway; I used to bring it in during summer when we were traveling, but ever since I had a feed-dog emergency in January 2008, I’ve been on an altered schedule. I confirmed their hours, made sure I knew what the technician wanted me to bring, and asked, just in passing, when I might expect to get it back?
A WEEK AND A HALF?!??!!???!!!
Oh, those best-laid plans. I do still have the Featherweight, of course, which pieces like a dream — better than the Janome, when it comes right down to it, as long as I don’t have to sew curves or anything too huge to fit under its little arm. But right now I need to quilt: Convergence Birds, Window on Whimsy, and Ruby Wedding. I guess I can officially give up my dream of having Ruby Wedding done for the quilt show in June. It was a long shot anyway.

The ever-reliable Featherweight
It could be worse; I have a retreat to attend the last weekend in April, and it would have been far more tragic if my machine had chosen to jump the tracks right beforehand. But I have that magical combination of motivation and some free time right now, and to see that run up against the brick wall of mechanical failure is very frustrating.
Oh well. Keep calm and carry on. Let’s see what I can find to do in the meantime.
Wailing and Gnashing of Teeth
I really thought that I was going to get a whole lot of quilting in this weekend. Apparently though, it was fortuitous that I recently read “The Yiddish Policemen’s Union” by Michael Chabon, so I could be reminded of the Yiddish proverb, “Mentsch tracht, Gott lacht.”
In English: man plans, God laughs.
Since the office was closed Friday, and my husband was at a miniature wargaming convention all weekend, I thought I was going to have two solid days of quilting Friday and Saturday. I had plans Sunday with Rhonda and Wendy for a mini stitch-in, so the grandiose part of my brain that churns out the unrealistic expectations had me visualizing completing the quilting on Convergence Birds in time to be hand-sewing the binding by Sunday afternoon.
But when my mom found out I was going to be a gaming widow all weekend, she invited me to their house on Friday. We had a delightful visit (and homemade vegetable pizza with pretzel dough crust!) and both my brother and my youngest sister were there, which was a very pleasant surprise. However, between the late start I got in the morning, bad traffic, and then my reluctance to cut such a pleasant family gathering short, I got home at about 10:00 pm. No quilting Friday.
Saturday, I had a short list of household chores and food prep to accomplish before I could mentally release myself to quilt. I had also planned to run a couple of errands and go to the gym. However, we had a (second) full day of soaking rain with terrible wind gusts that made me really not want to leave the house. So rather than either gritting my teeth and going out in unpleasant conditions, or making a command decision to scrap the errand-running altogether, I dithered. I made my various plans contingent on one another, and ended up as just a big entropic mess. So while I did eventually clean and cut vegetables, prep the pulled pork barbecue, bake banana muffins, clean the bathroom, and put away the snowman decorations, it was very late in the day by the time I did.
I got some quilting in, while listening to the director’s commentary on “The Lost Boys” (RIP Corey Haim!) While I was originally just going to quilt the center Convergence area in an all-over design, as Ricky Tims recommends in the book, I realized upon looking at it on the design wall that my seams were more straight-ish than straight. Whether this happened as a result of carelessness when appliqueing the bird border or if there had always been issues, I’m not sure.

It may not be obvious in miniature, but those seams were waving like a flag!
So I took a page from longarm quilters and did some ruler-guided ditch quilting. I used the blind hem foot, which has a modest rudder coming out of the middle (less dramatic than the one on the edge-joining foot), set the needle to stitch right next to the rudder, and guided the foot with a 3″ x 12″ Omnigrip ruler, adjusting the quilt top to keep the seams straight. It’s not perfect, but it’s much better than it was. I used MonoPoly by Superior Threads so the ditch quilting wouldn’t contribute to the visual design.
I sang with choir Sunday morning and then had a lovely lunch and visit with Rhonda and Wendy, during which I sewed twisted cord onto two more cross-stitched nativity figures (3 down, 6 to go.) We really need to make it a priority to do stuff like that more often; I always feel so motivated and renewed afterward. After they left, I gamely trooped back up to the studio. While there were only a scant few hours of weekend remaining, I was confident that I could complete the quilting of the bird border. After all, at this point, I was feeling rather accomplished. I had chosen a fern-feather no-mark overall design and had experimented to find the best color of Bottom Line to use as my quilting thread:

The fuchsia in the upper left didn't show up, but the light green was visible without being obnoxious.
I had quilted for about twenty minutes, completing three big ferny feathers with echo quilting and little spirals, when my thread broke. Odd, I quilt with Bottom Line all the time and never have problems with it. Hmmm. I turned the quilt over to the back and found…

AAAAGH!! Giant knots of thread!!!
One advantage to using a different color in the bobbin than in the top is that it’s easier to see where the problems are. In this case, the giant thread knots are made of light green top thread, rather than fuchsia bobbin thread, but the tension looks pretty good otherwise. So I have to do some experimentation to find out if it’s a) the tension; b) the needle; c) a bad spool of thread (hey, it could happen); or d) an unknown unknown. But I have done nothing so far, except to spend TWO AND A HALF HOURS ripping out the bad quilting. I got it all ripped out Sunday night, went to bed, and I haven’t been back in the studio since.
I hope to have a chance to rectify that tomorrow. However, if I can’t seem to face Bird Convergence, if it seems too much of an impasse, I can always pull out Lemoyne Stars. I talked to Diane last night, and she gave me a great idea on how to sew the pieced border on before cutting the Bad Border, so I don’t have to worry about getting the measurements or the math wrong. After all, why work on a problematic project when there’s another, less frustrating one waiting in the wings? And I wonder how I ended up with so many UFOs…
And now, in tribute, one of the best scenes from “Lost Boys.” Michael and David didn’t sparkle one bit.

