Posts filed under ‘Quilt Guild’
2013 Challenge Quilt — Solids!

Bright color camouflage! Can you find the hidden child?
Once again, part of why my blog went dark in the latter part of last year was that I couldn’t show you what I was primarily working on. This year’s challenge was announced in May and was solid fabrics, at least six different shades/hues. My initial reaction was very negative: basically, “eww, I’m not doing that!” After all, the fabrics I love are prints and batiks, and I have a houseful of them. Doing a solid fabric challenge would entail buying new fabric at a time when I’m desperately trying to use up my stash, as my stash decidedly lacks solids.

Finley helped me assess my feather coverage partway through the quilting.
However, when I told my mom about the challenge and how much I was NOT inspired by it, two things happened. First, she reminded me that the first quilts I fell in love with, the quilts that inspired me to start quilting, and indeed my first several quilts, were all made of solid fabrics. And second, she gave me a bag of twelve solid half-yards for my birthday. I subsequently added some neutrals, and the game was afoot. Besides, in retrospect, if my reaction to a challenge is “eww!” then that suggests that it really will be a challenge, not just an excuse to make a quilt I would’ve made anyway.
Early on in the process, I decided that the biggest advantage working with solids would give me is how well quilting shows up on solid fabric. Therefore, I wanted to keep the piecing simple. Since I love pinwheels, and have been planning for years to make a quilt that incorporates different sizes of pinwheels, I settled on the idea of making a quilt similar to this one of Kaffe Fassett‘s:

From _Country Garden Quilts_
I started the cutting at my mini-retreat in late July with Rhonda and Diane, and didn’t really work up a strict plan. I decided to just run all the solid fabric through my Accuquilt GO! cutter (after all, I really wasn’t looking to start a solid stash) and make the quilt however big it turned out. I had a lot of fun cranking out all those triangles. I then paired them off into blocks using my standard concept of quilt entropy, trying to get the colors as mixed up as possible. I don’t know whether I will ever be capable of leaving things up to chance sufficiently to make a “brown bag” quilt, but I did have fun free-associating about the various bright color combinations: green and purple is the Hulk, orange and fuchsia is the beach, red and brown is a robin, yellow and purple is Easter. The colors all coordinate with one another because there are so many of them; as Alex Anderson says, if the colors in your quilt aren’t going together, add more colors and they will.

You know you’re really chain piecing when you can barely see the baby
I sewed all the large 12″ blocks together and had paired up the triangles for the 6″ blocks when I realized I’d goofed. In the original quilt, the smaller blocks are 1/3 the size of the larger blocks, not 1/2. Oops. Time for a new plan. I liked the idea of keeping the center of the quilt set on point, so I just sewed the large blocks together and planned on making the smaller blocks into a border. And that’s when I got seriously sidetracked with other projects (they’re in the next post.) That’s also when I fully internalized just how large a quilt (84″ x 84″!) I was ending up with, which hadn’t really been in the plan.

Just the center
The primary problem with having the challenge meeting in January is that I didn’t get back to the challenge quilt until after Christmas: even though we actually had more time between the announcement of the challenge and the meeting, I would have had to have the quilt virtually finished before Thanksgiving to have truly been on-time with it, and my brain doesn’t work that way. I very nearly packed it in and turned it into another UFO, but Dan was my cheerleader and encouraged me to finish it. Fortunately, the rest of the quilt top went together smoothly and the children more or less cooperated to get me some sewing time.

Some days, this is what cooperation looks like
I wound up working in Danville, PA for a military dental event the weekend before the guild meeting, so I made certain I had the quilt basted and the quilting started before I left so I could get some dedicated quilting time in my motel room. I made the most of it and had the entire outer border and 1/4 of the center quilted by the time I got home. Once again, working under deadline really helped me make decisions as to what quilting designs went where. Feathers are favorites of mine to stitch without a great deal of marking and they always look fancy, so I put Patsy Thompson-style soft heart feathers in the outer border and Kimmy Brunner “twirly whirly” feathers in the center. I was able to get away with only marking the spines in all cases; the seam lines for the borders and the X through the center gave me all the other guidelines I needed. This was definitely not a project for subtlety, so I used neon green Brytes by Superior Threads for all of it. I managed to get the remainder of the center quilted and the outside edge zigzagged and trimmed in time for the meeting, so even though it wasn’t finished, it was finished-ish.

Before and after hyperquilting
The inner border was reserved for my fanciest quilting, since it would show the best there. I think it also helped me finish this quilt, as I was really looking forward to quilting that border; otherwise, I probably would have lost momentum once the meeting was past and I no longer had a deadline. I rewatched Patsy Thompson’s Free-Motion Fun with Feathers Vol. 4 DVD again for inspiration and quilted a hyperquilted, symmetrical border flowing from corner motifs that started as Quilter’s Rule Dragon Scales template and evolved from there.

Detail, corner quilting design
I used orange Brytes for the original feather and hyperquilted it with Superior Threads Metallic in variegated gold. I also shook up my standard machine binding protocol to add a little more embellishment by trading the stitching in the ditch for a decorative stitch in a variegated King Tut:

Detail, binding stitching
What would I do differently? Well, much as I love wool batting, it definitely increased the difficulty level on this quilt. I think as long as I’m quilting on my home machine, I need to reserve wool for the smaller projects. It doesn’t spray baste as nicely as the cotton blends, and I got more pleats and tucks on the back than usual. I didn’t have any problems with skipped stitches or shredded threads (even with the Metallic! That stuff worked like a charm and I will most certainly be using it more often from here on out) but I had more “nests” on the back than I normally do. I’m not sure why. I didn’t let it stop me (another benefit of being on a strict deadline) but I will be keeping my eye out for future problems along these lines and possible causes/solutions.
For a happy dance, I’m mining the classic movie musicals again. The bright colors in this quilt made me think of the old movies that would advertise being shot “in Glorious TECHNICOLOR!” including “On The Town.” Enjoy!
Orphan Block Guild Challenge

It’s always summer when you’ve got shades!
Obviously, it’s been a really long time since I posted. I had intended on taking the summer off from blogging, but I didn’t mean to let it drag so far into fall. However, Hurricane Sandy closed my office on Monday, and since the power at home stayed on, I got some good momentum going on this post before normal life resumed.
Part of what has kept me quiet was the fact that until very recently I literally couldn’t talk about the main project that has occupied me since July: the guild challenge. This year’s theme was orphan blocks. We randomly drew bags that contained anything from a single orphan block to a collection of blocks or precut pieces, and then had to make something new out of the bag’s contents. My bag had just one single block in it, and it had issues:

The original orphan block
In the plus column, it’s a 54-40-or-Fight block, which I’ve always liked the looks of but had never made; the basic color palette had promise, since purple and green are two of my favorite colors; and the fact that it was primarily made of solids meant that finding coordinating prints would be relatively simple. HOWEVER, I completely understand why this block ended up an orphan. It’s hand pieced, and the seam allowances were positively enormous, in the 1/2″ to 5/8″ range. There were rust stains, probably from being stored with needles or pins in it, and this block did not have a single 90-degree angle to its name. If I had made a block like this, I would have stopped at one, too. I salute the brave quilter who not only held onto this block for some years, but offered it up for public consumption. And I have to say, it inspired me to make something I’m very proud of, that I never would have conceived of otherwise.
My first thought was to just rip out the seams and use the individual pieces for applique. Heck, with those seam allowances, I certainly would have ended up with plenty of fabric! But ultimately, I decided I really wanted to maintain the sharp points of the original block and riff off of those for my final design.

The finished product, “Aurora Borealis,” 36″ x 36″
A brief aside regarding my conflicted relationship with foundation paper piecing. I absolutely love “sharp pointies” designs such as New York Beauty and Mariner’s Compass, and paper piecing definitely seems to be the way to go to achieve satisfactory results with these blocks. However, I really don’t enjoy the process that much. I’ve tried several different books’ and teachers’ methods for paper piecing, I’ve tried several different types of paper foundations, and I still just find it to be tedious. I don’t like sewing on paper because the presser foot slips around, I despise having to trim after each seam, and I HATE having to tear the paper off afterwards. But in order to achieve the results I want with those super-sharp points, it’s what I have to do, and I’ve made peace with that. It will just never be my favorite technique.
I’ve had a book in my collection for many years, “Quilt Mavens: Perfect Paper Piecing” by Deb Karasik and Janet Mednick, whose pictures I have (metaphorically) drooled over for as long as I’ve had it. Up until now, though, I’ve never had occasion to make any of the patterns from it. But strangely enough, their pattern “Spike Redux,” which is essentially a giant Lemoyne Star by way of the Chrysler Building, seemed to echo the sharp points of the 54-40 or Fight block while introducing new design elements. I just changed the color and value distribution to suit myself, and swapped out the corner New York Beauty-style blocks for the orphan block.
I had bought the beautiful, hand-dyed-look, gradated purple and green fabric, “Glacier Lake” by Caryl Bryer Fallert, at least eight years ago. (I found it on the enclosed porch of the old location of Endless Mountains Quiltworks, so it’s been a while.) It was love at first sight, but it’s been one of those “too good to cut” fabrics for me all these years. With this color palette pre-established, I had finally found its showcase in the big setting triangles and curving center pieces. I only had a yard and a half, so I had to cut carefully, and I only have a few scraps left after just barely having enough to make the binding, but it was the perfect fabric for the job. In fact, most of the fabrics for this project came from my stash; the only ones I had to shop for were the pale lavender and pale chartreuse, because I needed lights for value contrast, and these are not shades that naturally occur in my collection. Fortunately, my mini-retreat with Rhonda and Kathy occurred just when I was about to embark on this project, so a shopping trip to Sauder’s did the trick.

Detail, “Aurora Borealis”
The only part of the quilt that I hadn’t completely pre-planned before starting to cut fabric was the corner blocks. Initially I had considered leaving the block intact and just making three more like it (obviously machine pieced and with new fabrics), but I was concerned that wasn’t changing it enough for the spirit of the challenge. Also, having three identical blocks and one “vintage” block would probably tend to draw focus to the odd one out, like that old song from Sesame Street:
So I tried cutting the blocks in half diagonally, although I flipped the orientation after playing around on the design wall. I experienced a great deal of stress when finally rotary cutting that block, because it was the only one I had — normally the worst thing that could happen is that I’d have to recut or repiece, but the stakes were high on this! Plus, those hand-pieced seams really wanted to spring apart until I sewed across them. I had fun making my own new 54-40 or Fight block for the other two corners. I finally used the Tri-Recs ruler I’d bought years ago, and was very happy with the result.

Quilting detail, “Aurora Borealis”
For quilting designs, I mostly fell back on my old standbys: freehand feathers in the Glacier Lake pieces and parallel lines in the paper pieced areas. The stroke of genius was Dan’s, as he came up with the idea to quilt the corner setting triangles as if the piecing continued for complete blocks. Doing the dense pebbling filler pattern not only created contrast in the solid areas, but also gave me some additional peace of mind regarding the hand-pieced blocks, that they wouldn’t be going anywhere.
And all my work and soul-searching was very well rewarded at our guild meeting, when my quilt got the highest number of votes at the big challenge reveal! I got a lovely prize bag and the grateful satisfaction of knowing my work is appreciated by a group of quilters I love and respect so much. Priceless.
For the happy dance, I had to go with Gilles Marini’s Bollywood dance from DWTS All-Stars. It just makes me smile:
Finished! Liddle Lamzy Divey

Ronan Loves Fabric, too!
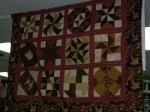
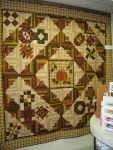
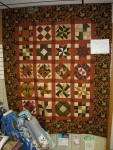
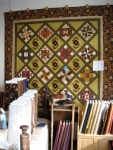
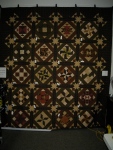
It’s the 2007 shop hop sampler quilt, finally finished!

“Liddle Lamzy Divey,” 2012, 86″ x 102″, only 1/4 visible because it’s hanging on my back porch.
I decided the name for this quilt had to reference the lambs in the focus print from the Jo Morton collection used for the shop hop blocks. After all, that was what made me buy the block kits — especially the little pugnacious lamb in the back:

Making this quilt created a multitude of fun challenges for me, and the overall design of the top just evolved organically as I solved each one. First, rather than making each block separately from its kit, I counted up how many of each shape and unit from each fabric needed to be made in order to make all 19 (18 shops + the kit included with the passport purchase) blocks. I then opened all the kits and only used what I needed. Since each kit included width-of-fabric strips, they were extremely generous, and I was left with a large quantity of excess fabric once all the blocks were made.
 A desire to use up this excess fabric was the genesis of the idea for the flying geese borders, because I had stacks of 3 1/2″ strips crying out to have something made from them. I used the Fons & Porter Flying Geese Ruler for the first time, and was very pleased with the result. I also fell in love with the plaid, which was a part of Jo Morton’s collection but not used in any of the blocks. The owner of (the since closed) Quilting in the Valley in Hegins had used it in the center of her shop hop quilt, and I knew I had to have it. Setting triangles seemed like the way to go, and since most of the blocks had light backgrounds, I put the narrow dark borders around them so they wouldn’t bleed into the plaid. (Fabric selection for those was based entirely on what was still left from all those strips.)

Long before I knew what the quilt top would look like, I bought the acid green tone-on-tone print because I knew I would likely need additional yardage of one of the “neutrals” and it was my favorite from that category. Due to just how huge the top ended up, I wound up having to piece the long vertical borders, but it still worked. Once again, a cutting error ended up making the quilt more interesting: I had initially planned for the outer borders to be solid 6″ strips with the extra flying geese pieced in to break it up. However, I got distracted and ended up cutting all my remaining yardage into 3 1/2″ strips. After storming around for a while, I got practical and decided to piece in the narrow strip of the focus fabric to make it look like an intentional design choice. As usual, the process of fixing my mistake led me to a more complex and compelling design.
 I didn’t do anything earth-shattering with the quilting, just variations on what I’ve been doing with most of my quilting lately: Pam Clarke and DeLoa Jones-inspired continuous curve variations and no-mark motifs following the piecing lines in the sampler blocks and flying geese; Patsy Thompson and Kimmy Brunner-style freehand feathers in the plaid setting triangles; and that Megan Best “Onions and Garlic” filler in the green vertical borders. I also quilted a little “half-hearted” design in the accent stripe in the outer borders and in the borders of the sampler blocks; it’s a variation on Sally Terry‘s “signature” sashing design that I thought complemented the feathers nicely.
 Overall, despite the sheer acreage this quilt represented, I tried to concentrate on making the quilting patterns echo and call back to one another so they looked like part of the same “family.” I also attempted once again to achieve Sue Patten’s “three densities,” with the densest area being the green vertical borders and the poofiest areas being the setting triangles. I did all the quilting with just two colors of Superior Threads’ So Fine!, orange and green, with tan Bottom Line in the bobbin. Other than a few isolated incidents of thread breakage after going through some very solid spots of converging seams, everything behaved beautifully. After this quilt, I think I can finally detect some visible improvement in my stitch length consistency, but that remains to be seen.
 I used the 19th block on the back as my label, and added a hanging sleeve made of the only fabric not from the shop hop collection in the quilt. (I didn’t have a big enough scrap left over to make a sleeve without doing a ridiculous amount of piecing, which didn’t seem worthwhile.) And it’s finished, a full week before I have to drop it off for the guild show. I washed it and am keeping it in a plastic storage tub until next week, so it doesn’t get cat hair on it, because this is what repeatedly happened while I was sewing on the binding:

They’re very lucky they’re cute.
For a happy dance, here’s the song that’s been running through my head ever since I hit upon the name for this quilt:
Almost There…
It’s all over but the shouting!
Or the binding, which in my life normally elicits some shouting.
I don’t know why I dislike sewing binding on so much. I don’t know if I’m still at heart a bratty child who’s too impatient, seeing the finish line but resenting still having one more task to perform. I don’t know if it’s the handwork aspect, that having executed all the piecing and quilting on the machine, it seems retrograde to sit with a needle in my hand. I don’t know if it’s my perfectionist tendencies that make me tense up over wanting every stitch to be invisible and ideally placed, yet wanting to finish sometime this century. All I know is that binding the quilt is my least favorite part of the process. I’d rather pick out stitches than sew on binding.
But the end is in sight, and I am definitely on target to finish in plenty of time for the show. (I also have to make and add the hanging sleeve, and sew on the label, and launder the quilt to get rid of the water-soluble basting thread… ok, maybe I should be sewing rather than blogging right now.)
I do have to say that as far as bindings go, I’m rather fond of this one. It’s the lovely plaid from the setting triangles again, because I can’t resist a plaid or striped binding, especially set on the bias. However, since the setting triangles go straight to the edge of the quilt, I wanted something to make the binding stand out. I didn’t think I had time to do one of Susan Cleveland‘s Piping Hot Bindings before the quilt show, so I cheated by using brown 1/2″ rick rack. I did use Susan’s technique, though, of attaching the rick rack first using a contrasting bobbin thread, then attaching the binding to the front of the quilt by sewing with the back of the quilt facing up, so I could follow that bright orange bobbin thread and sew just to the left of it. Hand sewing the binding down was incredibly tedious on such a large quilt, especially facing a deadline and during an unusually warm late spring, but the result appears so far to be worth it. And on the hot days, I just wore shorts and posed like Angelina Jolie at the Oscars.
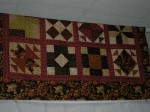
Here’s a little preview for the “finished!” post that I’ll hopefully be publishing soon. Just as I did during this year’s shop hop, in 2007 I took a picture of the quilt at each shop:
-

- Red Barn Quilts
-

- Quilters Quarter
-

- J&B Fabrics, part 1
-

- J&B Fabrics, part 2
-

- 118 Fabrics & More
-

- Endless Mountains Quiltworks
-

- American Ribbon Outlet
-
- Pocono Sew & Vac, side 1
-
- Pocono Sew & Vac, side 2
-

- The Quiltery
-

- The Country Quilterie
-

- The Happy Sewing Room
-
- Quilting In The Valley
-
- Wooden Bridge Drygoods
-
- Quilter’s Palette
-

- Ladyfingers Sewing Studio
-
- The Quilted Cat
-
- At Piece Quiltery
-

- Quilter’s Haven
-

- Allentown Sewing Machine Outlet
While the different settings and designs were extremely inspiring, and I have certainly gleaned some ideas from them for future sampler quilts, ultimately I went my own way. The big reveal should be coming soon…`
Book Review: “Listen To Your Quilt” by Barbara Persing

“Time for book club!”
Our guild program for April was a presentation by professional longarm quilter Barbara Persing and her sister, quilt shop owner Mary Hoover. Together, they are the designers behind the quilt pattern company Fourth and Sixth Designs (so named because they are the fourth and sixth in birth order in their family.) I enjoyed their trunk show of quilts and the affectionate banter between the sisters. However, the most valuable piece of information I took home was that Barbara had a book coming out just a few weeks hence, about choosing quilting designs and threads for your quilts. Since this is probably the single biggest current issue in my quilting, I anxiously anticipated its release.
 Imagine my pleasant surprise when Dan got it for me for our anniversary last week! At first I thought he’d been super-stealthy Observant Guy and had noticed the advertising card I’d picked up at the meeting and had placed on my studio whiteboard, but it turns out I’d added it to my Amazon Wish List so I wouldn’t forget about it, and he’d just found it there. Still, the result was the same.

I can’t think why he didn’t notice it there. (Sadly, this is not a staged photo.)
And it’s just as good as I’d hoped! Barbara starts by giving an overview of her “Four Questions” that should be asked before planning the quilting for any quilt. This isn’t a new strategy; Kim Brunner and Debby Brown each suggested a form of this approach during their lectures at Quilting with Machines, as do several of my favorite machine quilting books (more on them later.) Barbara Persing has managed to set herself apart by streamlining the discussion into an easily accessible system that any quilter can apply to any quilt. As a big fan of systems, I was hooked.
Basically, what she and all these other knowledgeable quilters are saying is that the secret behind choosing appropriate and complementary quilting designs for any given quilt is to identify what kind of quilt it is and how it will be used. There’s no point in doing gorgeous heirloom “bump-back” feathers on a busy print Turning Twenty quilt you’ve made for your nephew to take to college. (As Mark Lipinski famously said when he spoke to the Letort guild a few years back, “It’s just going to get covered in beer and DNA.”) Likewise, if you’ve taken the time to needle-turn applique a Baltimore album quilt, you probably don’t want to stitch a pantograph over it all.

Back detail, “The Sampler” by Barbara Persing. I took this (with the help of the white glove angel) at Pennsylvania National Quilt Extravaganza 2009, when it won for Best Machine Workmanship.
The latter 2/3 of the book is really a peek inside Barbara’s thought process as she quilts nearly 30 different quilts in four different categories: Child/Youth, Traditional, Contemporary, and Art Quilts. (She acknowledges the arbitrary and incomplete nature of these categories, but you have to start somewhere.) Each quilt has at least one page devoted to it with a 1/4-page photograph of the entire quilt, and inset closeups to show quilting detail. At the bottom of each page, she takes us through the way she answered her own questions for that particular quilt, from the larger generalities of degree and style of quilting, to the specific design chosen and thread used. I particularly enjoyed the attention she pays to thread choice, which has been a bugbear of my quilting lately and doesn’t usually get much press.
“Listen To Your Quilt” is in many ways the player that was up till now missing from my dream team lineup of machine quilting books. With only 70 pages to work with, the author doesn’t dwell at length on the subject of selecting quilting designs to complement particular design elements in the quilt top; she simply mentions that shapes from a fabric print can be mimicked or echoed , or that she used wave-like quilting on a blue quilt. I would recommend that anyone who is looking for a more comprehensive discussion of the process of designing the individual elements of the quilting should see “A Fine Line” by Melody Crust and Heather Waldron Tewell, which is twice as long and really explores this topic in depth, but doesn’t offer such a structured, practical blueprint. In “Machine Quilting Solutions,” author Christine Maraccini provides less variety of sample quilt pictures but more specific “how-to” diagrams of three different levels or intensities of quilting designs for each of the tops depicted. I would finish out the essential book shelf with “Quilting Makes The Quilt” by Lee Cleland, in which the author accomplished the Herculean task of quilting FIVE different versions each of TWELVE quilt top designs (yes, that’s a total of 60 quilts!) so that we could see just how much the quilting design choice can influence the final result. With these four books in my arsenal, I feel properly educated to choose the quilting for any quilt I might make.

The machine quilting portion of my library.
Some prospective readers who quilt on domestic machines may be concerned that this book is intended for longarm quilters. I can reassure you that this book is all about planning, not technique; the only mention of longarms is in her biography. If anything, the fact that she is quilting customer quilts, of which she has no input in the design, makes her approach even more relatable for me. I am not yet to the point in my quilting where I am designing my tops with the quilting in mind, as Ricky Tims and various other renowned quilters recommend. I am reacting to my own quilt tops much like a professional quilter who is seeing a customer’s quilt for the first time. While this is a mindset I’m trying to change, it made this book more applicable for me for the time being.
What “Listen To Your Quilt” does not do is teach how to machine quilt, and this was absolutely fine with me: that information is abundantly available from other sources. While there are some simple freehand, free-motion designs depicted on the last few pages, there are plenty of other collections of quilting designs available. What is usually missing from the books that tell you how to machine quilt, or provide you with designs of what to machine quilt, is an explanation of why you should (or shouldn’t) machine quilt a given design on a given top. “Listen To Your Quilt” is an excellent fulfillment of an underserved area of quilting education, and would make a useful addition to most quilters’ libraries.
Hooray for Quilt Guild Retreat!

“Summer’s just around the corner!”
On a recent weekend I attended the spring retreat for my quilt guild. I’m determined to get my 2007 Shop Hop quilt finished for our guild show in June, so I didn’t bring any other quilts to work on. (More on that shortly.) However, I knew that it’s not good for me to sit in one position for too long at a stretch, and I wanted to have something productive to do while I pondered any quilting decisions. Therefore, I also brought my scrap bag:

Do you like my “Coach bag”?
As I’ve previously posted, I’ve been trying to implement Bonnie Hunter’s Scrap User’s System. I’ve been doing pretty well with cutting up scraps as I cut fabric for new quilting projects, but I still have a huge backlog from before I started. Every time I felt like I needed to stretch my back or walk around, I’d meander over to the cutting table and cut scraps for a while. I estimate that through the course of the weekend, I probably spent 3 hours sorting and cutting up scraps. I had a nice collection of strips, blocks, and squares to show for my efforts by Sunday afternoon:

Strips, bricks, and squares from above

It looks like a lot of fabric, doesn’t it?
And here’s an “after” shot of my scrap bag:

Really. No tricks, no photoshop.
Yeah. Really. No kidding. I did not stage this in any way; I didn’t fluff up the scraps, or pick up anyone else’s. Either the fabrics were extremely compacted in there and I just relieved some of the pressure on them, or I have some sort of bottomless, loaves and fishes scrap bag. And that’s a miracle I do NOT need in my life, thanks! So, my “Coach bag” will be a presence in my studio for a while yet.
Anyway, I did spend the majority of the weekend quilting the Shop Hop sampler quilt. At the December retreat, I had completed all the stitching in the ditch and had quilted freehand feathers in the plaid setting triangles of the center strip:
At this retreat, I finished the setting triangles and quilted all 18 sampler blocks. This presented an interesting challenge, as nearly every block required me to come up with an entirely different quilting design. There were a few piecing doubles that gave me an intellectual rest. (As an aside, do we have a term for that in quilting: two blocks that are identical in the piecing, but appear different due to different value placement? If not, I’m thinking of something along the lines of the homonym/homograph/homophone terminology, but I don’t know who gets to determine these things. It’s not cut and dried like paleontology where the person who discovers the new fossil species gets to name it.) But with very few exceptions, each new block I came to was a new puzzle to solve. This added to the difficulty level but also kept the process much more interesting; repeating the same design 18 times would have gotten monotonous.
I still have a significant amount of work to do in the remaining six weeks before the show, but I know I can meet the deadline without pulling a bunch of sleepless nights. And if I have to eat those words, I promise to do it publicly.
And as always, I had a wonderful time at the retreat. It’s such a renewing experience to be surrounded by other quilters. And when you’re eating, sleeping, and breathing quilting, you start to see quilts everywhere. This was the floor in our bathroom:

I see square-within-a-square and on-point four-patches.
Product Review: Clover Protect and Grip Thimble
It really shouldn’t surprise anyone that I’m somewhat of a notions nut. I certainly am a believer in having the right tool for the job; what I need to find, however, is the happy medium between, on the one extreme, being the person trying to use a nail file as a screwdriver, and on the other, being the person at whom all those “as seen on TV” product commercials are aimed. Heaven forbid one might attempt to apply lotion, flip a pancake, or answer the phone while under a blanket, without the newest labor-saving product! Thus is my dilemma framed: I want to try every sewing product that promises to make my limited quilting time more pleasant and successful. At the same time, I don’t want to fill my already crowded studio with the notions equivalent of the Pasta Boat. So I will attempt to document here my trials of some of the products that seemed worth the money.
My love of Clover products is only partially based on their beautiful ads in my beloved Japanese quilt magazines. It’s also based on the fact that they seem, on the balance, to be worth every penny of their relatively high price. They appear to work both ends of the notions spectrum equally well: everyday basics, such as their silk pins and easy-threading needles, display unerring quality and consistency that seems to be lacking in other commonly found brands, while innovative products, such as their yo-yo makers, thread cutter pendants, and fork pins, surprise us in the “I never knew I needed that!” vein. So when I saw that they had a flexible-sided but metal-capped thimble, I thought it might be worth a try.

Clover Protect & Grip Thimble
Let me back up a bit. Thimbles are things I never really considered until a few years ago, because I’ve never been much for hand sewing. When I started quilting in my teens I wanted to do everything by machine out of impatience, and when I picked it back up about ten years ago, my other primary hobby was counted cross stitch. Therefore, I felt I already had a hobby for when I wanted to sit with a needle in my hand; quilting was for the machine. But I have mellowed in the last ten years. I’ve realized that not only does hand applique produce the results I like best, but there is a rhythm and a meditative beauty to the process as well. I’ve also had to face facts that there are times when only a hand-stitched binding will do. And as I’ve started to make more purses and other small quilted projects, I’ve had to get more comfortable with hand-finishing the details that a machine just can’t access. (I’m still not a hand quilter, though. Give me time.)

My favorite thimble
My favorite thimble, hands down, is my Roxanne thimble. I bought it at the hand-quilting class I took from Didi McElroy, so she fitted it for me personally, and I love it for being so well-designed. (I’ll never need the long manicured fingernail protector, though!) Being a dentist, I’m a stickler for ergonomics: if I develop degenerative musculoskeletal problems with my hands, I’m potentially out of work. Therefore, I’m very glad this was the first thimble I ever used regularly, so I didn’t have to unlearn any bad habits. The only problem with the Roxanne thimble is the cost: I think I paid $79 for mine in 2004, before all the metal prices skyrocketed; the same sterling silver model now sells for $110. Needless to say, as much as I love my thimble, I’m not buying one for upstairs and one for downstairs, or one for each project bag. If I’m going to be doing a great deal of hand sewing, I use my Roxanne thimble, which usually resides in the living room near the comfy TV-watching chair. But if I just have a little bit to do, I don’t want to have to leave the studio and fetch it, especially if Ronan’s in his doorway jumper. So I have experimented with alternatives, most of which have ended up in the drawer next to my sewing machine and will be donated to the next Guild Boutique.

The usual view from my sewing table
Since I have a horror of pushing the eye of the needle into my finger (based on experience, not just imagination) I had never before tried any of the jelly thimbles, despite how pretty they look sitting in the glass display jars at quilt shops. But since this one had the metal cap, I was willing to give it a try at $8.95. Plus, it came in orange! The fit was excellent, especially as it warmed to body temperature; this didn’t surprise me, as the package had a helpful cutout at the top to check for sizing. The thimble was comfortable to wear and to use, with nice deep dimples in the metal cap to make controlling the needle easy.
Some of the downsides to using this thimble were, for me, just a result of being used to using the Roxanne thimble and thus trying to push the needle through with the pad of my finger rather than the tip. But the main problem I had with it was one that anyone, even those used to using a traditionally shaped thimble, would encounter: right where the metal cap meets the plastic body, the thread gets caught! In the process of sewing down all of about two feet of binding, I had to unsnag my thread five or six different times. Very annoying! To be fair, “snag” isn’t exactly the right word, as it didn’t in any way shred the thread, just captured it and released it intact. But while it didn’t seem to damage the thread, it definitely threw me off my rhythm, albeit not enough to run downstairs and retrieve my Roxanne thimble.

SO annoying...
Verdict? Mixed. This is definitely the most comfortable thimble I’ve used that wasn’t my dear Roxanne. And with some practice, I’m sure I will stop trying to skewer my finger by pushing with the squishy plastic part. But the thread capture issue is the dealbreaker, and if that doesn’t lessen, this thimble will be joining its shiny brethren at the Guild Boutique table at next year’s quilt show.
Edited 2/20/12 to add: This post is part of Bonnie Hunter’s Thimble Linkup:
http://quiltville.blogspot.com/2012/02/its-thimbles-up-monday.html
So Quilty I Haven’t Quilted

I've been on the road!
quilty: quilt-y [kwil-tee] –adjective quilt-i-er, quilt-i-est.
1. Related to, but not specific to the act of, quilting.
2. Characterized by, connected to, or involving quilts.
That’s my made-up word of the day. I’ve been very wrapped up in quilty activities lately, to the point of being too busy to actually quilt! This has happened to me plenty of times before, and I know I’m not the only one: shop owners have frequently spoken to me about how they spend all day surrounded by quilts, thinking about quilts, but not finding time to make quilts. My free time has been consumed by some very quilty adventures, each of which is deserving of its own post, but I wanted to give you an overview:
Sept. 16: PA National Quilt Extravaganza and quilt guild meeting
Sept. 23-25: Quilting with Machines, Huron, OH
Oct. 2: The Airing of the Quilts, Tunkhannock, PA
In between, I’ve been working, traveling, and sometimes doing both simultaneously; I left the day after the PA show to work a weekend military dental event in Edinburgh, Indiana, then left again for Ohio two and a half days after getting home. I’ve also been trying to reorganize the studio, because machine quilting requires lots of space, and little things I hadn’t dealt with were piling up and getting pushed off the edge of the table as I quilted. (At least I didn’t do what I once did, and inadvertently quilted a piece of scrap fabric ONTO THE BACK OF the quilt I was quilting. That was damn unpretty.) I now have new thread racks on the wall, including one for cones, so I don’t have thread stacked precariously on the closet shelf any more.

I have also continued a project I started last spring, tracing my quilting stencil collection out onto paper so I have a hard copy of the designs I already own, without having to pull the big portfolio of stencils out of the closet and rifle through them for ideas.

I like the portfolio for storage (an idea I got from Karen McTavish when I took her wholecloth design class many years ago) but it’s a little unwieldy for casual browsing, and leads too often to my ignoring my stencils when choosing quilting designs.

Now I’m well on my way to having a full-size catalog of my stencils that will be much easier to deal with. I’m also flirting with the idea of photographing all the pages into a notebook on my phone so I have a portable reference for shopping; I have to investigate whether that would be a poor use of phone memory or not.
I’m also trying to get caught up with my magazine filing. [Warning: if descriptions of borderline OCD behavior disturb you, you may not want to read about how I organize my quilting magazines.] For the last approximately six years, I have made an effort to stay on top of my ever-increasing collection of quilting magazines by periodically going through them, tearing out the pertinent articles, photos, and patterns, and placing them in plastic page protectors. I then organize them in binders, with subject tabs separating them first into articles, patterns, and inspirations, then further subdividing the articles into topics such as how-tos, history, and interviews; the patterns into paper piecing, curved piecing, applique, big prints, holiday, etc.; and the inspiration photos just into roughly similar groupings. [Look, I warned you. I also sort my M&Ms by color before eating them, you got a problem with that?]

Every year or so I also purge the existing binders of things that no longer appeal to me or that I have better examples of, but the acquisitions far outweigh the deletions. Suffice to say I currently have four 3″ binders absolutely bursting at the seams. They are extremely useful references, though, and I consult them often. It’s much easier than having to sort through piles or magazine boxes full of intact but unindexed issues; and I’ve resigned myself to the idea that if I missed anything, it surely is counterbalanced by the usefulness of the system. (Not to mention, these days, no information is ever truly lost, even if I recycled the magazine it was in.) But as with so many other ongoing quilty projects, I’d gotten behind with it, and now I’m almost caught up.

And finally, before all this new learning had a chance to get old in my brain, I’ve organized all my handouts and class notes from Quilting with Machines into yet another binder. Once again, I had started this project last year, adding to a kind of half-assed “quilt class notes” binder that I’d started years ago but hadn’t given a good effort to. Now both years’ worth of QwM notes are in one binder, properly organized, to which I’m even adding photos I took of class samples.

So while I still don’t have any completely finished projects to brag about, I’ve been making the most of my last month of permitted travel before “my confinement.” All I mean is that the OB doesn’t want me to be more than an hour from the hospital as of 36 weeks, which falls October 23; I just like phrasing it that way because I sound like a character from Jane Austen or “Gone with the Wind.” And I now have a much better organized sewing space, which will allow me to spend more time quilting and less time trying to move or find things as I deal with significantly curtailed hobby time once the baby comes.
More on the actual shows and events soon! With pictures of quilts instead of binders! I promise!
My First Quilt
WOW. I got to meet Rachel Pellman!!!
To explain why this was such a big deal to me, we have to go back in time. WAY back, to before I made my very first quilt, to approximately 1986. I have sewn for as long as I can remember: my mom bought a Bernina when I was a toddler, and I grew up watching her make wonderful clothes for herself, me, and my sisters. I have fond memories of spending time at the Stretch & Sew store in La Grange, Illinois while she selected patterns and fabrics, and I must have just absorbed a fascination for sewing through example and osmosis. I was given access to my mother’s scrap bin, and by the time I was seven, I had petitioned successfully to be allowed to learn to use the sewing machine. I made little blankets, pillows, tote bags, bean bags, and eventually some stuffed animals and simple clothes. But I was always looking for new projects and new outlets for my interest in fabric and sewing.
I was fortunate that my childhood and adolescence coincided with the quilt revival of the late 70’s and early 80’s. The back-to-nature movement blended fairly seamlessly into the interest in Colonial life surrounding the Bicentennial, bringing the American craft of quilting to the forefront of society’s consciousness again for the first time since before World War II. (For a really good explanation of this sociological phenomenon, with lots of dreamy quilt pictures, watch the documentary, The Great American Quilt Revival.) My mom bought a handful of the quilt books that were released and promoted during this time; the ones I specifically remember as being the most influential on me were Lap Quilting with Georgia Bonesteel, the original edition of The Complete Book of Machine Quilting by Robbie and Tony Fanning, and The World of Amish Quilts by Rachel Pellman. This last title was the book that made me want to make a quilt.

I don’t know what it was that specifically spoke to me about these quilts: the graphic geometrics, the unusual color combinations, the blend of beauty and utility. By this point, we had moved to Pennsylvania and lived in a rural area with a significant Mennonite population. I was familiar with the Plain people I’d see in their horse-drawn buggies, the women wearing their distinctive dresses and bonnets, and I saw the quilts displayed for sale in various local craft stores and tourist traps. But those quilts were much more contemporary, made for the market, in the same colors that were endemic throughout housewares departments everywhere: remember those mauves and French blues, burgundies and hunter greens, all in fussy little floral calicoes? The striking “dark quilts” that were featured in Rachel Pellman’s book were nowhere to be seen. So, the summer between my freshman and sophomore years of high school, I decided to make my own “Amish” quilt.

My First Quilt: "Amish" Bear's Paw, 1986
Now, of course, I approached this project as a fairly typical fifteen-year-old. While I had the interest and discipline to design my own quilt based on what I had seen in the book, I had absolutely no intention of making it in a traditional fashion. For one thing, I hated hand sewing. For another, I was an impatient teenager: I wanted it done already! Therefore, I blended what I had learned from the Fannings’ book on machine quilting with the Amish designs. I would use the sewing machine for every square inch of this project, no matter what. And as I had tried a couple quilt blocks out of Georgia Bonesteel’s book, and knew how long they took to make, I decided my quilt wasn’t going to have 12, or 16, or 20 blocks. It would have FOUR. And they’d be BIG.

Little Mess on the Prairie: the result of my attempt to attach prairie points with a purple machine zigzag and some HUGE hand whipstitching
In fairness to my adolescent self, I did do some things well. I designed and drafted my own quilt, rather than relying on a published pattern. I researched the process, and I stuck with it until it was done. However, I also did a lot of things I shouldn’t have. I’m pretty sure the whole thing has 5/8″ seam allowances, because I was an apparel sewer. I used a weird, twill-weave, cotton/poly blend for the top, because that’s what JoAnn Fabrics had in the colors I wanted. The batting is polyester; I’m not sure I knew anything else existed, and it has bearded hopelessly. I machine quilted fearlessly, but also somewhat recklessly; there are a LOT of puckers on the back, and I wasn’t ripping out or redoing anything. The binding is really interesting, as I was not going to bother with the laborious process of mitering corners, and the hand sewing on my prairie point edging looks like Frankenstein’s sutures. But at the end of it all, I had a quilt entirely of my own making on my bed.

OMG 80s fabrics! Country bears and pindots: could it get any more stereotypical?
I went on to make five more bed-size quilts before I graduated high school, as well as a crib quilt and a whole stack of placemats as trial pieces for various techniques that are mostly still in use at my parents’ house. I couldn’t really quilt during college or dental school, although I did coordinate the making of a friendship quilt wall hanging for my sorority chapter during my senior year; I’d bought a second-hand Kenmore sewing machine out of a guy’s car the previous summer, which is a story for another day. But quilting never really left my blood, and once I had free time, floor space, and an income, I picked it right back up, but now with the patience and (hopefully) maturity that I’d lacked in a younger decade. And ooh, rotary cutters had happened while I was gone!
It’s possible that with my lifelong interests in fabric and needlework, I would have found quilting — or it would have found me — inevitably. But Rachel Pellman’s book put me on that path during a very impressionable, creative, and inquisitive period of my life.
And I welcomed the opportunity to thank her in person.
Bonnie Hunter in Pittsburgh? Road trip!!!

Me and Bonnie Hunter!
Another reason why it’s good to be part of a network of quilters: while Diane was here, she mentioned that Bonnie Hunter was going to be the guest speaker at the Three Rivers Quilters meeting the following Tuesday. I had first learned about Bonnie when she was profiled in Quiltmania magazine (funny to learn about an American quilter in a French magazine, but c’est la vie, I suppose) and then I was fortunate enough to hear her speak last summer in Indianapolis. Since then, I’ve been a faithful reader of her blog, and have been (gradually!) instituting many of her stash management ideas into my own quilting. I was all excited to see that she was on the faculty roster for Quilt Odyssey this year, but I was unable to register in time to get into any of her classes, which filled up in a blink of the digital eye.
This made me all the more excited that my schedule allowed for me to drive four hours to Pittsburgh Tuesday afternoon in order to hear her speak. I realized that this was a crazy impractical idea as soon as it flitted through my forebrain, so I called my mom and invited her to come along. With a travel companion and therefore a tacit endorsement of the scheme by a usually cooler head than mine, we headed west. Before the meeting we had time to stop at Quilters Depot in the Castle Shannon neighborhood of Pittsburgh. A new shop, it is small and doesn’t have much inventory at this time, but they were having a nice little sale and they stock some very interesting notions. I bought a magazine and a half yard of (surprise!) taupe fabric from Red Rooster, who has really distinguished themselves in recent years as a domestic producer of taupes.
We went to the church for the meeting, found Diane, and were pleasantly surprised to find that nearly half the room was guests! The guild president had us each stand and introduce ourselves, giving our name, hometown, and what guild we belonged to, and it took quite a while to get through all those introductions. (Other than the one member’s little granddaughter who was visiting from Florida, my mom had come the farthest.) They obviously did a good job advertising, and having a draw like Bonnie Hunter certainly brought the quilters out on a hot night! A couple of women had brought as show and tell quilts that they had made from Bonnie’s website and magazine patterns so that she could see them, and the guild members who had taken the daytime workshop, Jared Takes A Wife, showed off the blocks they’d made.
Although I’d heard a slightly different version of the same talk in Indianapolis last year, I was very happy to have the information reinforced. Plus, since Bonnie’s second book, Adventures with Leaders and Enders, has come out since then, she showed several of the quilts from that book, which were not available last year. I was also able to get a picture of this quilt, which is the main visual aid she uses for this talk, and which I hadn’t gotten a good shot of in Indianapolis:

The Fabric Food Chain by Bonnie Hunter
She illustrates through this quilt (how cool is that?) the essence of her Scrap User’s System, which is that precut 1 1/2″, 2″, 2 1/2″, and 3 1/2″ strips, squares, and “bricks” can be combined into most of the basic units used in the most common sizes of patchwork blocks. By cutting any scraps that measure between 1 1/2″ and 4 1/2″ into these usable units, rather than just pitching them into bags, boxes, and baskets (“all those B-words”), and then organizing them by size and separating light from dark, you can utilize your scraps and your stash, for which you paid $9/yard, when assembling your blocks, “rather than jumping in the car to go buy another jelly roll.”

Between this concept and the Leaders and Enders idea, where you sew on and off of usable squares rather than a ratty scrap when piecing your other projects, thereby building new quilts “in between the lines” of the ones you’re already working on, my mom and I really experienced some quilting revelations. I had bought Bonnie’s first book, “Scraps and Shirttails,” in Indianapolis, and my mom bought a copy for herself right there; I bought the “Leaders and Enders” book, and we both got them autographed. It was absolutely worth coming so far to both meet again one of my major quilting influences, and to share with my mom, Diane, and a room full of other happy quilters, why I was so excited when I first heard Bonnie speak.
We weren’t going to drive home at 9:30 at night, so we spent the night in a motel (talking about quilts till we fell asleep!) then started the day with breakfast at the Hot Metal Diner:

The door says, "No Smoking, No Whining"
If Guy Fieri hasn’t been here, he needs to. Huge portions of tasty food and a stimulating, fun environment. From there we headed to Quilters Corner in Finleyville, which turned out to be one of the best quilt shops I’ve ever seen. Amazing shop model quilts, a huge selection of fabrics, great purse patterns displayed with stitched models, and wonderful support from the staff. Plus, they have a bed in the middle of the shop, which always makes me happy. It’s a silly thing, and a smaller shop can’t spare the room, but I love getting to see a quilt displayed on a bed rather than on a wall. If I hadn’t just heard Bonnie Hunter speak, I probably could have done some major damage, but I heard her voice in my head:
“You know what? Quilting is a multi-billion dollar enterprise….the fabric is NOT all of a sudden going to stop being printed and dry up! I have faith in the fabric manufacturers that they will keep printing fabrics…maybe different fabrics…so yes it’s important to have what you need to finish projects you’ve started…but you can’t buy ahead for every project you ever want to make in your life.” — Bonnie Hunter from her “Paralyzed by the Stash” essay
Thus I managed to escape with just a taupe (yeah, I know) remnant — 3 yards for $9.95! — and another magazine. I have their business card, and I have a friend in Pittsburgh, so if I decide I absolutely have to have something I left behind, I have recourse. We finished the day at the National Aviary, which despite being in the midst of some major renovations was absolutely wonderful. (Steller’s Sea Eagles! Hyacinth Macaws! Rhinoceros Hornbill!) Any quilter who needs inspiration on how amazing color combinations occur in nature could certainly do worse than a trip to the aviary. Then home again, home again, bursting with renewed energy and motivation. Definitely a worthwhile road trip!

