Posts tagged ‘Patsy Thompson’
Finished! Liddle Lamzy Divey
It’s the 2007 shop hop sampler quilt, finally finished!
I decided the name for this quilt had to reference the lambs in the focus print from the Jo Morton collection used for the shop hop blocks. After all, that was what made me buy the block kits — especially the little pugnacious lamb in the back:
Making this quilt created a multitude of fun challenges for me, and the overall design of the top just evolved organically as I solved each one. First, rather than making each block separately from its kit, I counted up how many of each shape and unit from each fabric needed to be made in order to make all 19 (18 shops + the kit included with the passport purchase) blocks. I then opened all the kits and only used what I needed. Since each kit included width-of-fabric strips, they were extremely generous, and I was left with a large quantity of excess fabric once all the blocks were made.
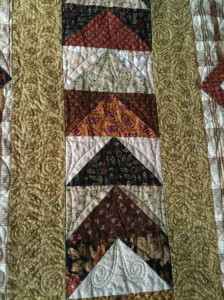 A desire to use up this excess fabric was the genesis of the idea for the flying geese borders, because I had stacks of 3 1/2″ strips crying out to have something made from them. I used the Fons & Porter Flying Geese Ruler for the first time, and was very pleased with the result. I also fell in love with the plaid, which was a part of Jo Morton’s collection but not used in any of the blocks. The owner of (the since closed) Quilting in the Valley in Hegins had used it in the center of her shop hop quilt, and I knew I had to have it. Setting triangles seemed like the way to go, and since most of the blocks had light backgrounds, I put the narrow dark borders around them so they wouldn’t bleed into the plaid. (Fabric selection for those was based entirely on what was still left from all those strips.)
Long before I knew what the quilt top would look like, I bought the acid green tone-on-tone print because I knew I would likely need additional yardage of one of the “neutrals” and it was my favorite from that category. Due to just how huge the top ended up, I wound up having to piece the long vertical borders, but it still worked. Once again, a cutting error ended up making the quilt more interesting: I had initially planned for the outer borders to be solid 6″ strips with the extra flying geese pieced in to break it up. However, I got distracted and ended up cutting all my remaining yardage into 3 1/2″ strips. After storming around for a while, I got practical and decided to piece in the narrow strip of the focus fabric to make it look like an intentional design choice. As usual, the process of fixing my mistake led me to a more complex and compelling design.
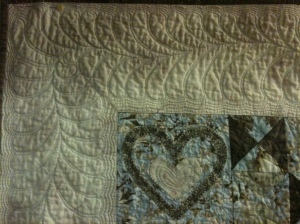
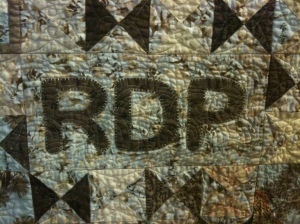
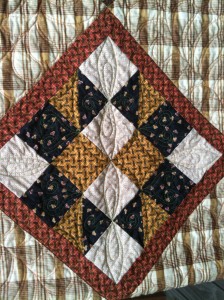 I didn’t do anything earth-shattering with the quilting, just variations on what I’ve been doing with most of my quilting lately: Pam Clarke and DeLoa Jones-inspired continuous curve variations and no-mark motifs following the piecing lines in the sampler blocks and flying geese; Patsy Thompson and Kimmy Brunner-style freehand feathers in the plaid setting triangles; and that Megan Best “Onions and Garlic” filler in the green vertical borders. I also quilted a little “half-hearted” design in the accent stripe in the outer borders and in the borders of the sampler blocks; it’s a variation on Sally Terry‘s “signature” sashing design that I thought complemented the feathers nicely.
 Overall, despite the sheer acreage this quilt represented, I tried to concentrate on making the quilting patterns echo and call back to one another so they looked like part of the same “family.” I also attempted once again to achieve Sue Patten’s “three densities,” with the densest area being the green vertical borders and the poofiest areas being the setting triangles. I did all the quilting with just two colors of Superior Threads’ So Fine!, orange and green, with tan Bottom Line in the bobbin. Other than a few isolated incidents of thread breakage after going through some very solid spots of converging seams, everything behaved beautifully. After this quilt, I think I can finally detect some visible improvement in my stitch length consistency, but that remains to be seen.
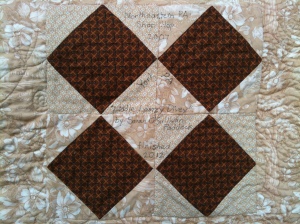 I used the 19th block on the back as my label, and added a hanging sleeve made of the only fabric not from the shop hop collection in the quilt. (I didn’t have a big enough scrap left over to make a sleeve without doing a ridiculous amount of piecing, which didn’t seem worthwhile.) And it’s finished, a full week before I have to drop it off for the guild show. I washed it and am keeping it in a plastic storage tub until next week, so it doesn’t get cat hair on it, because this is what repeatedly happened while I was sewing on the binding:
For a happy dance, here’s the song that’s been running through my head ever since I hit upon the name for this quilt:
Finished! Spumoni Spring
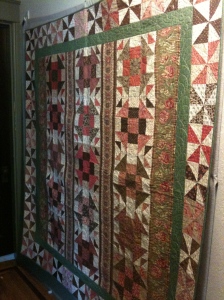
Five quilts down, one to go:
I have submitted my entry forms for the guild quilt show, now only a month away, and I am entering six quilts: Welcome Ronan, AKA Ronan’s Quilt; The Very Hungry Caterpillar; Dragons Galore, AKA Minkee Dragons; Halloween Buzz Saw; Spumoni Spring, AKA Pink and Brown; and the shop hop sampler quilt. That final one is still on the sewing table, still being quilted. BUT! It’s mostly complete, I know what I’m doing with the rest of it, and I already have the binding made. AND! The other five are completely finished, including hanging sleeves. I think that’s a personal best; I’m usually sewing on hanging sleeves into the wee hours of Wednesday morning before the show, when we have to bring our quilts to the fairgrounds.
So, back to Spumoni Spring. The title presented itself once I added that green:
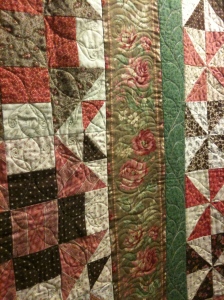
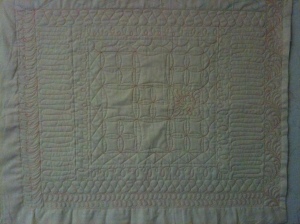
The blocks are quilted in a Pam Clarke-inspired design, for which I used her Basic 8 stencil and a blue chalk pounce to just give me some temporary guidelines to work with. This was a really satisfying technique: no blue marker to wash out, but definitely more consistent results than I can achieve by just eyeballing it. The blue chalk was highly visible on all my fabrics, but it brushes off very quickly, so I couldn’t mark more than one block at a time. I was also trying to use as few thread starts and stops as possible. Therefore, as I prepared to enter each block, I had to use my big 16 1/2″ square plexiglass ruler as a table to slide under the quilt and give me a surface on which to mark my blue chalk asterisk. Not the most graceful technique in the world, but I’m not arguing with the finished product.
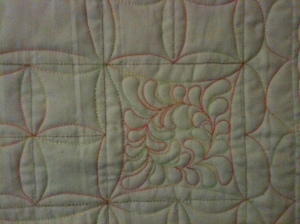
The two center vertical strippy borders were such a busy print that I knew nothing would show up, so I just echoed the print to create the appropriate quilting density. The two outer vertical strippy borders were not quite as busy, but with that large floral, I still didn’t want to exert myself particularly; if I’m going to do something fancy, I want to be able to see it! Therefore, I selected a design I’d been meaning to try: Onions and Garlic from Megan Best’s “Spinal Twist” book. It’s simple but creates a beautiful texture, which (like many of my favorite freehand designs) benefits from being somewhat imprecise. This is one I will definitely use again.
The outermost pinwheel border was the area I selected to get the least dense quilting design. I’ve mentioned before how I like Sue Patten‘s principle that a quilt should have three densities of quilting to create depth and contrast, the same way the top should have three values of fabric. Since this is definitely a lap/cuddle quilt, rather than a wall quilt, I thought having a nice soft poofy border where your face would go might work out well. We’ll see, because currently I feel like it needs something more. Oh well, it’s a learning experience! I just did a looping continuous curve variation, following the seam lines as if they were hourglass blocks:
In contrast, the densest quilting was in the green border, where I did one of Patsy Thompson‘s feather wave borders. I broke down and mail-ordered the 40″ flexible curve ruler, which made marking the spine VERY easy. I used a variegated pink thread from Fil-Tec that behaved beautifully; I will definitely be exploring more of their threads.
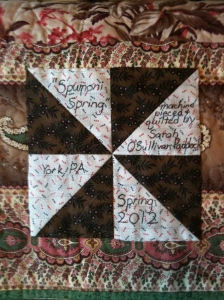
The binding seemed to need to be green as well, and I used a spare pinwheel block as the label. And after five years in the UFO box, it’s finished! It feels so good to be racking up a list of these. Of course, the next “Finished!” post will be about a new (though small) project that I’m taking to Show & Tell at guild tonight, and I’m already mentally making my challenge quilt for next fall, so the UFO completion rate will probably slip a bit in the near future. But at the same time, the confidence I’ve built over the last several projects is really encouraging me to take a deep breath and quilt Ruby Wedding. Now THAT would alleviate some quilt guilt and free up some brainspace!
This quilt’s happy dance really couldn’t be to any other song, and Gerard Darmon’s version of it for this video made me smile:
Finished! Ronan’s Quilt
Way back in March, I had posted a picture of the quilt I was making for Ronan. I had finished Arianna’s quilt to give to her on the day both babies were baptized, and I really did believe that I’d finish Ronan’s quilt shortly thereafter. So here we are, more than nine months later, and hey, it’s done! Obviously, it’s not that I’ve been working on it all this time, just that the small amount of studio time I get these days hasn’t been devoted to this project. I put the borders on over the summer, pieced the back, made the binding, spray basted the quilt, and… stopped. It was mostly fear of ruining this quilt top after all the thread problems I’d had, especially considering how many seam intersections there are in all those hourglass blocks. However, Halloween Buzz Saw was a great confidence builder, so I was willing to venture a try. My guild retreat the first weekend in December was a great opportunity to get a large portion of the quilting done.
I started by stitching in the ditch with the walking foot to stabilize the whole quilt top, which allowed me to start the free motion quilting wherever I wanted to. In this case, I wanted to start with the feathered border. I’d been excited about this border ever since Quilting with Machines, since it was really the only place on the quilt where elaborate quilting would show. I used Robison-Anton #40 polyester thread in a light blue to quilt a Patsy Thompson-style free-motion feather after marking the spine and a 1″ margin inside the borders, then echo quilted on either side of it using Isacord polyester thread in a light tan. Although I’m happy with the overall effect, I had expected the light blue to contrast with the taupe border fabric enough to stand out slightly, and I expected the light tan to blend in more closely and nearly disappear. Instead, the opposite happened: I think the tan has better contrast with the border fabric than the blue. I can’t call it a failure, not by a long shot, but it’s a learning experience, and hopefully not a mistake I’m going to repeat.
The next section to be quilted was the hourglass blocks. I did have some difficulty getting my free motion quilting foot set properly to deal with the bumps where the seams meet, but I found that switching to the closed circular foot attachment rather than the open-toed one I’d been using solved the problem. It’s a little harder to see around, and it requires an extra step when starting to get the thread ends out, but it glides over lumpy block centers rather than getting hooked on any imperfectly pressed flanges of fabric. There must be a good reason why this is the style of all the longarm feet I’ve ever seen! I think I’ll be using this one from now on unless I’m working on a wholecloth, which isn’t particularly likely.
Since I knew the heavy piecing and busy prints in this section weren’t going to allow anything fancy to show, I kept it very simple: just some continuous-curve-variation loops. It looks prettier on the back than on the front, and I’ll have to remember it as a filler pattern for the future. However, once again I learned something about thread choice, in that I wish I had made a different one. I used the same fine tan thread that I’d used in the border, which means it vanishes in the light and medium triangles but contrasts highly in the dark ones. In retrospect, I don’t know if the better choice would have been to use a variegated thread, which would have played peek-a-boo throughout all the patches, or to use something that would have contrasted with all the fabrics, like a fine orange thread. I just know I should have used something other than what I did. It’s not terrible, just not right.
I’m happier with the results in the applique blocks. I used the fine blue thread from the border and quilted more heavily over the applique than I ever have before, because I didn’t want to take any chances with a little boy peeling off the pieces. The monogram block got an allover freehand mini Baptist fan, which only shows up on the dark letters but looks good that way, and the hearts block has echo quilting inside the appliques and a loop-de-loop filler in the background.
The large blocks featuring the owl print were left for last, in part because I kept equivocating as to what I was going to do with them. This print has so many large solid open areas that I didn’t want to just do a stipple-equivalent filler pattern, but it has enough busy areas that I didn’t want to get too elaborate, either. I also want to introduce meaning through the choice of quilting design whenever possible. So I traced Dan’s, Ronan’s, and my hands and used our handprints as the primary design, stitching them in orange So Fine #50 by Superior Threads. As this wasn’t enough quilting for these large patches, I then went back in and stitched the loop-de-loop filler in the light blue thread, as well as a heart inside each handprint. I am entirely happy with how these sections turned out. I love the idea that in years to come, Ronan will be able to place his hand over his tiny handprint and see how much he’s grown.
The binding is scrappy, using the longest dark taupe scraps I could find among the leftovers from Taupe Winding Ways. I made the binding over the summer when I finished the top and pieced the back, and I made more than twice what I needed for this quilt: I have no memory of whether that was a conscious decision or just bad math! Oh well, I know this isn’t the last project I’ll have a use for taupe binding on, so it’s not going to waste.
What’s a Ronan-appropriate happy dance? This was my best guess:
The Rest of My Classes at QwM 2011
Continuing my story…
Friday afternoon and Saturday morning were devoted to my two hands-on domestic sewing machine quilting classes. I feel almost honor-bound to take as many of these as the powers that be at QwM will offer, as I want to do my part to make sure they keep offering them. It also gives me the opportunity to meet, and therefore evangelize to, my fellow DSM quilters who may not know that any of the design-type classes are equally applicable to them as to the more numerous longarm quilters in attendance. We may have to sit through some minor references to canvas leaders and advancing the machine and so forth, but I use that time to meditate about how I can quilt in any direction I choose, for as long a distance as my quilt requires, and how my dining room still has a table in it. Kidding, of course, but Leah Day had an excellent post recently on Seven Reasons Why I Don’t Want or Need a Longarm, which was exactly what I needed to galvanize me pre-QwM against feelings of machine inadequacy. She reinforced the fact that quality machine quilting is possible on a DSM even if you’re not Ricky Tims/ Diane Gaudynski/ Lee Cleland/ Patsy Thompson/ Barbara Shapel/ Karen Kay Buckley/ Caryl Bryer Fallert/ Hollis Chatelain. Don’t get me wrong; if I walked downstairs tomorrow morning to discover that my house had magically grown an extra room with a longarm quilting machine in it, I wouldn’t turn up my nose. But in the real, non-magical world, that’s a huge investment for a huge machine that I’d only use for my own quilts, and buying one wouldn’t automatically turn me into a better quilter, just one with no dining room and a big payment to make every month. The learning curve is still paramount, and the big machine isn’t a shortcut around practicing.
OK, off the soapbox and on to what I did in class. The first was “Freehand Feathers” with Beth Schillig, who has had quilts at Houston and Paducah and used to be a Bernina dealer near Columbus. She was a kind, patient, generous teacher who showed us several feather styles I hadn’t tried before, and I was very happy to have produced these doodle cloths in a four-hour class:
(Click on the pictures to zoom in if you need to, photographing wholecloths is hard.)
The next morning I had “Becoming a Domestic Diva Part 2” with Penny Roberts, who is primarily a longarm quilter and inventor of longarm gadgets, but keeps her hand in with DSM quilting and was an excellent teacher with a well-thought-out lesson plan. She provided us with a pre-“stitched in the ditch” sample so we could concentrate on the free-motion fun stuff. When she started with continuous curve, I was concerned I had taken too beginner-y a class, but I quickly came to realize that my current lifestyle doesn’t really allow me much time to just play and experiment with my quilting; I always feel like I have to make every minute count so I have to accomplish! Taking these classes was like the “spontaneous activity in a prepared environment” concept from Montessori school: it gave me permission to just goof off with my machine, and I definitely feel the value of the experience. As you see:
Not to mention, through all that in-class quilting, I did not have a single problem with my machine! Not one! I certainly hope this augurs well for the future.
Saturday afternoon, feeling more than a little fried, I finished up with “But How Should I Quilt This?” with Debby Brown. While the class was excellent, the most valuable thing I took from it was finding Debby! She was not someone whose reputation I knew before taking her class, and I’ve greatly enjoyed perusing her blog and checking out her free online videos and tutorials. She was an entertaining lecturer, and really synthesized a great deal of disparate information into a fairly coherent system for helping the quilter focus on a few complementary designs to successfully quilt each top.
This spoke very centrally to my recurrent problem of Analysis Paralysis when it comes to quilting my own quilts: I fall for the fallacy that there is only one way to “correctly” quilt the quilt, and if I don’t find it, the quilt will be a failure. Debby rationally and rightly pointed out that the first step to quilting a top is to simply make a decision. Her next words stopped me in my mental tracks and made me write them down: “Sometimes it’ll be just good enough, but sometimes it’ll be perfect.” I think the reason I found that simple statement to be so profound (aside from sheer mental and physical exhaustion) is what she didn’t say, but I’ve apparently believed to be true, that there is no acceptable alternative to perfection. And the secret, of course, is that there is. There’s good enough. There’s quite nice. There’s really special. What there is not, is COMPLETELY UNACCEPTABLE OH MY GOSH YOU RUINED YOUR QUILT. Because even crappy quilting results in…A QUILT! Not a top sitting in a box, waiting to be sold in (hopefully) many decades in my estate sale, but a quilt, that gets used and loved. That keeps the baby warm. That gives the cat a place to sleep. That lets me see that fabric I absolutely had to have. That goes to show and tell and hangs in the guild show and maybe gets given as a gift to wrap the people I love in the longest-lasting hug I know how to give. A top can’t do any of that, and it’s not a quilt until it’s quilted.
So I’m going to go quilt those tops. I’ll keep perfection on the horizon, but I’ll try to keep perfectionism at bay. Let’s go make some good enough quilts.
Baby Quilts
 Big surprise that lately, when I’ve had a chance to quilt, I’ve been working on baby quilts. As I alluded to in my last post, I’m making a quilt for Ronan that’s blue and taupe. I had gotten this wonderful Japanese owl print by Alexander Henry several years ago from a vendor at the Airing of the Quilts, with no thought at the time that I would someday have a baby son; I just liked the fabric. It manages to be juvenile-appropriate without being juvenile. Really, the only clue that the designer intended it to be a baby fabric at all was that it was available in pink and blue. My mom bought some too, in both colorways, and has made three baby quilts with it (two pink and one blue) for two daughters of family friends and one of my nephews. In contrast, for me this was one of those fabrics that gave me (bad pun alert!) Quilter’s Block. It was too cute to cut. That is, until I had a good idea– and then made a bad mistake that had the potential to scare me off cutting any “good” fabric for the rest of my life!
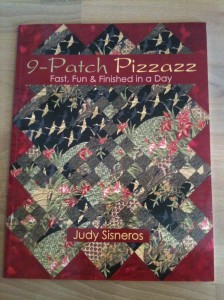 I bought the book, “9-Patch Pizzazz” by Judy Sisneros a few years ago as a way to use up some large prints that I always fall in love with on the bolt but then don’t know what to do with. I loved the author’s ideas for combining the large print with both coordinating and contrasting fabrics, but of course, being me, I had to goose up the difficulty a little bit. So while I came up with a basic layout very similar to the ones she uses in the book:
 I decided to use quarter-square triangle squares, or hourglass blocks, instead of the 9-patches. This decision also allowed me to use some relatively small scraps (hi, Bonnie Hunter!) left over from cutting the Taupe Winding Ways blocks. Cutting the triangles posed no problems; the trouble started when I cut the big blocks of the owl fabric. I have an 8.5″ x 12″ Omnigrip ruler that has faked me out in the past with that extra 1/2 inch. Somehow I managed to transpose that in my mind into thinking there was an extra 1/2 inch on the 12″ side, too. So all the owl blocks that were supposed to be cut 12.5″ x 12.5″ were accidentally cut 12″ x 12″. And of course I didn’t have enough fabric to recut anything (although I would have had enough to cut them correctly in the first place, grumble grumble.) While there was initially some wailing and gnashing of teeth, I realized that with so many seams coming together in the pieced areas, odds were (knowing how I tend to piece) that the hourglass block sections would measure shorter than the cut size for the large-print blocks anyway. Therefore, I reserved judgment on the cutting error until I had the piecing done.
Wouldn’t you know it? The ONE time in my piecing life that I channel Sally Collins and have my blocks come out exactly the intended size, is the ONE time I wanted them to turn out small! Oh well. I added some 1″ dark taupe strips– another opportunity to add in more fabric!– and I think it actually improved the design. I’ve heard the saying before, it’s not a mistake, it’s a design opportunity, but I think this is the most significant example in my work so far.
To a lesser extent, this phenomenon recurred with the appliqué blocks. I knew I didn’t have enough of the owl fabric for all of the large blocks on my plan, so I intended to make one 6″ x 6″ block and one 6″ x 12″ rectangle out of the blue and taupe leaf print that I used in the hourglass blocks. Several of the model quilts in the book use more than one featured print to excellent effect. However, once I got them up on the design wall, they just blended right into the background. I salvaged the situation with some fused, machine blanket stitch appliqué, and I think the result is more interesting and attractive than if I’d had enough owl fabric in the first place.
I still need to add the borders, but I needed to put Ronan’s quilt aside to start AND FINISH!! Arianna’s quilt. We stood as godparents to Matt and Alyssa’s baby daughter, and of course I wanted to make her a quilt. (Plus, it gave me an opportunity to use some pink fabric, now that I live full-time in the Land of Blue.) I started with some Log Cabin and Pinwheel blocks I had left over from another project, added some borders and some more machine blanket stitch appliqué, and quilted it with Patsy Thompson-style no-mark feathers and freehand Baptist Fans. Considering how down-to-the-wire this project was (I finished putting the binding on at 1:30 on the morning of the baptism) I think it turned out quite well:
 Once again, deadlines seem to be my friend when it comes to selecting quilting designs. If I have all the time in the world, I can dither endlessly as to which designs would be best. If I’m racing to finish, I make a command decision and put the hammer down. This was the first time I’ve even attempted, let alone used, that freehand Baptist Fan, which was inspired by Ruth B. McDowell‘s use of it as a background filler on her fabulous art quilts. I was very pleased with the result and will definitely use that again (possibly even on Ronan’s quilt?) especially on another quilt with a lot of busy piecing. It makes such a nice texture. No wonder it’s a classic. (Plus, more fun quilting puns: Baptist Fans on a baptism quilt?? Huh?? Funny?? I’m such a dork.)
On Saturday Ronan and I attended the AQS Lancaster show. I won’t give you my reviews now; hopefully there will be some new posts on the subject within the next week. I will say that I was very excited to see that many of the changes I predicted from last year have come to pass. I definitely noticed a significant uptick in positive media coverage of the show over last year, much of it focused on the predicted $10 million it’s bringing with it to Lancaster! Several non-quilters of my acquaintance specifically asked me if I were going to the show, as they had heard about it from TV, radio, and the newspaper. So AQS seems to have come to understand Lancaster, and Lancaster seems to have grasped what it means to have a show of this caliber come to town. More on that soon!
Little Happy Dances!
Wow, it feels great to get things finished! Even though none of these projects were on my “official” list of UFOs, they were still taking up both physical and psychological space, and it’s wonderful to have them out from underfoot, so to speak. Plus, as I wait for labor to start, finishing quilt projects is apparently as close to “nesting” as I get.
Noah’s Ark panel:
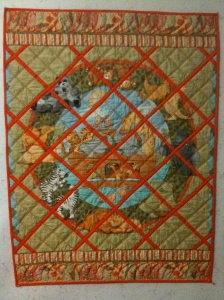 I picked up Mary Mashuta‘s “Foolproof Machine Quilting” for $10 on sale at Quilt Beginnings in Columbus, OH on our way out to Indianapolis in August. I have long been a fan of hers, first upon seeing her gorgeous quilts and wonderfully inspiring books (her book, “Confetti Quilts” would be on my desert island list) and second upon learning that she manages to amicably share a sewing space with her twin sister, Roberta Horton. However, for all that this book contained some great ideas, it was mostly centered around making walking foot quilting accessible to new quilters who’d been put off by free motion. Since that’s not where I am at this stage, I passed the book along to a friend.
But one of the ideas she’d stressed was using heavy threads and decorative stitches to make quilting show up on busy prints (for which she and I share a passion.) I didn’t want to do very intricate quilting on this piece, first of all because it’s just a panel that I tweaked by piecing in the lattice, but also because I didn’t want to detract from the graphic impact of the panel. The viewer’s brain already has to make the visual “jumps” across the lattice; I didn’t want to further confuse things by introducing a busy quilting design. So I marked a simple 2″ grid to echo, rather than compete with, the lattice, then used the walking foot with a serpentine stitch and orange Brytes by Superior Threads, a nice heavy 30/3 polyester with a bit of a sheen to it. I used the Pellon Legacy wool batting I’d bought at AQS Lancaster, which gave it a nice puffy loft. (I hesitate to say it, but I think I might actually prefer the Pellon to the Quilter’s Dream wool I used for Convergence Birds and have set aside for Ruby Wedding!)
I switched to my fancy new free motion foot, its first real test drive since I bought it at Quilt Odyssey, but left the Brytes in to do a no-mark, freehand Patsy Thompson-style feather in the top and bottom borders. I’ve been a huge fan of her Freemotion Fun with Feathers DVD series, but hadn’t had much opportunity to use her techniques in actual quilts rather than just on doodle cloths, and I’m very pleased with how it turned out. I quilted these feathers before I took her class at Quilting with Machines in September, and it acted as an excellent warmup. I wasn’t sure whether the feathers would show up in that busy print border, but apparently the combination of the puffy wool batting and the thick thread did the trick. I will have to remember that.
For the binding, I used the same fabric I’d used for the lattice strips, and Suzanne Michelle Hyland’s Sew Fast, Sew Precise Machine Binding technique that was so maligned by the show judges on my quilts this spring and summer — remember, “a hand-sewn binding adds refinement” — but that gets my quilts finished rather than languishing in limbo. Plus, I don’t think my baby boy will be so discriminating.
Mom’s Halloween Attic Windows:
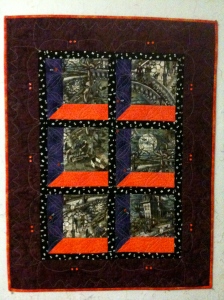 I had three big decisions to make when quilting this little quilt:
1) How to handle the border, which is decently wide and of a solid batik that would nicely show off the quilting
2) How to quilt the focus fabric squares without distracting from the fabric itself
3) How to use the glow-in-the-dark thread to best advantage.
It’s always tricky to quilt something for someone else. Even considering that my “client” in this case is my mother, whose tastes I have far more experience with and insight into than the average person’s, there’s still that worry that what pleases me might not please her. I know she doesn’t like extremely dense quilting, especially in contrasting threads. At the same time, I have this wonderful opportunity to use glow-in-the-dark thread on a Halloween quilt, and the NiteLite colors are all very light; I used the Purple, but against the deep plum border even it looks almost white. I used the Pellon Legacy soy blend batting, which only needs to be quilted every 8″, so dense quilting wouldn’t be necessary. I started with simple ditch quilting with the walking foot and fine, matching threads to anchor the center. That way, I could come back to the center once I’d figured out what to do with it.
I knew I wanted to do something spectacular in that border, yet that would still fit the whimsical theme of the piece. That was when I remembered the antique Easter quilt I’d seen in Fons & Porter, with an appliqued border of stylized bats that just looked like fancy swags at first glance:
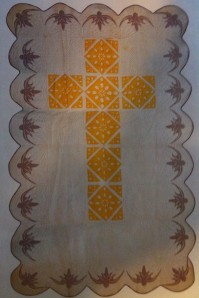
"Easter Quilt," by Bertha Amelia Meckstroth, 1933 (from Fons & Porter's Love of Quilting Magazine, July/August 2010)
That idea was way too much fun to leave alone, so I modified a simple bat design from an online coloring page (great resources for simple shapes and line drawings!), sized it to fit, and then used another technique from Mary Mashuta’s book to mark them: I cut them out of freezer paper and ironed them onto the quilt top, then did my freemotion quilting just outside the edge of the paper. This also allowed me to fudge the measurements where I needed to, and obviated the need to do a lot of marking on a dark fabric. I hadn’t originally intended to add the button eyes, but I wanted to make the shapes more clearly recognizable as individual bats, and especially with the “spooky eyes” fabric as the sashing, I think it maintained the mood.
I wish I could post a picture of what it looks like glowing in the dark, but I do not have the right camera equipment for that. In fact, I have a phone, which is not going to cut it. But let me assure you, it’s pretty impressive. So I decided to just use the NiteLite for all the visible quilting, even though it’s higher contrast than I would have otherwise dared. That also solved my dilemma for the Attic Windows sashing, as I didn’t really want to have to change threads between the purple and orange segments. I chose the design partly as a quilting pun: it’s a variation on the old Pumpkin Seed design, which I thought was both thematic and pretty. Add some diagonal lines to tame the focus fabric, and it’s done! This also got the machine binding treatment: it’s a wallhanging, for goodness sakes! I did hand sew the hanging sleeve, though. Isn’t that batik adorable?
Matt and Alyssa’s quilt gets its own happy dance post, after all the trials and tribulations of what was supposed to be a simple project. So here’s my preliminary happy dance for the two smaller projects, and I’ll indulge in a grander one in the next post:
Quilting with Machines 2010, Part I: The Classes
It was such a great experience to attend Quilting with Machines again this year. Going last year was fantastic, and I learned an incredible amount, but I hadn’t really had much idea what to expect. This year, attending as a veteran of last year’s event, I felt fully prepared to soak in the knowledge. And soak I did, as if Madge from the old Palmolive dish soap commercials were facilitating:
Upon registration, along with a lovely and well-designed tote bag and badge holder, we each received a name badge that listed all our class numbers on it. I was interested to see that Diane and I were definitely on the upper end of the curve for having filled up our badges, taking nine and ten classes respectively over the course of the three days. While some other attendees may have been just as busy as we were, since all-day classes would have been represented as single numbers just like the more common 2-3 hour ones, I definitely got the impression that most of the other registrants had left themselves a lot more free time than we did. However, to my way of thinking, if I’m going to take time away from work, family, and other obligations; if I’m going to go all the way to Sandusky, Ohio, incurring all the travel time and expense that involves; if I’m going to pay to stay at the resort; then darn it, I’m going to pack as much into that experience as I possibly can. Not to mention, with the ample selection of excellent classes to choose from, I certainly wasn’t stretching to fill my days; if anything, I had to make some very hard decisions as I haven’t yet figured out how to be two places at once!
 Plus, even though QwM had a bigger vendor mall this year than last (future post) and they held their first actual honest-to-goodness quilt show (further future post), it’s not like I needed additional time off during the day to investigate those more fully (better for the budget that way, too.) More free time during the day may have allowed us to explore more of the area quilt shops, or more of the area itself: right next to Cedar Point amusement park and right on the banks of Lake Erie, it’s apparently quite the tourist destination. But I was there to learn to be a better machine quilter, and we could have been on the nuclear test site at Alamo, Nevada as far as I was concerned, as long as I achieved that goal.
Only time will tell if I’m actually becoming a better machine quilter, but it won’t be for lack of a good education on the subject. My ten classes were almost uniformly excellent, and the few that fell somewhat short were still very good, just not quite up to the extremely high standard set by the others. Here was my schedule:
Thursday
8-10 a.m. Stunning Sashings, Sue Patten
11-1 p.m. Continuous Curve Quilting, Dawn Cavanaugh
1-2 p.m. Solutions for Quilting Star Quilts, Cheryl Barnes
2-4 p.m. Filling In the Fillers, DeLoa Jones
Friday
8-10 a.m. Design-O-Rama, Kim Brunner
11-1 p.m. Every Little Bit Counts, Sue Patten
2-4 p.m. Leaves, the Fun with Shapes Way, Diana Phillips
Saturday
8-10 a.m. Show Off!, Renae Haddadin
11-1 p.m. Echoed Puzzle Filler, Dusty Farrell
1-5 p.m. Feathers, Glorious Feathers Part 2, Patsy Thompson
Among the standouts was Sue Patten, of course. I had taken a class from her last year and found it to be not only extremely entertaining, but probably one of the most practically useful classes on any subject I’ve ever taken, as far as being able to go home and immediately implement what she’d taught. My strategy for class registration was to make a list of the teachers I absolutely had to take a class from, and make sure I had at least one with each of them before filling in the rest of the schedule. After last year’s experience, Sue was right at the top of that list. This year I took two classes from her, both lecture/demonstration classes during which she quilted on the longarm machine while explaining what she was doing in her own inimitable way. Each room with a longarm was also staffed by a young man with a high-quality video camera, so that what was happening at the machine was simultaneously projected onto a big screen, like at an arena rock concert. We followed along with her excellent handouts as she stitched, adding notes and occasional pattern variations, and leaving with a whole catalog of new, interesting, easily executable designs, as well as some very funny stories and one-liners, like “We don’t handstitch in the church basement any more. It’s too cold down there, and there’s no more brownies.”
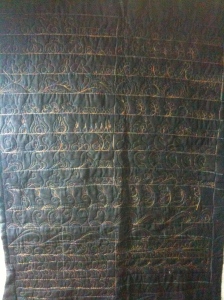
As if I weren’t enough of a fan already, I won the door prize drawing to take the class sample home from the sashings class:
 Another high point was Kim Brunner, of the aforementioned Twirly Whirly Feathers book and DVD. The class was mainly about how to design the quilting for a quilt based on its intended purpose and cues from the design and fabrics, and was chock full of helpful content. However, the main thing I learned was exactly why she won the Machine Quilting Teacher of the Year award for 2009. She was absolutely in control of that room, overcoming administrative difficulties (our attendance sheet was MIA), technical difficulties (her portable graphics tablet stopped working partway through class), and student difficulties (you know how there are so often 1 or 2 students in a class of 30+ who think the class is just for them alone?) with astonishing grace and flexibility. She kept her cool and sense of humor no matter what, had a list of guidelines and procedures at the beginning of class that really laid out what we could expect from her and what she expected from us, and generally was just the apotheosis of friendly professionalism. And if that wasn’t enough, I won another door prize, this time a year’s subscription to Machine Quilting Unlimited magazine!
Kim was also our speaker for the Friday night banquet, which had already distinguished itself by having surprisingly good food for a big hotel sit-down dinner; none of the cliched rubber chicken there. She gave a talk entitled, “Grandma’s Girl,” about the quilting women in her family going back a century in rural Minnesota, that had us all laughing and crying at different points. I think my favorite moment was when she revealed her horror at learning she was descended from the dreaded Sunbonnet Sue (prompted by finding a photograph of an ancestor in a poke bonnet that hid her face), but there were many hilarious and poignant moments throughout the presentation.
I didn’t expect Dusty Farrell’s class to be one of the standouts, but I was pleasantly surprised. He’s the biker-looking guy you see at the Nolting longarm booth, quilting on the machine decorated with painted skulls. He’s heavily tattooed, including some quilting designs he drew for the tattooist to follow. Not only was the improvisational quilted filler design he taught gorgeous and inspiring, but I was really impressed by his whole attitude and philosophy about quilting. I took down lots of quotes in my class notes like, “You only get better if you play, and the only way to play is to make your quilting fun.” He owns a quilt shop in northwest Pennsylvania with his wife and his mother-in-law, made a total career shift to longarm machine quilting for hire after losing his job as a high-end luxury item repo man (!!), and just approaches the whole field with a refreshing outsider’s outlook and a very serious-minded dedication. I actually wished my husband were there to hear Dusty talk, which is a first for me at a quilting event. Plus, his quilting was very entertaining to watch, as he used the YLI blacklight-activated thread on black fabric with a blacklight bulb in the longarm machine, so it was more like watching a laser-light show than watching someone quilt. His class models were amazing as well. He’s just getting into teaching, and I hope he gets many more opportunities.
Patsy Thompson’s class was simply wonderful. For all I’ve learned watching her DVDs (and I own 5 of them!) there’s just nothing like having her right there in person, giving gentle guidance and feedback. This was a hands-on class on the domestic sewing machine, and I felt very fortunate to be able to participate at all after the near-disaster I had precipitated through my own negligence. Before leaving home Wednesday, I had very carefully packed up my supplies, actually physically checking items off the class supply list Patsy had provided — and then I accidentally left my bag with all my notions, threads, sewing machine feet, bobbins, scissors, Machingers, etc. in my car trunk parked outside Diane’s house, three hours’ drive to the southeast of the resort. Whether I was distracted, excited, or just blind — black bag on black trunk carpeting — who knows, but I was devastated when I realized what I’d done. I had my sewing machine, thank goodness, with its cord and foot pedal; I had my practice quilt sandwiches; and I had left my freemotion quilting foot on the machine because I’d been quilting before I left the house. But I had no thread, and not a single bobbin for my Janome. Fortunately, the Superior Threads booth at the vendor mall (staffed by Bob Purcell himself!) came to my rescue. I was going to buy some threads anyway, and it turns out that the size L prewound bobbins fit my machine! With a Tim Gunn “Make it Work” attitude, and the addition of some kind loans of supplies from Diane and from Patsy herself, I barely missed my forgotten bag, and was very happy with the techniques I learned and the work I did in class.
PA National Quilt Extravaganza 2010
Actually getting around to posting about this!
The first issue I must address about this show is the name: Pennsylvania National Quilt Extravaganza does not exactly roll off the tongue. It doesn’t even have a cute acronym. This is why I, and most people I know, tend to refer to it as “the Fort Washington show”, even though it hasn’t been held in Fort Washington for at least four years. Since it moved to the Greater Philadelphia Expo Center I’ve been flirting with calling it “the Philadelphia show,” but a) it’s not really in Philadelphia, being located about a 40 min. drive to the northwest of the city; and b) that sounds less like a quilt show and more like a TV show about corruption and cheesesteaks. (I kid, I kid, I lived there for five years.) At least it’s less confusing than it was during the intervening years between the Fort Washington expo center and the current location, when it was held at the Harrisburg Farm Show complex, because calling something “the Farm Show show” just leads to shame and self-loathing.
So: Diane and I went to PNQE (that works in print if not in speech, but hey, we’re on the internet here!) She had been in the area for a work-related seminar, and I was departing Friday afternoon for a weekend of work in Indiana, so we were able to attend the show Thursday on its very first day. It was crowded but not ridiculous, which was a good thing because I haven’t internalized the fact that my pregnant body is now no longer any narrower if I turn to the side. (Fortunately I only knocked a couple of fat quarters on the floor with my belly trying to absentmindedly squeeze through booths.) Like the other Mancuso quilt shows I’ve attended, it was large. The majority of the quilts on display aren’t actually from the competition specific to the show (which always drives my mom nuts when it comes to voting for Viewer’s Choice) but are traveling exhibits such as the World Quilt Competition, quilts from SAQA, and the Hoffman Challenge. The show program actually lists seventeen special exhibits. This means there are over six hundred quilts (and garments) on display, according to the show website. I’m getting fatigued all over again just typing about it.
I have to say, I really thought the competition stepped it up a notch this year. (Good pictures of all the ribbon winners can be found here.) The quilts were amazing, and special congratulations to Diane on sharing in a blue ribbon for Best Wall Quilt for a stunning Alaskan landscape slice quilt:

"Ketchikan, Alaska" by Lila Mason, Fran Frederick, Rose Kotzalas, Diane Quinn, Karen Zemba & Nancy Reigel

"Ketchikan, Alaska" by Lila Mason, Fran Frederick, Rose Kotzalas, Diane Quinn, Karen Zemba & Nancy Reigel
Vendor-wise, I managed once again to be very conservative in my purchasing. I didn’t entirely escape buying fabric, because I knew I would regret not buying this fat quarter:
 but mostly I bought stencils, having found some good deals and being very much in the machine-quilting mindset. Plus, I suspect someone at The Stencil Company must have planted a post-hypnotic suggestion on me or something, because I seem powerless to NOT buy something from them every time I’m within gravitational pull of their show booth. At least all my new (and old) stencils are catalogued and organized now, so I don’t have guilt associated with them — well, except for the part about not actually using them…
Once done with the show, we met Rhonda for dinner and proceeded to my quilt guild meeting, where we enjoyed a trunk show lecture by Didi Salvatierra full of even more quilty gorgeousness:
And then Friday morning we watched a Patsy Thompson machine quilting DVD until it was time to get packed up and on our respective roads. I didn’t get to any quilt shops while I was in Indiana; the only one whose hours aligned with my work schedule was Back Door Quilts, and I had just been there in August, so I passed in favor of some really good thrift store shopping. I did, however, have my laptop and my quilting DVDs with me, and I watched Kim Brunner’s Twirly Whirly Feathers DVD in my motel room to mentally prepare myself for Quilting with Machines, my next stop — and next blog post.


